The Daring Baker’s Challenge: Mille-feuille/Napoleon

Our October 2012 Daring Bakers’ challenge was hosted by Suz of Serenely Full. Suz challenged us to not only tackle buttery and flaky puff pastry, but then take it step further and create a sinfully delicious Mille Feuille dessert with it!

Now I am NOT one for messing around with puff pastry. In fact, I almost didn’t tackle this month’s challenge because frankly, it looked too difficult and took up way too much time for me. But when it came down to it, my simple stubbornness got in the way and I decided to take on the evil that is puff pastry this past weekend.

The first thing I did was make sure I had all the ingredients on hand  to pull off this month’s task. I tend to bake on Saturday mornings while everyone is still asleep and there is nothing I hate more than having to get out of my jammies and get dressed before 11am just to go pick up a gallon of milk or package of butter at the grocery store. So after finding out I had everything on hand, there were no more excuses as to why I shouldn’t at least try it.

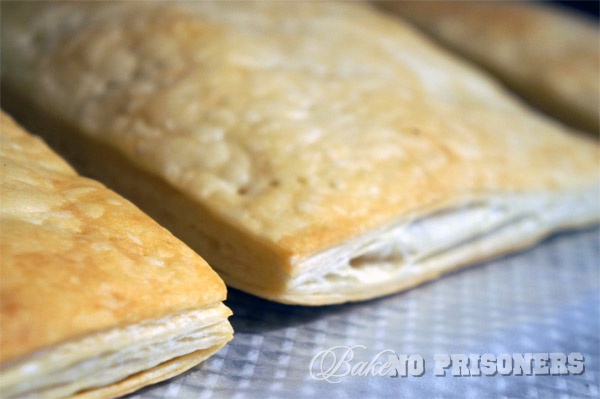
The puff pastry itself, took most of the morning and was more tedious, than difficult. It was a lot of rolling, folding, and refrigerating.  I followed this recipe provided by the Daring Baker’s challenger and was sure to place a heavy pan on top of the puff pastry while it baked to avoid  the over “puff” that can often happen to the best of bakers!

Next, I made the custard according to the provided  recipe. It was nothing more than your typical custard recipe including milk, cornstarch, egg yolks, sugar, vanilla, and butter, but it was oh so yummy. I was half tempted to ditch the whole napoleon thing and eat the bowl of custard all by myself, but than I thought about all the rolling, folding, and refrigerating and I reluctantly changed my mind.

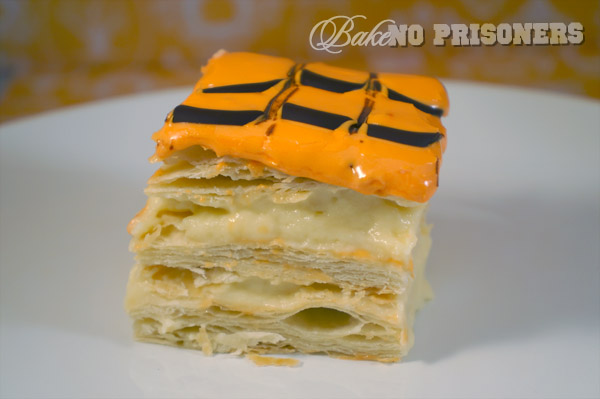
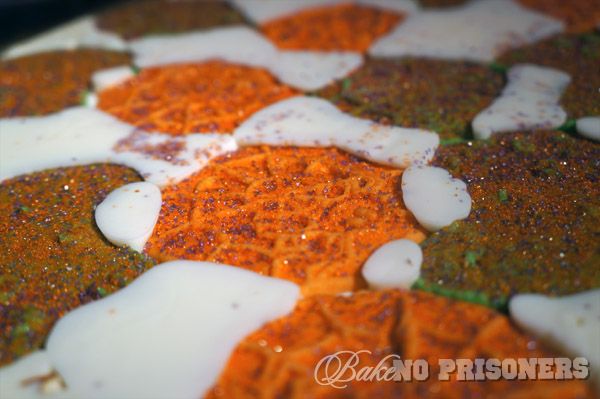
Once assembled, I topped my Napoleon with orange royal icing and dark chocolate to celebrate my favorite holiday!

I am so glad I decided to take on this month’s challenge. If I were dressing up this Halloween, I would be Superwoman, because there is nothing this girl can’t tackle!

Halloween Bark

I. LOVE. H A L LO W E E N.

It is my favorite holiday of the year! I mean, what’s not to love…

FREE Candy, costumes, haunted houses, classic horror films…the list goes on and on…

Let me break it down for you on how we celebrate Halloween in our house…

Around the end of September is when I drag out the 4…yes…4 bins of Halloween decorations for the inside of the house alone. I am talking pumpkins of all kinds, owls, frogs, ghouls candles, and much more. Then a few weeks before the sacred holiday we tackle the decorations for the outside of the house. This includes a pumpkin trail all the way down my stoop. Some of the pumpkins have been bejeweled, some have ribbon, and some are even lighted. And speaking of lights, I have pumpkin lights in the bushes and  purple and green string lights wrapped around my banister. Oh and the cobwebs! YES! The cobwebs are EVERYWHERE!!

So a week before Halloween, the hubster and I go and visit the pumpkin patch and I pick out the biggest and roundest pumpkin I can find. When we get home, we figure out what design we are going to carve out on our pumpkin and then break out the dremel. Yes, I do have my very own orange, pumpkin dremel just for this occasion. Once we are done we toast the pumpkin seeds just like Mom used to.

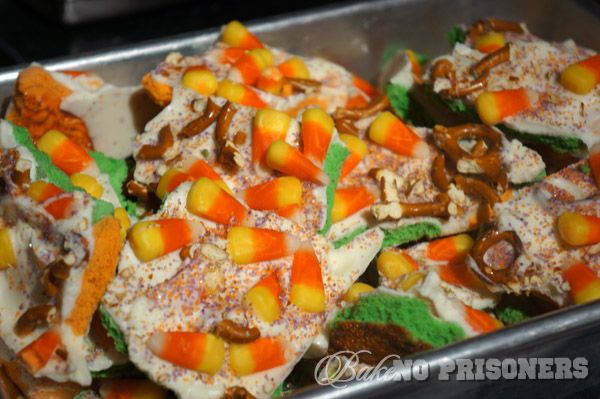
Another favorite Halloween tradition is coming up with yummy treats to bring to the kiddos at school. I loved surprising them last year with butter beer cupcakes during our book character dress-up extravaganza,  in which our class had chosen Harry Potter and the Chamber of Secrets. This year we chose Harry Potter and the Goblet of Fire, my all time favorite book and movie of the Potter series. Our book character dress-up isn’t for a few more weeks, but I wanted to get the kiddos excited for the upcoming events, so I made this all too simple Halloween bark.

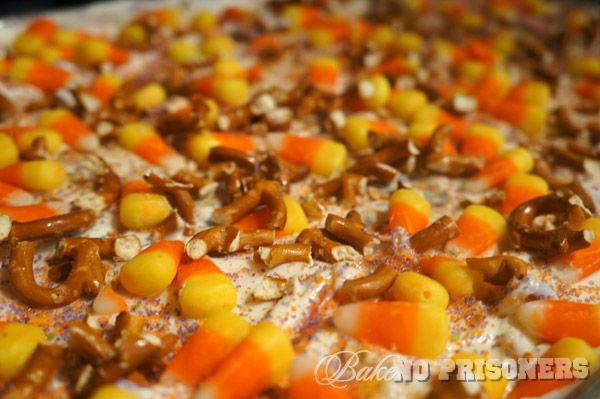
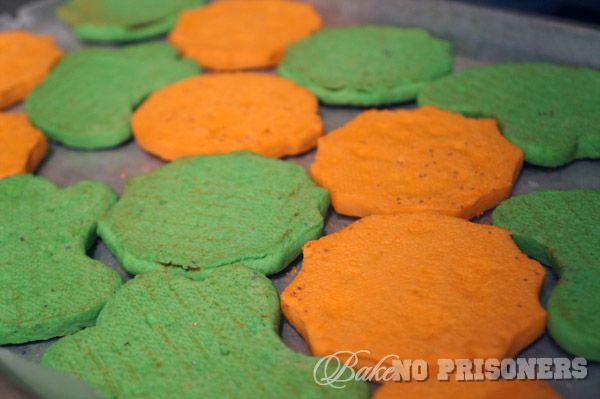
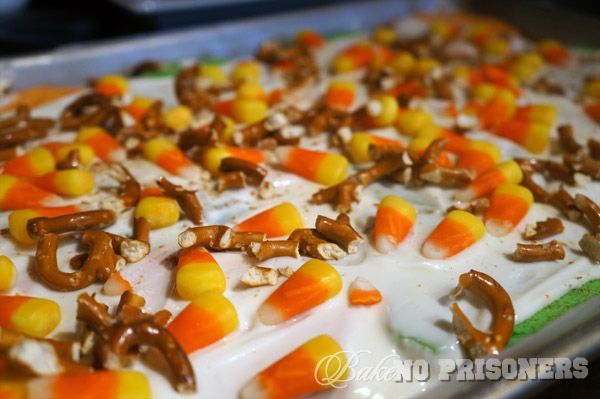
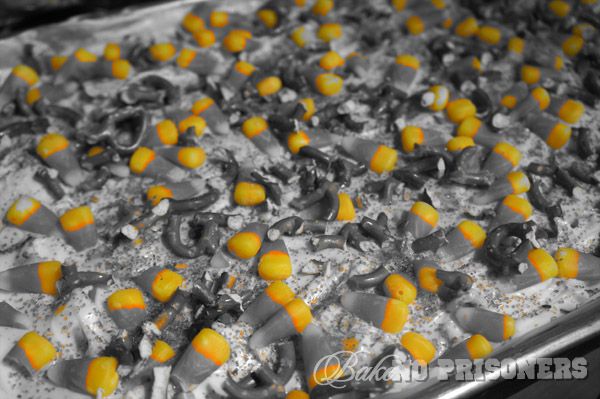
All you need are some fun sugar cookies, melted white chocolate, candy corn, crushed pretzels, and fun sprinkles!

Directions:

1. Layer the sugar cookies on a wax paper coverage cookie pan. Make sure your pan has some sort of lip on it to keep the melted chocolate in.

2. Melt your chocolate candies according to the package and spread over the cookies, filling in the gaps and edges.

3. Layer your candy corn, crushed pretzels, and sprinkles on top and let it firm for about 30 minutes.

4. Flip over and remove wax paper.

Break into pieces and serve!

And just for fun…

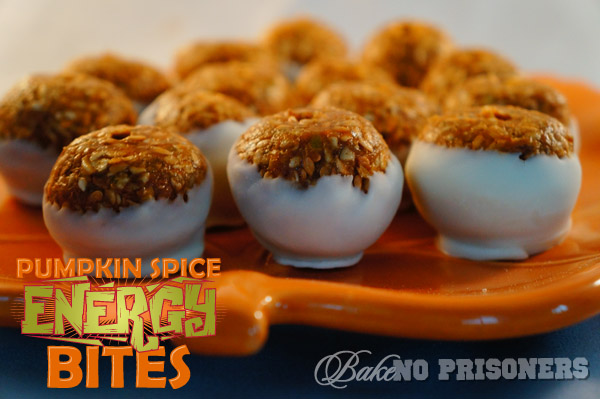
Foodie Pen Pals = Pumpkin Spice Energy Bites

It’s that time of the month again…FOODIE PEN PALS! Of course, this comes at a totally erratic and crazy time for me. I am currently trying to plan and organize (along with my awesome 4th grade team) an outdoor, overnight classroom trip that leaves Thursday, complete 1st term report cards by tomorrow, make chocolate cakelets for a team member who has been ill, grade papers, clean house, blog, read the new J.K. Rowling book, coach Girls on the Run and teach!! All of this can wear a girl out!! Even Wonder Woman would have had difficulty keeping up with my to-do list these days!

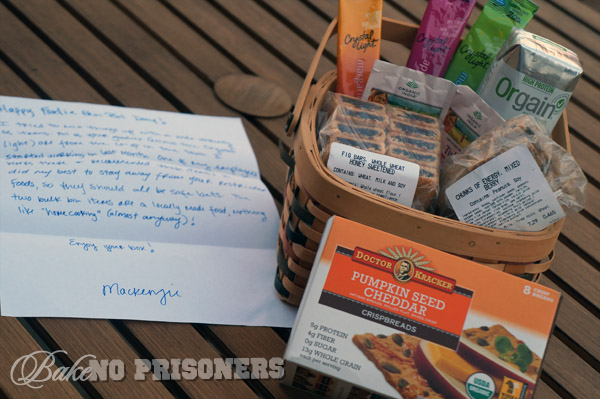
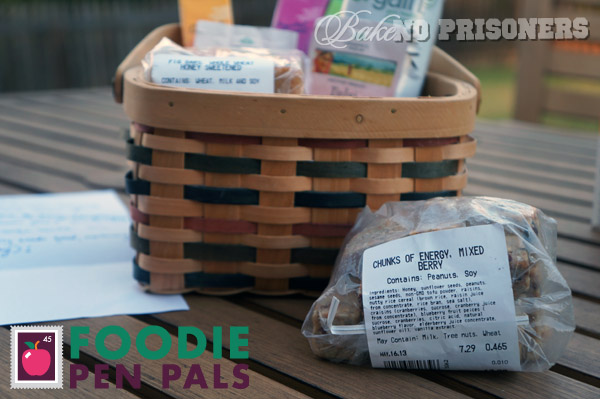
So when Mackenzie from Wealth is Health sent over her Foodie Pen Pal package this month, I was so excited to see that she had included these amazing energy bites among all of the other goodies. I had heard of energy bites before, but had never actually tried one. They were packed full of flax seeds, berries, pumpkin seeds and oatmeal, while held together with peanut butter and honey. They were sweet, nutty, and oh so good for you. So after I gobbled them up (in a matter of days, mind you), it got me thinking…how does one make energy bites?

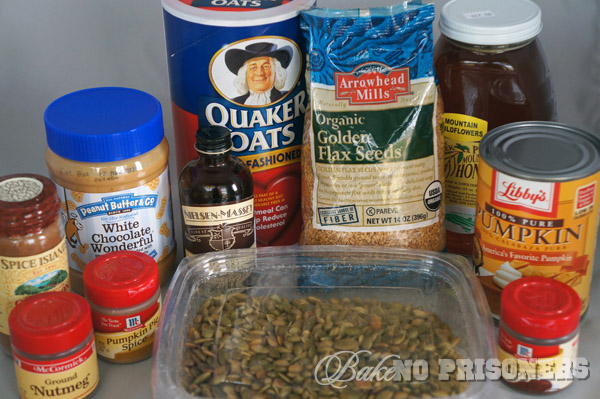
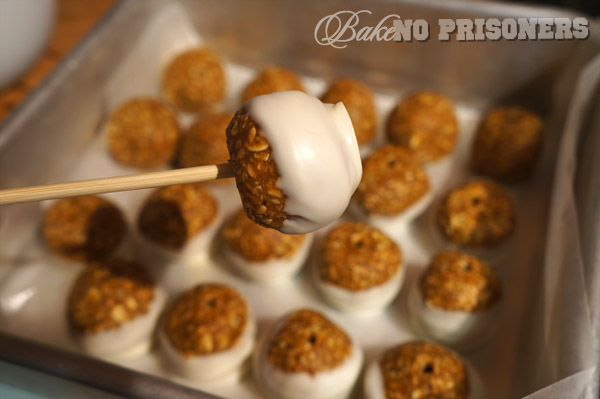
To my surprise, it’s not as hard as you might think! First, you have to think of a type of theme you want your energy bites to be. The ones in my FPP package were mixed berry energy bites. So I thought since I was on this ginormous pumpkin fix, I would make some sort of pumpkin spice energy bites. Then, you have to choose the type of seeds, nuts, dried fruit, or chocolate chips you want to add. I choose old fashioned oats, flax seeds, pumpkin seeds, sesame seeds, and walnuts. Next up are your spices. I added cinnamon, nutmeg, cloves, and pumpkin spice. Finally, to hold your energy bites together, you will need peanut butter and honey, a bit of vanilla, and to make it a bit naughty, I rolled my bites in white chocolate. (Although my friend, the music teacher, says that white chocolate is good for you in moderation…something about antioxidants). :)

My pumpkin spice energy bites lasted about as long as the ones Mackenzie sent me (mostly because I shared with my teacher friends), but at least now I know how easy it is to make them! Thanks Mackenzie for the foodie inspiration!

By the way, Foodie Pen Pals turns 1 today! I stumbled upon the Lean Green Bean by accident a few months ago! They have over 1,000 foodies and bloggers alike from around the globe that send foodie packages once a month to an assigned pen pal. Every month you get a new pal, so it is a great way to network and make friends, not to mention try out the food fare from around the nation. If you are interested, please take a moment to visit Lindsay over at the Lean Green Bean!

Pumpkin Spice Energy Bites

Ingredients:

1/2 cup Peanut Butter & Co. White Chocolate Peanut Butter

1/4 cup pumpkin puree

1/3 cup honey

1/4 teaspoon vanilla

1/2 teaspoon cinnamon

1/2 teaspoon pumpkin spice

1/4 teaspoon nutmeg

1/4 teaspoon cloves

1 cup old fashioned oats (uncooked)

1/2 cup golden flax seeds

1/2 c ground pepitas (pumpkin seeds)

1/2 cup ground walnuts

2 tablespoons sesame seeds

Directions:

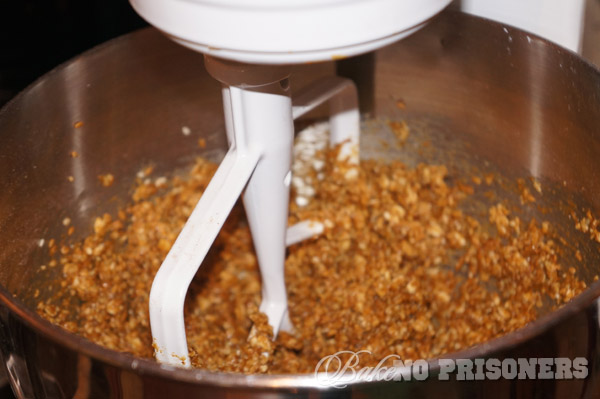
1. Combine the peanut butter, pumpkin puree, honey, and vanilla in your standing mixer. Mix until ingredients are well blended.

2. Combine the pepitas and walnuts in a food processor, and pulse until smooth and combined.

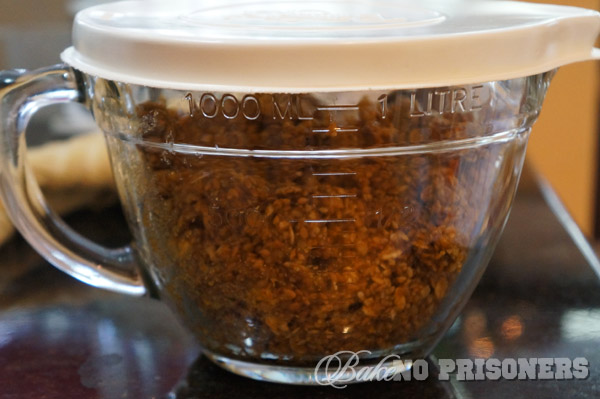
3.  With your mixer on medium low, add spices one at a time. Once blended, stir in the oats, flax seeds, pepitas/walnut mixture, and sesame seeds until evenly combined. Cover and refrigerate for at least 30 minutes.

4. After your mixture is cool, use a small cookie scoop or spoon to shape your energy balls. I used a small scoop and then rolled them into balls about 1 inch in diameter. Or to make them square, like the mixed berry energy bites, you can line a small baking pan with parchment paper, and press the mixture evenly into the pan, let it cool, and then cut into bars.

5. If you would like to dip your energy bites into white chocolate, I would suggest freezing the bites for another half hour before you skewer and dip them into melted chocolate.

6. Store in a covered container in the refrigerator for up to 2 weeks. (Storing them in the refrigerator helps the energy bites hold their shape.)


The Daring Bakers’ Challenge: Mountain Apple Empanada Gallega

Patri of the blog, Asi Son Los Cosas, was our September 2012 Daring Bakers’ hostess and she decided to tempt us with one of her family’s favorite recipes for Empanadas! We were given two dough recipes to choose from and encouraged to fill our Empanadas as creatively as we wished!

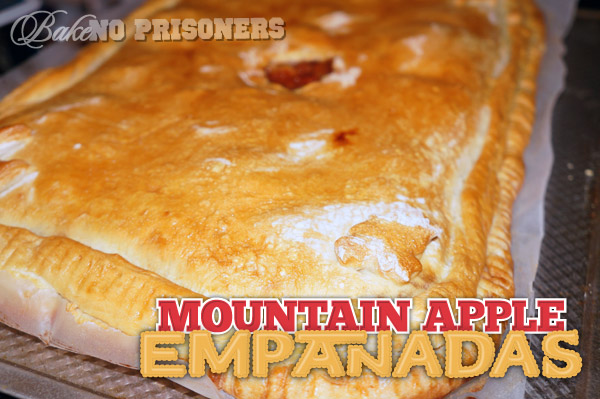
So I decided to take all those mountain fresh apples that the hubster and I picked a few weeks ago, add a little sugar and cinnamon, and make a mountain apple empanada!

I started my empanada dough first, by following this recipe from Asi Son Los Cosas. It is almost fool proof and took me no time at all getting the dough prepared. Once in a lightly oiled bowl, I left the dough alone to rise for about 40-50 minutes and began work on my apple filling.

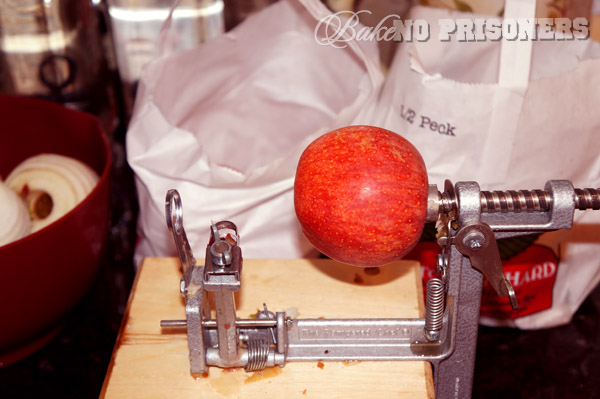
I cored and peeled 6-8 apples with my handy dandy apple peeler. It is one of those hand crank, older-than-dirt peelers attached to a wooden board, but it just so happens to be one of my favorite kitchen gadgets. I think it’s because it makes me feel like I am in an old world time period, let’s say circa 1930′s, wearing a white, frilly apron with heels and listening to some big band orchestra in the background while baking Mama’s homemade apple pies.

Once my apples were sliced and diced, I added a 1/2 cup to 3/4 cup of sugar and 1 1/2 tablespoons of cinnamon.  I let them simmer on the stove for about 10 minutes until the apples began to soften. I then removed my apple mixture from the stove and let it cool while I rolled out my empanada.

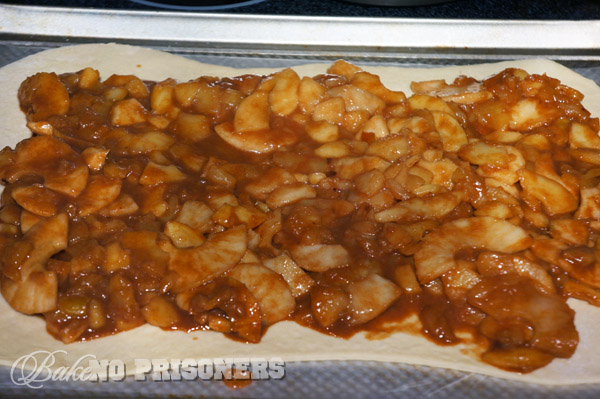
On a lightly floured surface, I cut my dough in half and rolled out one half in a long rectangle. I then added my cooled apple mixture.  After taking a closer look at this photo, I noticed my apple slices are a few different size. Part of that is because of the breakdown of the apples due to the heat from the stove, but I would recommend you try and keep your slices the same size to ensure that they cook at the same rate.

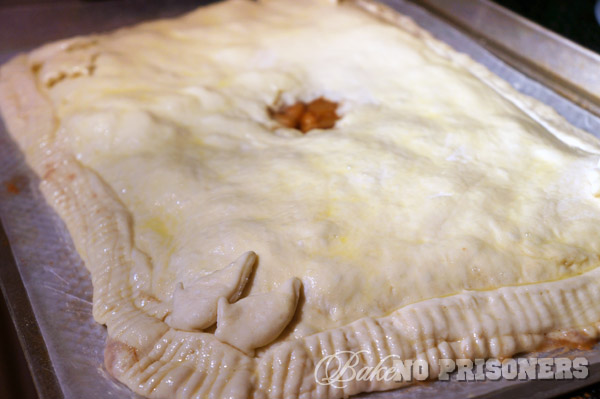
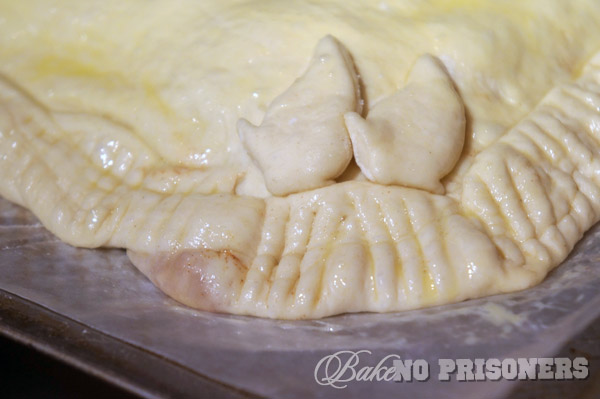
The apple empanada is very similar to making an apple pie only your using empanada dough instead of a pie crust. So to top your empanada, take your other half of dough and roll that out in a long rectangle. You will have to make sure it is a bit smaller than your bottom rectangle because it only has to cover the filling. I chose to seal the bottom rectangle to the top with fork marks, so that looked like an apple pie.  You also have to make a 1 1/2 -2 in. hole in the middle to allow hot air to escape.

I also used my extra dough to make little leaves to border my forked crust.

After a quick egg wash, I baked my empanada for 45 minutes at 350 degrees.

Final note: This post makes me think of my Mom, who is on a 31 day Mediterranean cruise with her friends and is currently in Barcelona, Spain. I hope that while you are in Spain you have a true empanada for me, Mom. xoxo

Pumpkin Pie Cinnamon Rolls

I can literally smell Fall in the air. I know. It sounds weird, but I promise you I can smell it and it is the most wonderful smell in the world.  It is that crisp, cool smell that infiltrates your home as you open the windows for the first time. It is the cinnamon and apples simmering on the stove. It is the pumpkin spiced lattes wafting through the local coffee shops. Yes, fall is my absolute favorite season. And I love everything that encompasses it.

I also have a deep love for cinnamon rolls. Did you happen to read my last post about my magical Saturday morning muffins? Well, muffins aren’t the only thing we eat on our perfect Saturday mornings. We also enjoy cinnamon rolls. Gooey, hot fresh-from-the-oven, icing all drippy, licking my fingers good cinnamon rolls. Now, normally, because I don’t want to wait all day for the dough to rise, my cinnamon rolls are the Pillsbury in-a-can kind my Mom used to make. (I remember quite vividly, fighting with my brother and my Dad over who got the middle roll because that was always the gooey-est). But with Fall tapping me on the shoulder, I thought, why not try a fall version of one of my favorite breakfast foods.

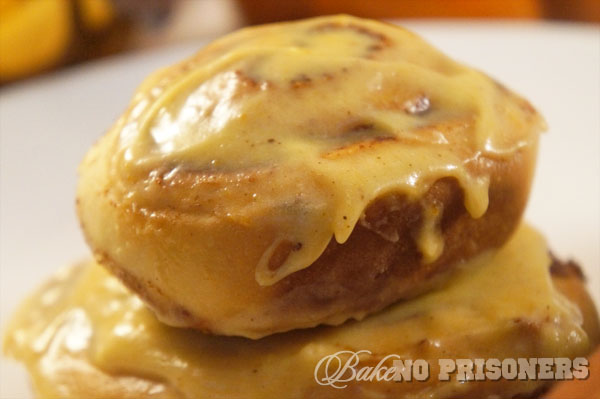
I had first thought about making apple cinnamon rolls, but I had forgotten I had used up all my mountain apples on the several apple pies I had made the weekend before (mountain day-cation post coming soon). Then I realized, I had just picked up my very first canned pumpkin of the season the day before and that pumpkin cinnamon rolls were totally the way to go! I also thought I could make a yummy cream cheese pumpkin icing to top my ooey, gooey pumpkin cinnamon rolls.

Now I will say that I spent the better part of the day waiting for these puppies to rise, but that was ok with me because I was watching a Firefly marathon on Netflix to pass the time. Plus, by the time the rolls were baked and iced, they were totally worth it. This is not as hard as it looks folks. You can do this! You want to do this! It has to be done…

Pumpkin Pie Cinnamon Rolls

Ingredients:

Dough:

1/2 cup milk

8 tablespoons (1 stick) butter at room temperature

1/2 cup warm water (about 110 degrees)

1 envelope (about 2 1/4 teaspoons) instant yeast

1/4 cup sugar

1 large egg plus 2 large egg yolks

1 1/2 teaspoons salt

4-4 1/4 cups all purpose flour, plus more for work surface

Filling:

3/4 cup packed light brown sugar

1 tablespoon cinnamon

1 tablespoon pumpkin pie spice

1 tablespoon nutmeg

1/8 teaspoon salt

Icing:

12 ounces cream cheese, softened

4-5 tablespoons corn syrup

3 tablespoons canned pumpkin

2 cups confectioners sugar

sprinkle of cinnamon, nutmeg, and pumpkin pie spice

Directions:

For the dough:

1. Heat the milk and butter in a small saucepan or in the microwave until the butter is melted. Remove from heat and set aside until the mixture is lukewarm (about 1oo degrees). I used a thermometer to double check.

2. In the bowl of your standing mixer fitted with the paddle attachment, mix together the water, yeast, sugar egg, and yolks at low speed until well mixed.

3. Add the salt, lukewarm milk mixture, and 2 cups of the flour and mix on medium to low speed until well blended, about 1 minute. Switch your attachment to the dough hook and add another 2 cups of flour, and knead at medium speed, adding up to 1/4 cup of flour, one tablespoon at a time, until the dough is smooth and freely clears the sides of the bowl, about 10 minutes.

4. Scrape the dough onto a lightly floured surface and shape into a round. Place it into a lightly oiled bowl and cover the bowl with plastic wrap. Leave in a warm, draft-free spot until doubled in size, about 1 1/2 – 2 hours. Watch Firefly…
For the icing:

1. While your dough is rising, combine all of the wet ingredients in the bowl of your standing mixer. Blend together at low speed until roughly combined, about 1 minute. Add your confectioner sugar 1/2 cup at a time until blended. Increase the speed to high and mix until the icing is smooth and free of cream cheese lumps, about 2 minutes. Cover with plastic wrap and refrigerate.

Roll and Fill:

1. After the dough has doubled, press it down and turn it out onto a lightly floured work surface. Using a rolling pin, shape the dough into a 16 by 12-inch rectangle, long side facing you. In a small bowl, mix the filling ingredients and sprinkle the filling evenly over the dough, leaving a 1/2 inch border at the far edge. To roll the dough, begin with the long edge closest to you and using both hands, pinch the dough with your fingertips as you roll. Moisten the top border with water and seal the roll. Lightly dust the roll with flour and press the ends to make a 16-inch cylinder.

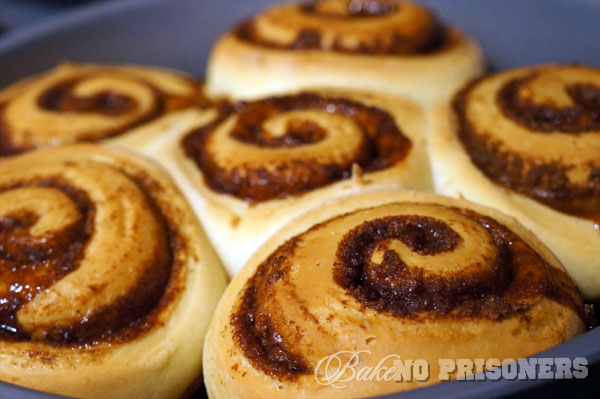
2. If you have gotten this far, then you are in the homestretch. Grease a 13 by 9 baking dish. Cut the roll into 12 equal pieces using dental floss. I start by cutting the roll in half, then each half in half, and so on. Place the rolls, cut side up, into the baking dish. Cover with plastic wrap, and place in a warm, draft free spot until doubled in size, about 1 1/2 -2 hours.

3. BAKE! When your rolls are almost fully risen, heat the oven to 350 degrees and place your oven rack to the middle position. Bake the rolls until golden brown, about 25-30 minutes. Invert the rolls on a wire rack and cool for 5 minutes. Place rolls upright and frost those babies with your cream cheese icing! Serve/Gobble immediately!!


Magical Morning Blueberry Muffins

Saturday mornings are quite magical in our house…

There are NO alarms buzzing…

We wake up to the sun shining bright and cheerful (we have no kids…we ARE the kids)…

We leisurely find our way to the couch, still in our pajamas, total bed head, cup of coffee in hand and watch Doctor Who reruns or play Lego Harry Potter…

It really isn’t until after 10 or so that we really decide what we are going to do with our day. (Although lately, my 15K training group has decided that an 8am run is ABSOLUTELY necessary.) Then I usually mosey my way into the kitchen and whip up a batch of something sweet and gooey.

This past Saturday morning I was recovering  from, to quote Alexander, “a terrible, horrible, no good, very bad day” the Friday before. The hubster had truly come to my rescue, saving me from near disaster on many varying levels. He was able to not only put out a few fires with his super hubby strength, but deal with my near breakdown from it all…

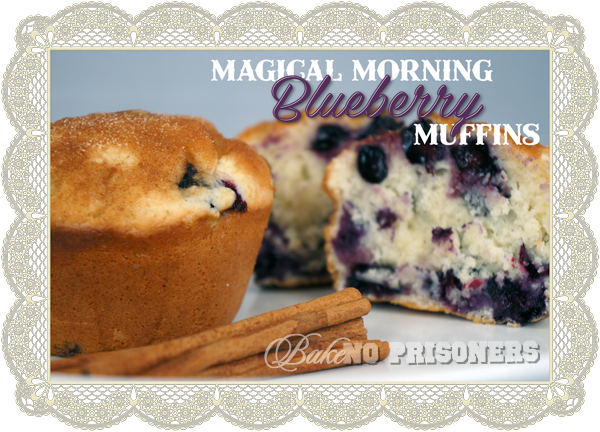
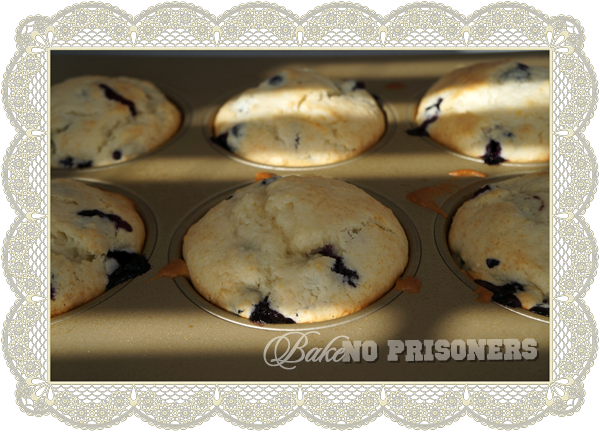
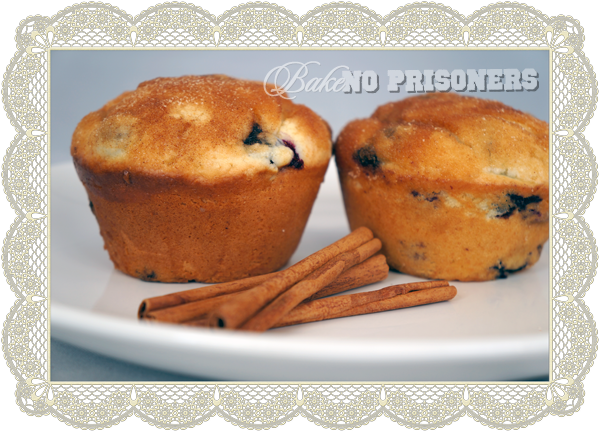
So to honor my Super-Man, I made him the Magna Carta of muffins. A muffin so infamous, it belongs in the Muffin Hall of Fame. A true tribute to all that is sacred and holy to the traditional blueberry muffin. This past Saturday, I baked super-sized cinnamon-sugar-dipped organic blueberry muffins.

Cinnamon-Sugar-dipped Organic Blueberry Muffins

Makes 12 standard muffins or 6 super-sized muffins

Ingredients:

2 cups all purpose flour

1 tablespoon baking powder

1/2 teaspoon salt

1 large egg

1 cup sugar

1/2 stick butter, melted and cooled slightly

1 cup sour cream

1/4 cup heavy cream

1 1/2 cups organic fresh blueberries

Directions:

1. Preheat oven to 350 degrees and make sure you adjust an oven rack to the middle position. Grease 12 cup standard pan, or be brave and grease a super-sized 6 cup pan.

2. Combine together the flour, baking soda, and salt in a medium bowl until combined. In a separate bowl or in a stand mixer with the whisk attachment, whisk the egg until well-combined, about 30-45 seconds. Add the sugar and blend for another 45 seconds. Add the butter slowly and then add the sour cream and heavy cream, whisking until just combined.

3. Using a 1/4 cup of the dry ingredients, gently toss the organic blueberries until completely covered. Add the wet mixture to the dry ingredients and combine until smooth. Gently fold in the blueberries. Be careful not to over-mix.

4. Divide the batter among the greased muffin cups and bake until the muffins are light golden brown and a toothpick inserted in the center of the muffin comes out clean. For standard muffins, bake for 25 to 30 minutes. For super-sized muffins, um, well….I forget…so you will need to check periodically after 30 minutes or so. Sorry!

5. Pop out your muffins and let them cool on a wire rack for about 5 minutes. While they are cooling, mix 1/2 cup of sugar and 1 teaspoon of cinnamon in a small bowl. Melt 4-5 tablespoons of butter in a small saucepan or microwave. After the muffins have cooled, dip the top of each muffin in melted butter and then roll in cinnamon-sugar mixture. Enjoy while still warm! It is the perfect treat for the Super-Man in your life….or Wonder Woman.

Foodie Pen Pals

When I was in elementary school, I had a pen pal in the United Kingdom. The details are a bit fuzzy on how I got my pen pal or for how long we kept in contact, but I used to love reading her letters and comparing how different life was here in the States. That’s probably where my love for all things UK came from. For some reason or another, we stopped writing to each other, but I never got over how fun it was to receive something in the mail. I think my pen pal contributed to my obsession for Amazon as well. :D

I stumbled upon the Lean Green Bean last month and was pleasantly surprised to hear that they had a pen pal system in place for foodies just like me! They have over 1,000 foodies and bloggers alike from around the globe that send foodie packages once a month to an assigned pen pal. Every month you get a new pal, so it is a great way to network and make friends, not to mention try out the food fare from around the nation.

This month, I was to send a foodie package that contained all the local goodies in and around my town to Jessica at The Enlightened Kitchen and I was to receive a package from new foodie friend, Lynn from Spotsylivania, VA. I had never heard of Spotsylvania before, so I looked it up. According to its county page, in addition to its beautiful rural landscapes, Spotsylvaniais is known as the “Crossroads of the Civil War” and is home to many historical resources including the Fredericksburg and Spotsylvania County Battlefields National Military Park. I, personally, would love to visit the Historical Courthouse and Old Jail in the Spotsylvania Courthouse area.

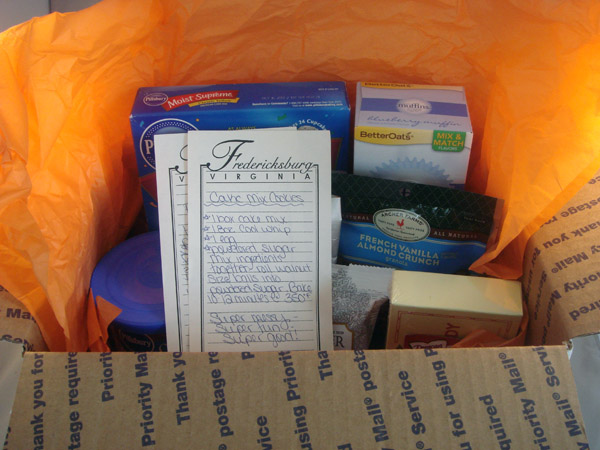
Here is the foodie package I received from Lynn. :)

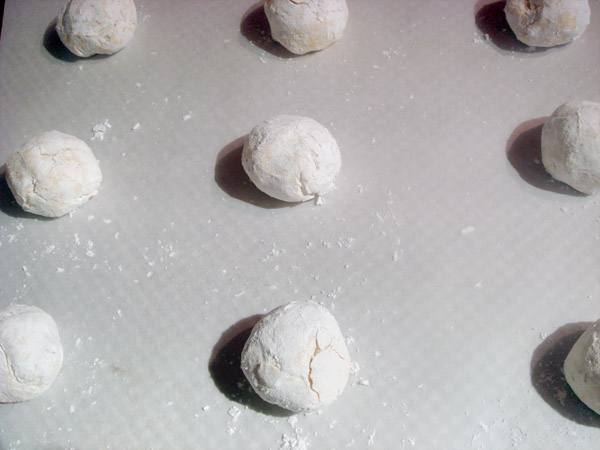
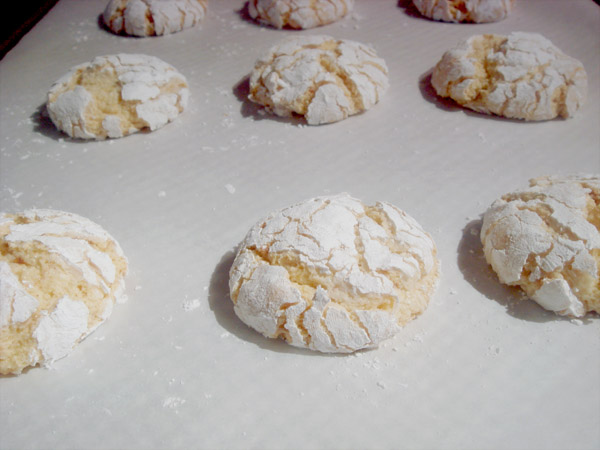
She also attached a sweet letter and a recipe for Cake Mix Cookies. She included a few of the ingredients to make the cookies, so I gave it a go! They sounded delicious and reminded me of the post I made last week of the  deep dark chocolate cookies I found on Pinterest because of the way the confectioner sugar cracks when it bakes.

I also decided to add the gourmet Virginia Diner peanuts she included in my foodie package to give a bit more crunch. I just pulsed 1/2 cup in the food processor and added it to the batter.

They were so yummy! And they tied in perfectly with the vanilla cinnamon coffee Lynn sent as well!

Cake Mix Cookies

Ingredients:

1 box vanilla cake mix

1 8oz. Cool Whip or other preferred whipped topping

1 egg

confectioner sugar

Directions:

Mix all ingredients together except the sugar in a large bowl. Using a mini-ice cream scoop or small spoon, roll out a ball of batter about 1/2 of an inch. Drop it into the confectioner sugar and coat well.

Place on baking sheet and bake at 350 degrees for 10-12 minutes.

Overall, Foodie Pen Pals was a great experience this month and I can’t wait to try it again in September! If you are interested in participating, please check out Lindsay’s blog, Lean Green Bean. You won’t be disappointed!


The Daring Bakers’ Challenge: Filled Pate a Choux Swans

Pate a Choux, or in our house, Pikachu to be nerdy, has proven to be quite the Daring Bakers’ Challenge this month. Over a month’s time, I have tried to make Pate a Choux 7 times, using 28 eggs, 42 tablespoons of butter, 7 cups of flour, and 7 tablespoons of sugar and salt. In its simplest form, Pate a Choux is nothing more than the pastry dough that makes up an eclair. It is just a few eggs, several tablespoons of butter, a cup of flour, and a little sugar and salt. Sounds like a breeze, right? Wrong! Nothing could be further from the truth! Do not let the short ingredient list fool you! This recipe challenge is not for the faint of heart! In my opinion, it is the devil incarnate! But, I digress…

The first 3-4 times were a complete disaster! (OK, so I thought I was done with my rant…apparently not) The dough never solidified, thus I had to begin again and again. After trying a different recipe, I finally had some success with the dough forming in the pan, allowing me to add the eggs, and fill the pastry bag. The swan heads came fairly easy, but I piped the bodies too flat. Once out of the oven, the heads again were perfect. They were puffed and golden brown, but the bodies weren’t done and what puff they had, quickly deflated.

The 6th time I tried, I had perfected the dough and getting it into the oven was a breeze, but, (yes, there is a big BUT),  I had dripped something onto the oven floor prior to their arrival, thus smoking out my poor Pate a Choux swans. They were not blog worthy, so I began again, again.

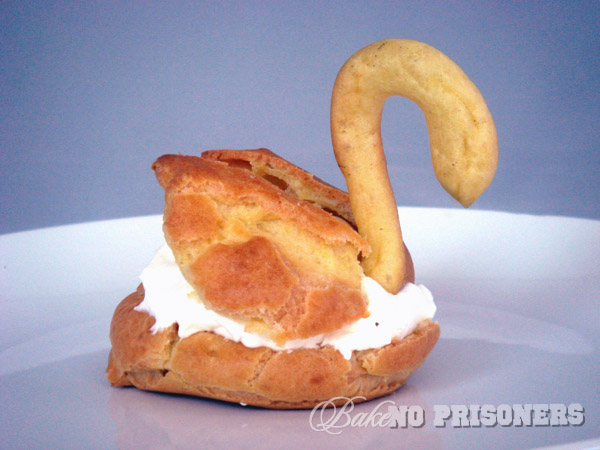
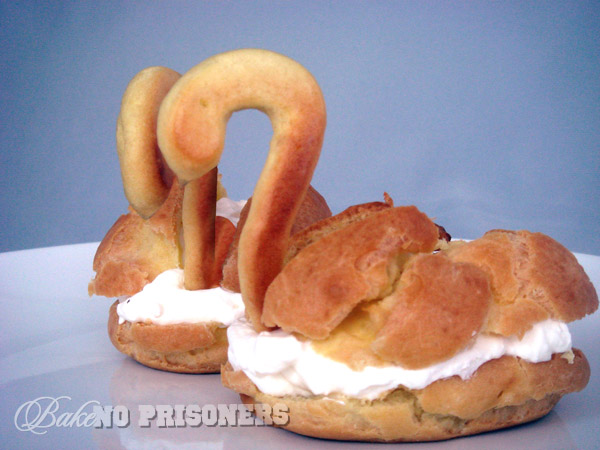
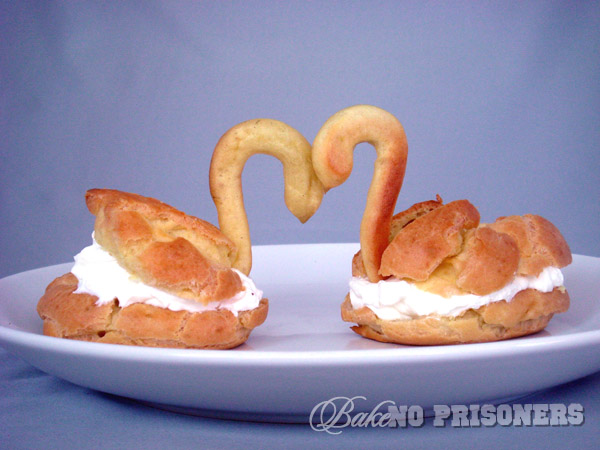
The 7th and final go round with my Pikachu was a complete success! The dough formed nicely in the pan, the eggs were added, the swans were piped, and all were puffed and golden. Once cooled, I sliced the swan bodies in half and sliced the top half to make the wings. I then added Chantilly cream (which was the easiest part of the entire process!) to the bottom half, added the head carefully(which I wanted to rip off at this point), and placed the wings neatly on top.

When it comes to this challenge (or my life for that matter) I am not sure whether I would call myself stubborn and hard headed or determined and steadfast, but the ladder sounds better to me, so I will go with that. For anyone attempting Pate a Choux, I recommend a bakery!

Kat of The Bobwhites was our August 2012 Daring Baker hostess who inspired us to have fun in creating pate a choux shapes, filled with crème patisserie or Chantilly cream. We were encouraged to create swans or any shape we wanted and to go crazy with filling flavors allowing our creativity to go wild!

Here is the challenge in its entirety!


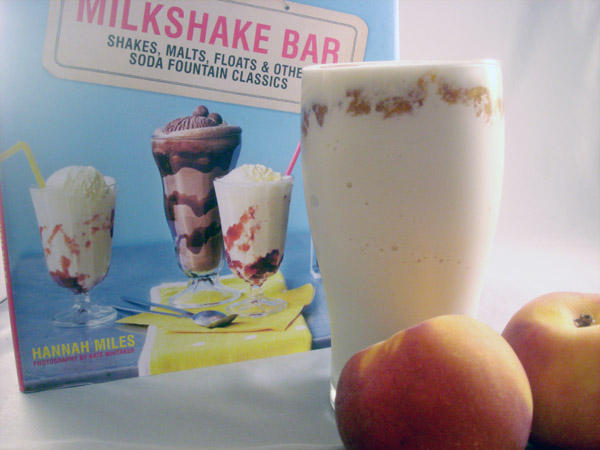
Spicy Peach Milkshakes and a MILKSHAKE BAR cookbook giveaway

We have a winner to announce for Bake No Prisoners Milkshake Bar GIVEAWAY! Our winner will receive a copy of the Milkshake Bar, by Hannah Miles!

The winner is……comment #5!!!!!

Samantha Remington says:

August 30, 2012 at 6:19 pm (UTC -5)

Vegan chocolate

Congratulations, Samantha!! I will contact you shortly for shipping information.

School is back in session this week and we are celebrating the end of summer and the beginning of the new school year with one of my favorite things…MILKSHAKES!! And to top it off, BNP is giving away Hannah Miles’ MILKSHAKE BAR cookbook! It is filled with everything from Lemon Meringue milkshakes, to Watermelon Coolers, to even a doughnut float! You won’t want to miss out on this!!

When I was little, I always loved the end of summer. Mom and I would head to the mall to pick out new clothes, kicks, and school supplies for the upcoming school year. (Some things never change! I am totally in love with my new purple glitter Vans I got a few weeks ago! Thanks Mom!) Summer was also our last chance to have our friends over for a sleepover or go to the pool. And nothing made a hot Florida summer day better than a cold sweet treat.

Today, I am still picking out new clothes and heading to the pool at the end of summer vacation, but it is the cold summer treats that really make my day! I had recently picked up a few pounds of peaches and was inspired (thanks to my new Milkshake Bar cookbook) to make this spicy peach milkshake.

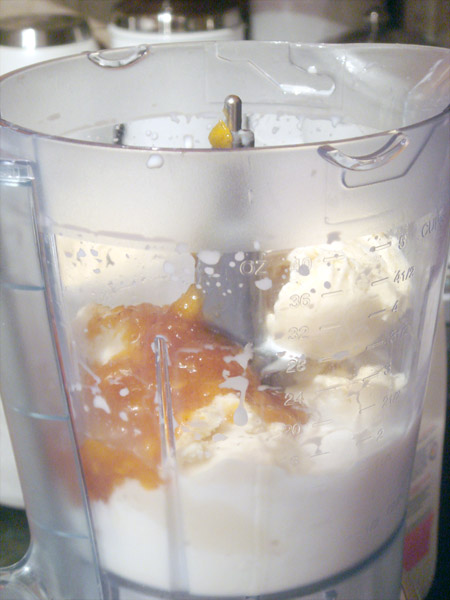
I began by taking 4 peaches, peeled and diced, and placed them in a small 4 quart pot. I then added a 1/4 cup of sugar, 1 tablespoon of cinnamon, a dash of nutmeg and 3 tablespoons of water. With the burner on low, I let the peach mixture simmer for 30 minutes. Finally, I let it cool to room temperature.

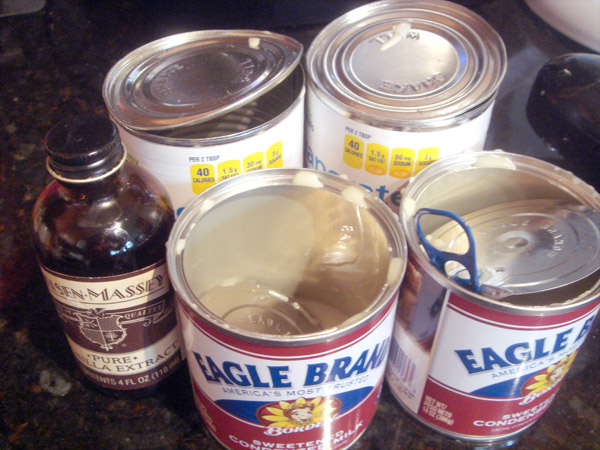
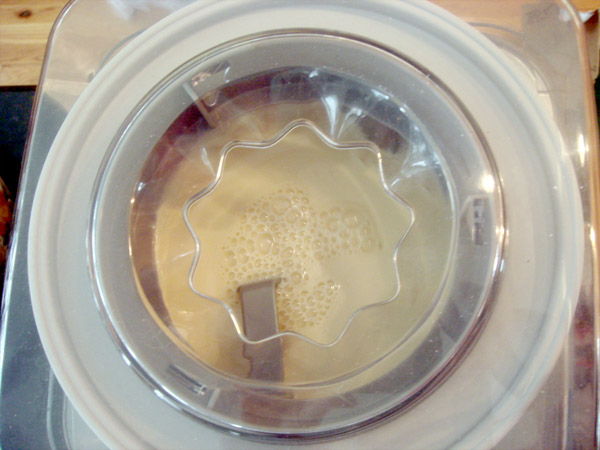
The ice cream base comes from my father-in-law’s top secret, super-easy, lightning fast, vanilla ice cream recipe. Unfortunately, this is all I can show you about the recipe without being in jeopardy of a major copyright infringement lawsuit…Ha!

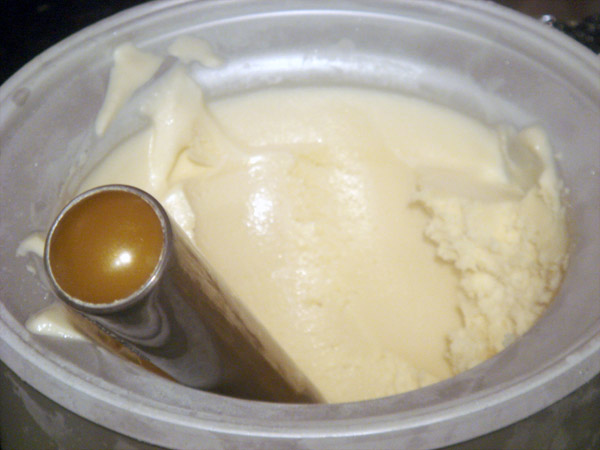
Honestly, you can use any vanilla ice cream base recipe you want and whip it up in your ice cream maker in less than 30 minutes!

Once at desired consistency, add 4-6 scoops of vanilla ice cream to the blender, along with your cooled peach mixture, a little milk,  and blend. I saved a few spoonfuls of the peach mixture to place on top for decoration.

Now onto the giveaway…

How to Enter the Milkshake Bar Cookbook GIVEAWAY

To enter this giveaway, just answer the following question in the comments section of this post:

“What’s your favorite milkshake?”

Additional (Optional) Entries

To up your chances of winning, you can receive up to THREE additional entries to win by doing the following (these are optional, not required):

1. Become a fan of Bake No Prisoners  on Facebook. Come back and let me know you became a fan in an additional comment.

2. Share Bake No Prisoners on Facebook on your personal page and let me know you did in an additional comment.

3. Follow @BakeNoPrisoners on Twitter. Come back and let me know you’ve followed in an additional comment.

The Fine Print

Restrictions: Winner must have a U.S. shipping address.

Deadline: Friday, August 31, 2012 at 11:59pm EST. Contest is now closed.
Winner: The winner will be chosen at random using Random.org and announced at the top of this post. The winner will also be notified via email; if the winner does not respond within 48 hours, another winner will be selected.
GOOD LUCK!!

Duh, Pinning…

This girl loves her jewelry! At any given moment, I could be in the car on my way to The Jewel Box to pick out something that sparkles and glitters in the sunlight. I love everything from  big chunky rings to long dangle earrings. Nothing is truly off limits when it comes to accessorizing.  I have so much jewelry in fact, that I have not one, not two, but 3 jewelry boxes and 2 drawers FULL of bling!

I am a jewelry junkie.

I think I have a problem….

I may have to be admitted or attend weekly JA (jewelry anonymous) meetings. :D

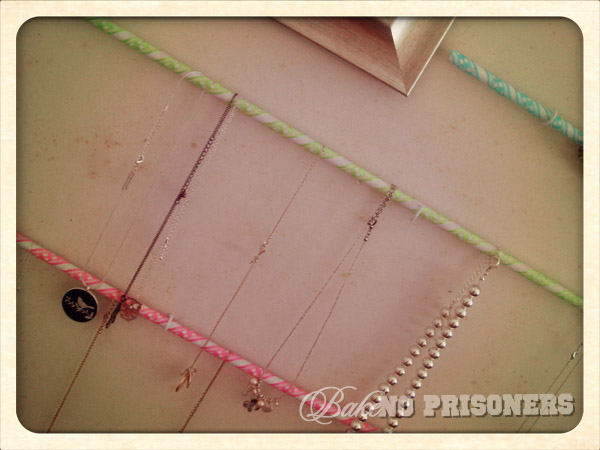
So while on Pinterest the other day, I noticed this jewelry wall DIY that caught my eye from Something Like That Designs. It seemed simple. It seemed cheap. (Two of my favorite things.) And it offered a solution to my ever mounting jewelry addiction. It also allowed me to view my jewelry collection at a glance, so that I didn’t forget altogether about something I had purchased awhile back and that I didn’t have to go digging around for a certain piece in one of my many jewelry locations.

The total cost was around $20, but it has given me a bit of solace and a way to view all of my favorite pieces so that I can choose what works best with what outfit.

What you will need:

3 dowels (You can find these at Lowes or Home Depot)  I purchased the 0.97 cent ones.

white spray paint

small white screw-in-to-the-wall hooks

pretty ribbon

hot glue or Elmer’s glue

chicken wire (Again at Lowes. I purchased the smallest roll possible at $8.97)

2 photo frames – any size you want, as these are for your earrings (I found 2 silver 8 by 11 frames on clearance at Micheal’s)

What to do:

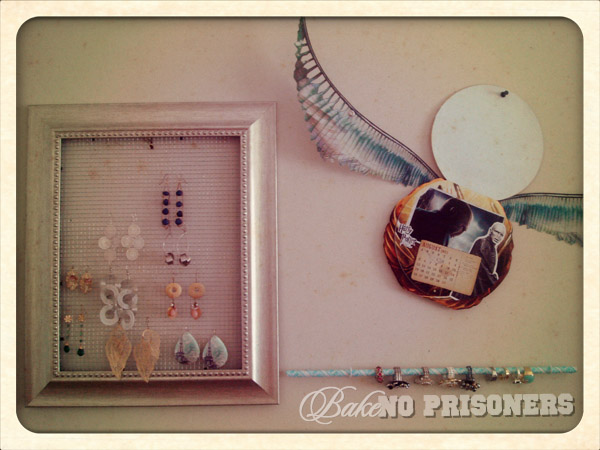
This is the really easy part. All you have to do is clamp the dowel to a secure location and cut to preferred length using a Dremel. Then spray paint them white, or any other color you like. I choose white because I had this awesome neon ribbon I could glue around the painted dowel. This made the neon ribbon really pop against the white paint. Glue the ribbon around the dowels. Finally, screw the hooks into the wall and place the dowels on the hooks. Voila! A new and funky way to display your favorite pieces!

For the frames, I just took out the glass and matting and replaced it with chicken wire. This part was a bit more difficult because it wouldn’t fit exactly right. I may go back and cut new wire and staple it to the frame, but for now it holds my earrings nicely. (Don’t you just love my Harry Potter calendar next to the frame! squee!)

Lastly, for all of you kiddos (and teachers) headed back to school tomorrow, GOOD LUCK and have a wonderful year! I know I will! I will have a peachy milkshake and cookbook giveaway to kick off the new school year in a few days, so be on the lookout!