Happy 2nd Birthday, Bake No Prisoners!

DSC01387_600x400

This week marks the 2nd blogiversary of Bake No Prisoners!

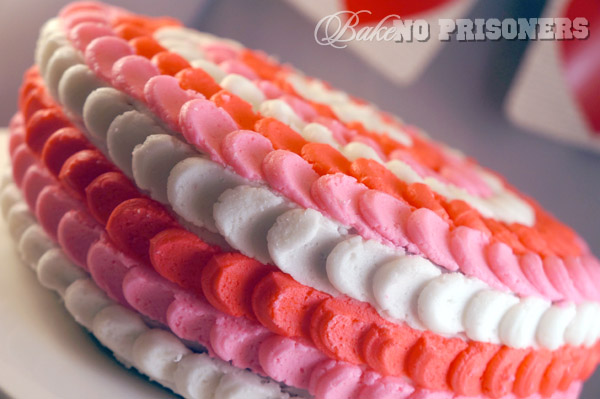
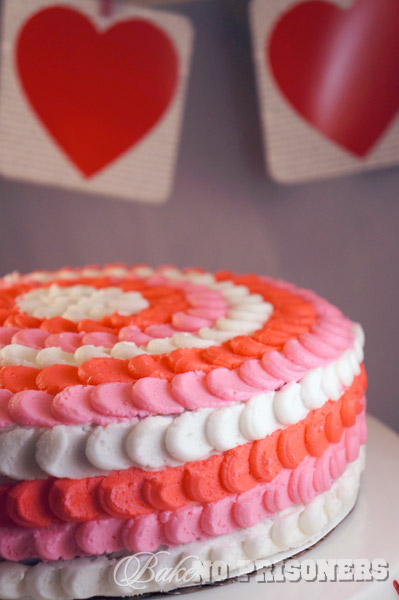
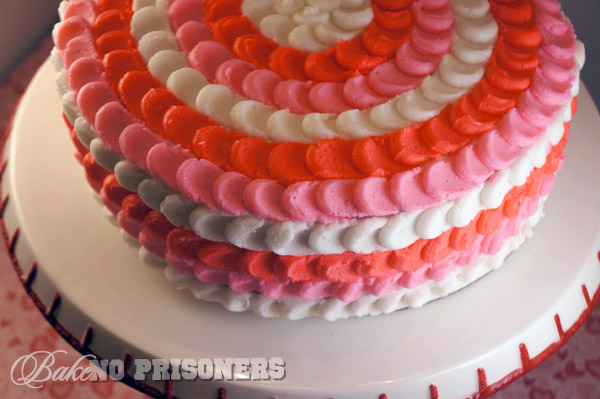
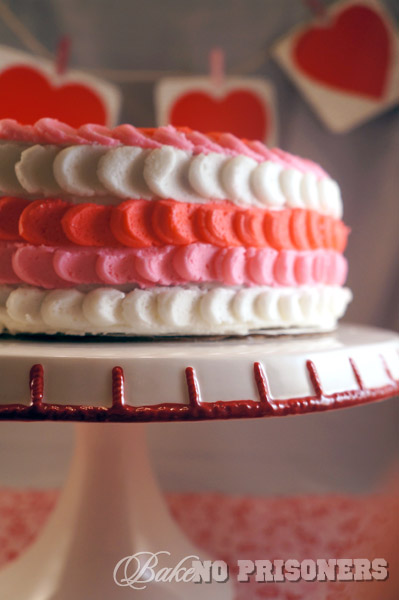
And what better way to celebrate than with this beautiful Valentine Petal Cake and our new look!

To be honest, when Bake No Prisoners started, I really didn’t know what I was in for. At the time, I enjoyed cooking and baking for family and I loved to spend hours surfing the net for inspiring blogs and recipes. I had no real photography skills, nor did I know the first thing when it came to blogging. I just knew that I loved to bake and write…and so once I hit publish on that first post, life as I knew it was over.

Ok…I am being a bit dramatic, but if you look at the big picture from my end, you can see how much I have grown as a baker, a blogger, a photographer, and foodie friend.

I never really started baking until I got married. I come from a long line of amazing women who are self taught bakers and chefs, but I never took the time to hone in on their skills until my early 20′s. My grandmother was known for her apple pies and perfect, flaky crust, for which my Mom says I have surpassed her skills. My Mom is required, not asked, to make several different types of Christmas cookies each year to satisfy the lot of us and it usually takes her weeks to complete this daunting task. And yes, Mom, we are all eternally grateful. And then there’s me. I had a lot of catching up to do and this blog helps me reach my never ending goals.

DSC01403_600x400

As a child, instead of baking, I loved to write. I wrote all the time. Short stories. Poems. Fictional alien narratives that won me awards. I envisioned myself as an author or a journalist of some kind. But as time went on, my passion to write succumbed to my passion for teaching. I have this keen ability to relate to children. Maybe it is because I am still a child at heart, but I like the shows they like (hence my current obsession with Dance Academy), I like the same music, and I am quite the fan of video games. I also have a deep love affair with learning. And I love to pass on that need to learn to my students. This blog allows me to do both….write and learn. I learn new things with every post about Word Press or blogging techniques. I have also learned that posts are not just about the recipes…You have to give a little of yourself to your posts, and readers alike.

DSC01394_600x400

Last year for my birthday, we all went out to the best restaurant in town. It was great. I ordered the duck. My husband brought the annual cookie cake…double stuffed. The whole family was there. My favorite part? My in-laws had purchased me a photo box for my food photography. This changed my photos indefinitely. This meant that they took my blog seriously. Even more…the following month, the hubster bought me my own Sony NEX-5N. Over the past year, I have grown as a photographer. I now know the lighting needed for a certain photo or what background would enhance the picture. I still have a lot to learn, but I am getting better each day. Now if I could only master Photoshop….UGH!

DSC01389_600x400

This last part of my post is most important.

Friends.

Throughout this process I have had so much support from my old friends, positive feedback from my new friends, and am encouraged and excited about the friends to come. I cannot tell you how happy it makes me when someone likes my Facebook page, or follows me on Twitter. And I get super duper pumped up when you leave a comment. It can be pretty scary when you put your ideas, thoughts, and feelings out there for everyone to see, but you make me feel inspired to do it. Thank you to all my friends, old and new, and friends yet to come.

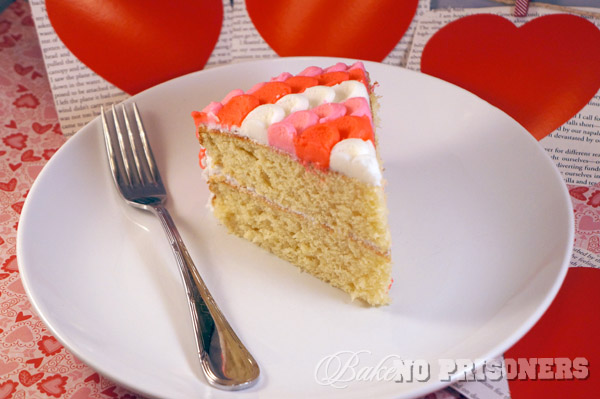
Happy 2nd Blogiversary, Bake No Prisoners! Now have a slice of the bloody cake!

DSC01419_600x400

Recipe info: Basic Vanilla Cake

*I substituted half the vanilla extract for almond extract

Amazing tutorial on the Petal cake decorating technique can be found here: The Hungry Housewife
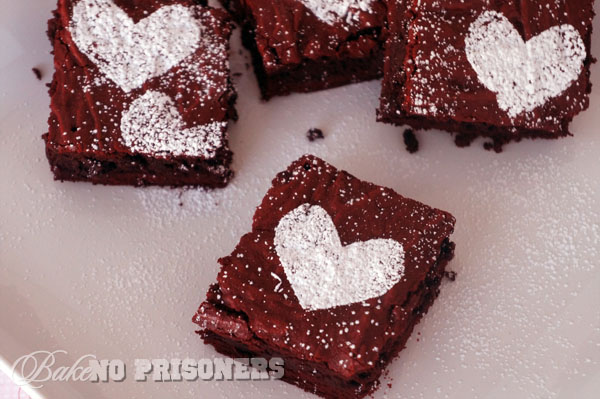
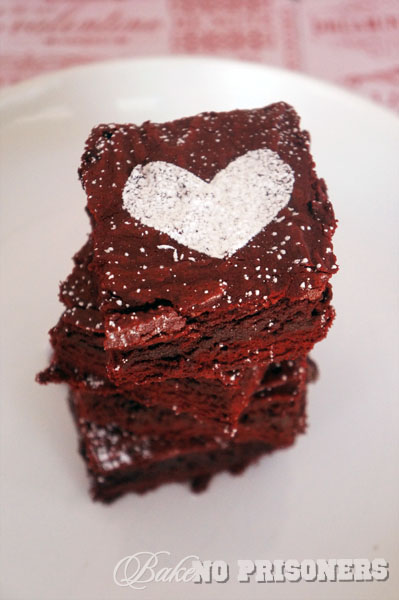
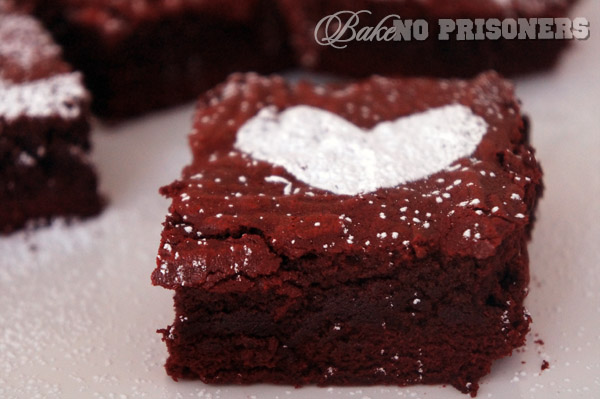
Red Velvet Espresso Brownies

Whenever the forecast calls for a little bit of snow in the Piedmont region of North Carolina everything stops…

People race to the grocery store to stand in a ridiculously long line for milk and bread. The gas stations are lined with cars waiting to fill up their tanks. The local schools call for a snow day. And all the busyness just stops until the snow melts away.

That is exactly what happened today. I had hoped and prayed the night before for a snow day. Not because I didn’t want to go to school and teach, but because it had been about 2 years since the last snow day. And I love my snow days. I have this tradition when it comes to snow days. First, I sleep in. I mean really sleep in… Let the sun wake you up and not feel guilty about it sleep in. Second, I stay in my pajamas all day. I mean why wouldn’t you. There is no where to go…not with my mountain of a driveway anyway. Third, I bake. I try to bake something chocolatey, warm, and gooey that would be perfect for a snowy day. And I think I these brownies are perfect.

Red Velvet Espresso Brownies

Ingredients

  • 5 ounces semisweet chocolate, chopped
  • 2 ounces unsweetened chocolate, chopped
  • 1 stick unsalted butter, cut into quarters
  • 3 tablespoons cocoa powder
  • 1 tablespoon espresso powder
  • 1 1/2 tablespoons red food coloring
  • 1 tablespoon vinegar
  • 3 large eggs
  • 1 1/4 cup sugar
  • 2 teaspoons vanilla extract
  • 1/2 teaspoon salt
  • 1 cup flour

Instructions

  1. Preheat your oven to 350 degrees and adjust your oven rack to the middle position. Spray an 8-inch glass or metal square pan with nonstick cooking spray. Line pan with foil or parchment paper.
  2. In a double boiler, melt the semisweet and unsweetened chocolates and butter, stirring occasionally until smooth. Set aside to cool.
  3. In a small bowl, combine cocoa powder, red food coloring, and vinegar until it makes a thick paste.
  4. In your stand mixing bowl, whisk together the eggs, sugar, vanilla, and salt until combined. Whisk the warm chocolate mixture into the egg mixture, then add the cocoa paste. Once blended, add in the flour a little at a time until just combined.
  5. Pour mixture into the prepared pan, spread into the corners, and level with a spatula. Bake for 35-40 minutes until an inserted toothpick comes out with a small amount of sticky crumbs. Cool on a wire rack or eat warm on a snowy day.

Notes

Recipe by Carrie, inspired by No. 2 Pencil's recipe found on TatertotsandJello

Schema/Recipe SEO Data Markup by ZipList Recipe Plugin
http://www.bakenoprisoners.com/wordpress/index.php/red-velvet-espresso-brownies/


Halloween Bark

I. LOVE. H A L LO W E E N.

It is my favorite holiday of the year! I mean, what’s not to love…

FREE Candy, costumes, haunted houses, classic horror films…the list goes on and on…

Let me break it down for you on how we celebrate Halloween in our house…

Around the end of September is when I drag out the 4…yes…4 bins of Halloween decorations for the inside of the house alone. I am talking pumpkins of all kinds, owls, frogs, ghouls candles, and much more. Then a few weeks before the sacred holiday we tackle the decorations for the outside of the house. This includes a pumpkin trail all the way down my stoop. Some of the pumpkins have been bejeweled, some have ribbon, and some are even lighted. And speaking of lights, I have pumpkin lights in the bushes and  purple and green string lights wrapped around my banister. Oh and the cobwebs! YES! The cobwebs are EVERYWHERE!!

So a week before Halloween, the hubster and I go and visit the pumpkin patch and I pick out the biggest and roundest pumpkin I can find. When we get home, we figure out what design we are going to carve out on our pumpkin and then break out the dremel. Yes, I do have my very own orange, pumpkin dremel just for this occasion. Once we are done we toast the pumpkin seeds just like Mom used to.

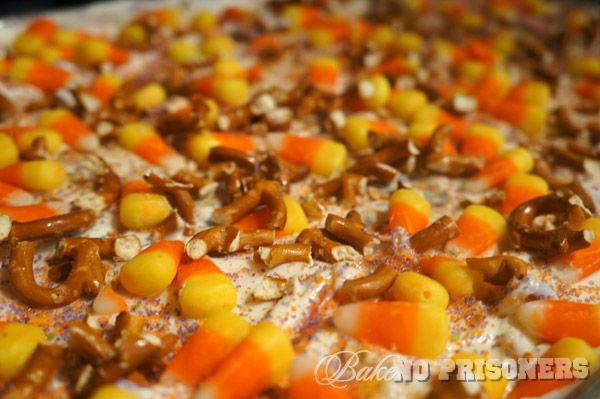
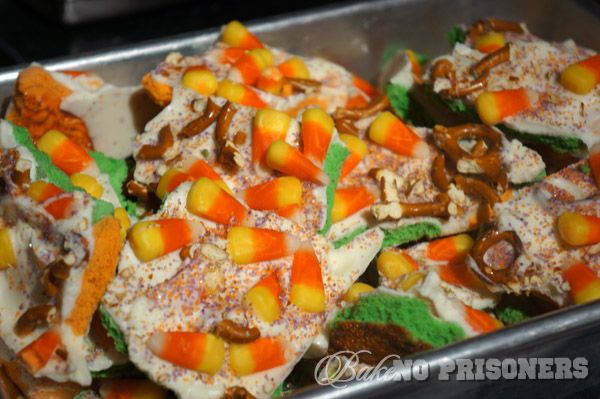
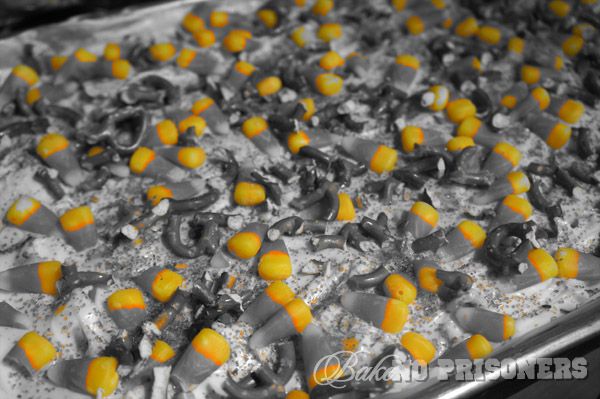
Another favorite Halloween tradition is coming up with yummy treats to bring to the kiddos at school. I loved surprising them last year with butter beer cupcakes during our book character dress-up extravaganza,  in which our class had chosen Harry Potter and the Chamber of Secrets. This year we chose Harry Potter and the Goblet of Fire, my all time favorite book and movie of the Potter series. Our book character dress-up isn’t for a few more weeks, but I wanted to get the kiddos excited for the upcoming events, so I made this all too simple Halloween bark.

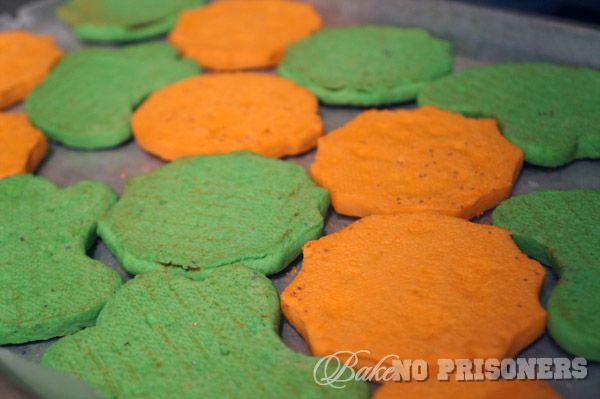
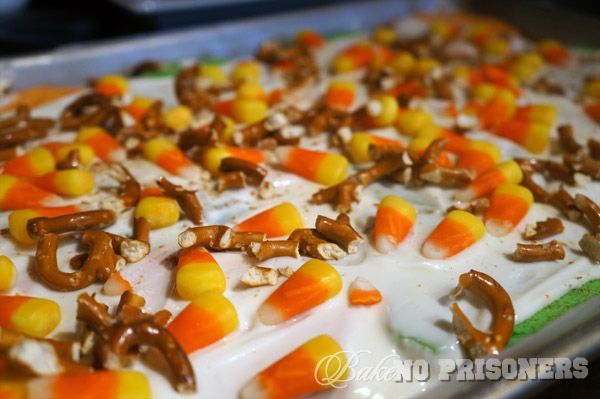
All you need are some fun sugar cookies, melted white chocolate, candy corn, crushed pretzels, and fun sprinkles!

Directions:

1. Layer the sugar cookies on a wax paper coverage cookie pan. Make sure your pan has some sort of lip on it to keep the melted chocolate in.

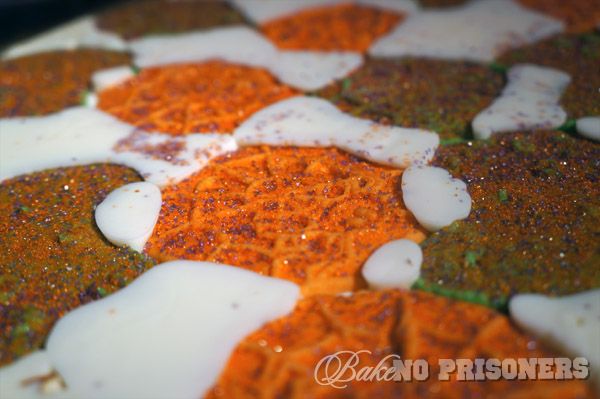
2. Melt your chocolate candies according to the package and spread over the cookies, filling in the gaps and edges.

3. Layer your candy corn, crushed pretzels, and sprinkles on top and let it firm for about 30 minutes.

4. Flip over and remove wax paper.

Break into pieces and serve!

And just for fun…

Spicy Peach Milkshakes and a MILKSHAKE BAR cookbook giveaway

We have a winner to announce for Bake No Prisoners Milkshake Bar GIVEAWAY! Our winner will receive a copy of the Milkshake Bar, by Hannah Miles!

The winner is……comment #5!!!!!

Samantha Remington says:

August 30, 2012 at 6:19 pm (UTC -5)

Vegan chocolate

Congratulations, Samantha!! I will contact you shortly for shipping information.

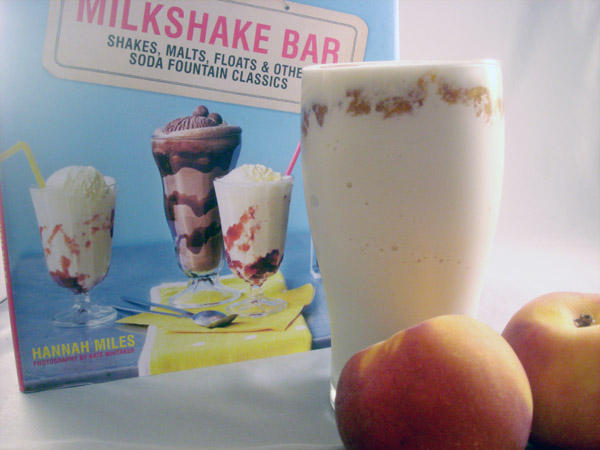
School is back in session this week and we are celebrating the end of summer and the beginning of the new school year with one of my favorite things…MILKSHAKES!! And to top it off, BNP is giving away Hannah Miles’ MILKSHAKE BAR cookbook! It is filled with everything from Lemon Meringue milkshakes, to Watermelon Coolers, to even a doughnut float! You won’t want to miss out on this!!

When I was little, I always loved the end of summer. Mom and I would head to the mall to pick out new clothes, kicks, and school supplies for the upcoming school year. (Some things never change! I am totally in love with my new purple glitter Vans I got a few weeks ago! Thanks Mom!) Summer was also our last chance to have our friends over for a sleepover or go to the pool. And nothing made a hot Florida summer day better than a cold sweet treat.

Today, I am still picking out new clothes and heading to the pool at the end of summer vacation, but it is the cold summer treats that really make my day! I had recently picked up a few pounds of peaches and was inspired (thanks to my new Milkshake Bar cookbook) to make this spicy peach milkshake.

I began by taking 4 peaches, peeled and diced, and placed them in a small 4 quart pot. I then added a 1/4 cup of sugar, 1 tablespoon of cinnamon, a dash of nutmeg and 3 tablespoons of water. With the burner on low, I let the peach mixture simmer for 30 minutes. Finally, I let it cool to room temperature.

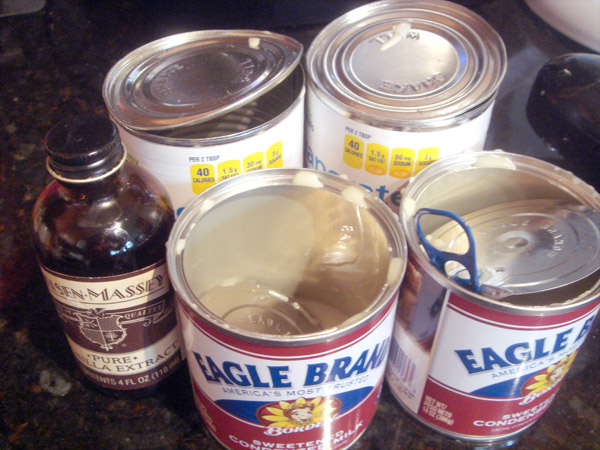
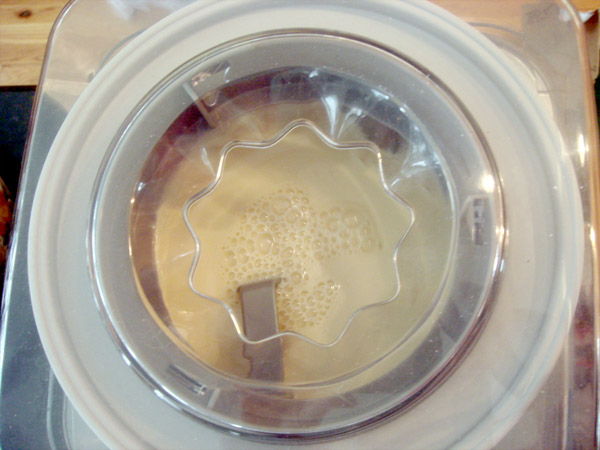
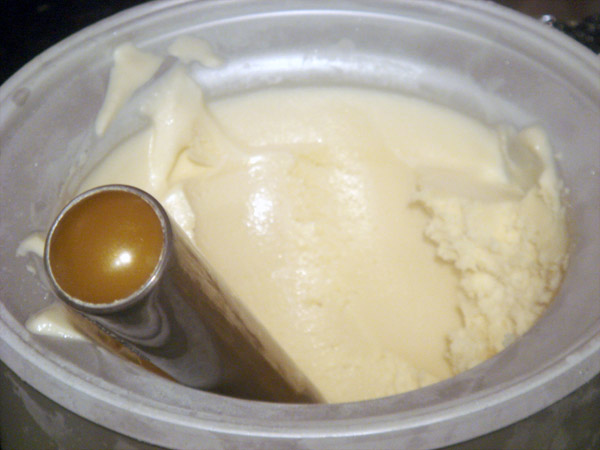
The ice cream base comes from my father-in-law’s top secret, super-easy, lightning fast, vanilla ice cream recipe. Unfortunately, this is all I can show you about the recipe without being in jeopardy of a major copyright infringement lawsuit…Ha!

Honestly, you can use any vanilla ice cream base recipe you want and whip it up in your ice cream maker in less than 30 minutes!

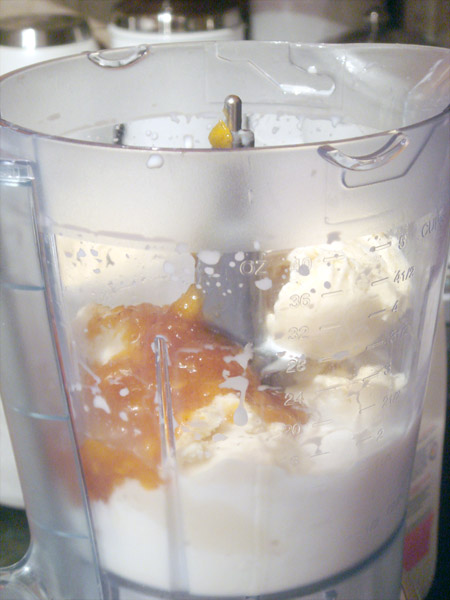
Once at desired consistency, add 4-6 scoops of vanilla ice cream to the blender, along with your cooled peach mixture, a little milk,  and blend. I saved a few spoonfuls of the peach mixture to place on top for decoration.

Now onto the giveaway…

How to Enter the Milkshake Bar Cookbook GIVEAWAY

To enter this giveaway, just answer the following question in the comments section of this post:

“What’s your favorite milkshake?”

Additional (Optional) Entries

To up your chances of winning, you can receive up to THREE additional entries to win by doing the following (these are optional, not required):

1. Become a fan of Bake No Prisoners  on Facebook. Come back and let me know you became a fan in an additional comment.

2. Share Bake No Prisoners on Facebook on your personal page and let me know you did in an additional comment.

3. Follow @BakeNoPrisoners on Twitter. Come back and let me know you’ve followed in an additional comment.

The Fine Print

Restrictions: Winner must have a U.S. shipping address.

Deadline: Friday, August 31, 2012 at 11:59pm EST. Contest is now closed.

Winner: The winner will be chosen at random using Random.org and announced at the top of this post. The winner will also be notified via email; if the winner does not respond within 48 hours, another winner will be selected.

GOOD LUCK!!

Blue Velvet Cupcakes and a Sprinkle Bakes Cookbook GIVEAWAY

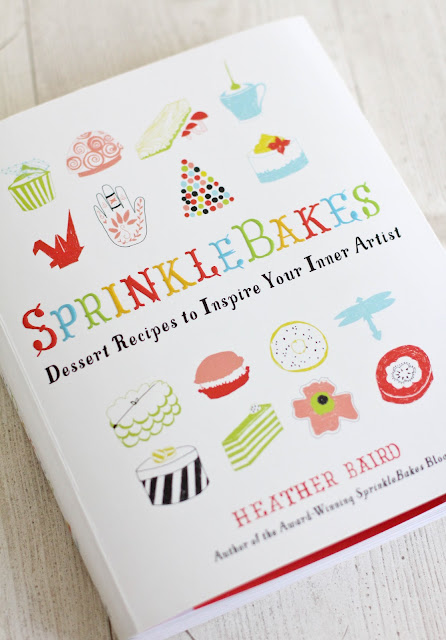
I have a winner to announce for Bake No Prisoners first GIVEAWAY! Our winner will receive SprinkleBakes: Dessert Recipes to Inspire Your Inner Artist, by Heather Baird of SprinkleBakes.

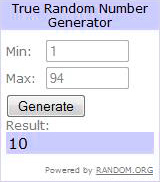
The winner is……comment #10!!!!!

Sarah says:

July 16, 2012 at 8:29 pm (UTC -5) Plus, I’m following you on Twitter.

Congratulations, Sarah!! I will contact you shortly for shipping information.

As I sit here writing this post, I am overlooking the peaceful coastline of Myrtle Beach, South Carolina. (Mental note: perfect writing location) It is a trip we typically take every year and it normally includes a healthy variety of Mr. BNP’s family. I smile fondly when I think about our family trips to the beach in years past and it fills my heart with joy knowing that I will always have those memories to share in the future. We stay at the same beach front condos that have been in the family for years. We love to lay out under the umbrellas and splash in the sea. We enjoy eating out at the same places like Peaches and their fabulous foot-longs or Sea Captain with their spicy seafood jambalaya. We have to have our liver-mush and biscuits in the morning and pinto beans in the afternoon. And at the end of the week, we always celebrate the hubster’s birthday!

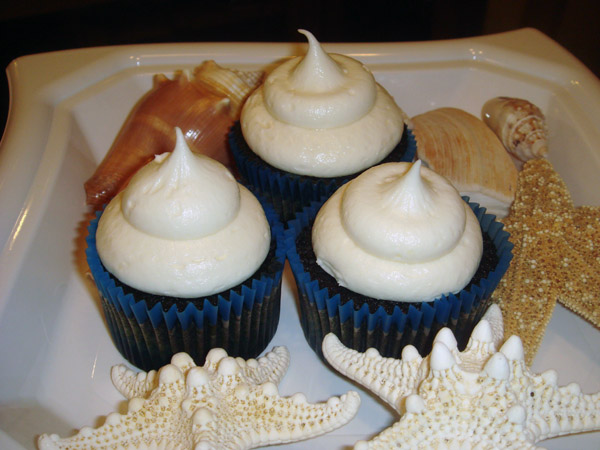
A few weeks before we left for the beach, I had ordered the new cookbook everyone is the baking blogosphere has been talking about lately, Sprinkle Bakes. While flipping through the visually appealing pages of what I can only call a “baking art museum”, I had noticed a blue velvet cupcake recipe that would go perfect for Mr. BNP’s beach birthday! So this year I thought I would be a bit proactive and bring cupcakes to help celebrate the occasion. (I also made a giant birthday cupcake, candle included, that the hubster got to eat for breakfast the day we left for the beach). I am so impressed with this cookbook that I thought I would use it in our first Bake No Prisoners GIVEAWAY!! You will absolutely love the artistic side to all of author/baker Heather Baird’s sweet creations! As well as how easy she makes it with her step by step directions and photos. You definitely won’t want to miss out! (See the bottom of this post for details).

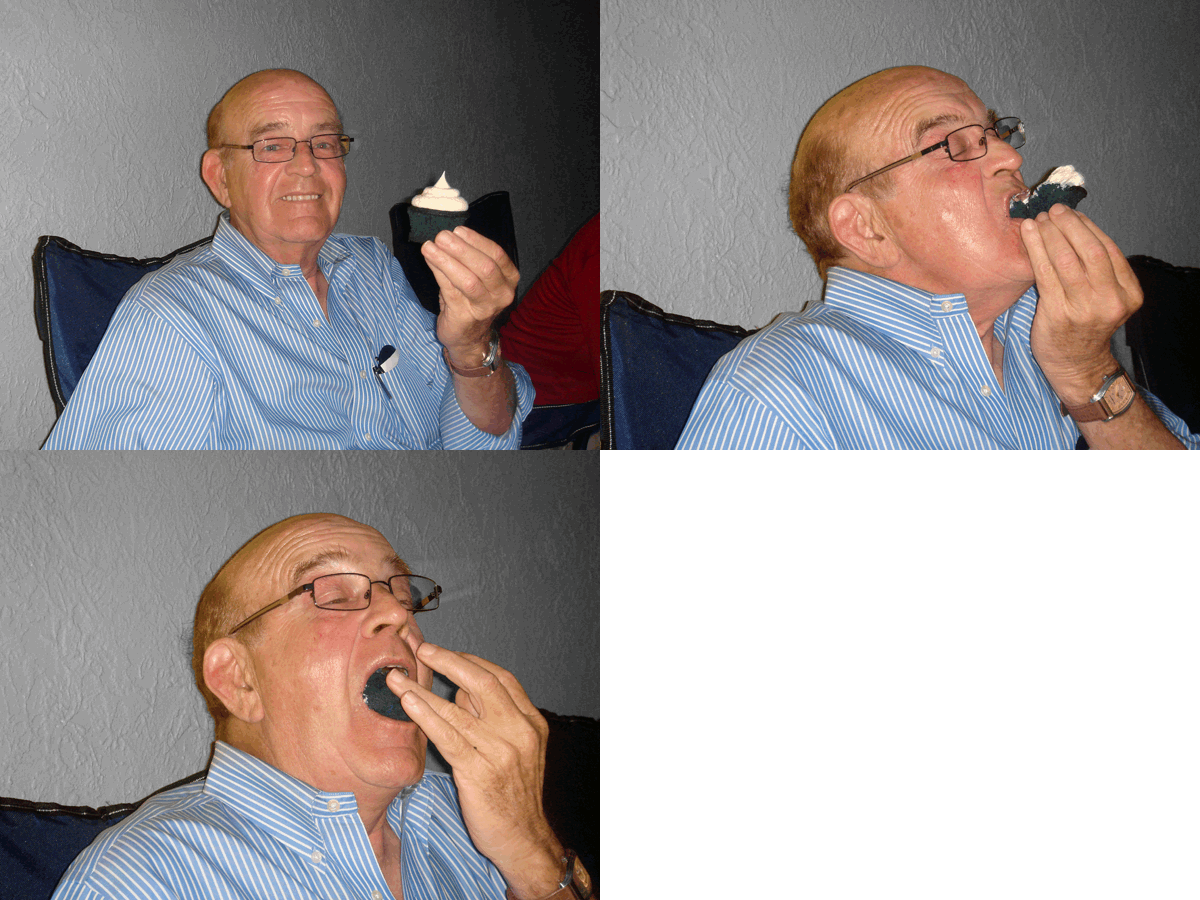
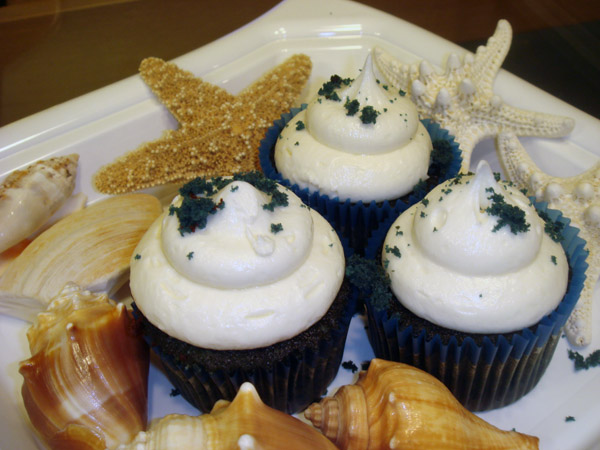
Now on to the cupcakes! These blue velvet cupcakes are very similar to red velvet cupcakes and happen to be my FIL’s (Aka three bite wonder) favorite!


These cupcakes were pretty easy to make and their blue hue tied in perfectly for a great beachy feel! Add these to my FIL’s famous homemade vanilla ice cream and you have the perfect summer treat!

Blue Velvet Cupcakes

Ingredients:

Cake portion:
2 cups sugar
½ pound (2 sticks) butter, at room temperature
2 eggs
1 tablespoon cocoa powder
3 ounces liquid blue food coloring
1 small dab of violet gel food coloring
2 cups cake flour
1 teaspoon salt
1 cup buttermilk
1 teaspoon vanilla extract
½ teaspoon baking soda
1 tablespoon vinegar
Frosting:
1 pound cream cheese, softened
2 sticks butter, softened
1 teaspoon vanilla extract
4 cups sifted confectioners’ sugar
2 tablespoons white chocolate ganache (my special touch!)

Directions:

1. Preheat oven to 350 degrees F. Prepare cupcake pan(s) with paper liners.

2. Cake:In a mixing bowl, cream the sugar and butter, mix until light and fluffy. Add the eggs 1 at a time and mix well after each addition. Mix cocoa and food coloring together to form a paste, and then add to sugar mixture; mix well. Sift together flour and salt. Add flour mixture to the creamed mixture alternately with buttermilk. Blend in vanilla. In a small bowl, combine baking soda and vinegar and add to mixture.

3. Pour batter into cupcake papers. Batter will be thick! Bake for 25–30 minutes, or until a toothpick inserted into the center comes out clean. Remove from oven and cool completely before frosting.

4. Frosting: In a large mixing bowl, beat the cream cheese, butter, ganache and vanilla together until smooth. Add the sugar and on low speed, beat until incorporated. Increase the speed to high and mix until very light and fluffy. Frost the cupcakes with a butter knife or pipe it on with a big star tip. Embellish as desired.

Recipe by Sprinkle Bakes.

How to Enter the Sprinkle Bakes Cookbook GIVEAWAY

To enter this giveaway, just answer the following question in the comments section of this post:

“What’s your favorite summer treat?”

Additional (Optional) Entries

To up your chances of winning, you can receive up to THREE additional entries to win by doing the following (these are optional, not required):

1. Become a fan of Bake No Prisoners  on Facebook. Come back and let me know you became a fan in an additional comment.

2. Share Bake No Prisoners on Facebook on your personal page and let me know you did in an additional comment.

3. Follow @BakeNoPrisoners on Twitter. Come back and let me know you’ve followed in an additional comment.

The Fine Print

Restrictions: Winner must have a U.S. shipping address.

Deadline: Friday, July 20, 2012 at 11:59pm EST. **Contest has now ended.

Winner: The winner will be chosen at random using Random.org and announced at the top of this post. The winner will also be notified via email; if the winner does not respond within 48 hours, another winner will be selected.

GOOD LUCK!!

Chocolate Chip Cookie Dough Truffles

So to piggy back off of last post’s Chocolate Chip cupcakes, I have discovered the latest and greatest cookbook that prides itself around the best part of making chocolate chip cookies…chocolate chip cookie dough! The Cookie Dough Lover’s Cookbook, which I have already ordered and is being delivered as we speak, has everything from cookie dough cream pie to these cute little cookie dough truffles below. I found this truffle recipe on display over at Bakerella and was immediately compelled to jump into my kitchen and whip up a batch! I mean, how can you go wrong with cookie dough wrapped in chocolate or peanut butter candy coating with mini chocolate chips? So be honest…do you eat some of the raw cookie dough when you are baking chocolate chip cookies? For me, it is the highlight of the entire cookie baking process!

Chocolate Chip Cookie Dough Truffles
from The Cookie Dough Lover’s Cookbook

1/2 cup (1 stick) unsalted butter, room temperature
1/4 cup granulated sugar
1/2 cup packed light brown sugar
2 tablespoons milk
1/2 teaspoon vanilla
1 1/4 cups all purpose flour
1/2 teaspoon salt
1/2 cup mini chocolate chips
chocolate candy coating
Popsicle sticks, cut in half (use kitchen scissors to make a clean, smooth cut) or cake pop sticks

  • In a large bowl, beat butter and sugars with an electric mixer until light and fluffy (about 3 minutes).
  • Mix in milk and vanilla.
  • Add flour and salt and mix on low until combined.
  • Stir in chocolate chips.
  • Chill dough in refrigerator for about 30 minutes until firm enough to roll or scoop into 1-inch balls.
  • Place rolled balls on a wax paper lined baking sheet and place in the freezer for at least 15 minutes.
  • Melt candy coating following instructions on the package. Remove a couple of balls from the freezer at a time and insert the cut stick into the ball. Dip in candy coating and let any excess fall off back into the bowl.
  • Add small sprinkles on top and place on wax paper to set. If the chocolate pools at the bottom of the ball, dot the balls on the wax paper until most of it is pulled off the ball and then place it on a clean spot of the wax paper to set.
  • Refrigerate in an airtight container for up to a week.

If decorating like chocolate chip cookies, flatten the balls into patties and freeze for dipping. Insert the stick carefully into the thickness of the patty and dip in melted peanut butter candy coating. Then just sprinkle with more mini chocolate chips before the coating sets.

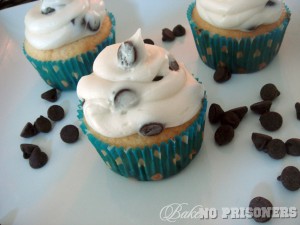
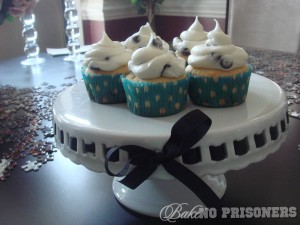
Chocolate Chip Cupcakes

I love chocolate chip cookies! Especially the new ones at Chick-Fil-A. They are at their best when they are gooey and soft and fresh out of the oven. Last weekend I was in the mood for chocolate chip anything when I came across this recipe from Martha Stewart. I own her infamous Cupcakes cookbook which has everything from dipped and glazed to simple and sweet. Since it is just my husband and I here, I had to cut the recipe from 30 cupcakes to 15 and finally to 8. This was not an easy feat and at one point I actually had to 1/2 an egg! Fortunately for me, it all worked out. They were a bit on the muffin side rather than of a cupcake consistency, but after I slapped some vanilla butter cream with chocolate chips, I was in heaven!

Click on the link below to check out the recipe!

Martha Stewart’s Chocolate Chip Cupcakes

It’s a Cupcake Graduation

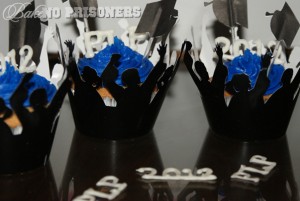
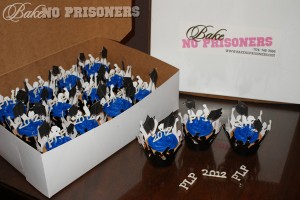
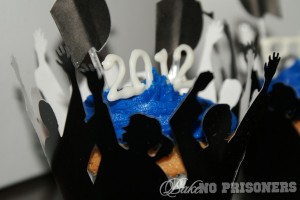
If you are a frequent visitor of BNP, then you know that during the day I teach 4th grade at an amazing K-12 charter school. Well a few weeks ago I was perusing the school’s Facebook page and a parent had asked if we had a baker in our school community. So I thought to myself, Self, why not put yourself out there and see what happens. Come to find out, this parent contacted me and asked if I would be up to making 5 dozen cupcakes for the 2012 seniors. And to that I said…OF COURSE!

So I sent her a few design ideas and she came back with a few of her own and together we came up with a very cool and creative cupcake to celebrate the milestone of high school graduation. I developed a vanilla cinnamon cupcake that is compared to that of a cinnamon roll and used a vanilla butter cream to top it. This is by far my favorite cupcake I have ever made to date! I also made 2012 and PLP signs out of  white chocolate to contrast the blue frosting (blue and white are our school colors) and used a graduation liner and hats to make it festive.

Congratulations Class of 2012! “You have brains in your head. You have feet in your shoes. You can steer yourself any direction you choose. You’re on your own. And you know what you know. And YOU are the one who’ll decide where to go…” ~Dr. Seuss

Pink Lemonade Cake Push Pops

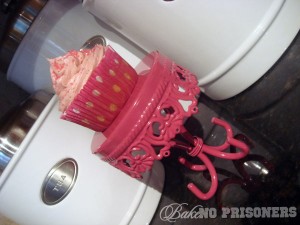
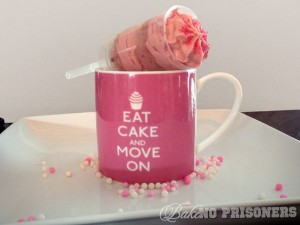
My fourth grade students just finished up an introductory unit on Chemistry and to make things interesting, I challenged them to memorize “The Elements” song by Tom Lehrer. If you have never heard of Tom, he was a brilliant mathematician and singer/song writer who wrote the now legendary song, where he sets the names of the chemical elements to the tune of the”Major-General’s Song” from Gilbert and Sullivan’s Pirates of Penzance. As a reward, students earned a pink lemonade cupcake courtesy of yours truly!

Well I made quite a few cupcakes this weekend and used the left over cupcakes to make these! I saw them over at Bakingdom a few days ago. She had quite creatively developed Star Wars themed cake push pops. I, myself, plan to piggy back off her idea and create The Avengers cake push pops in the near future, so be on the lookout!

If you are interested, below is the link to “The Elements” song! After several weeks of practice, I can sing it now too!

The Elements Song by Tom Lehrer

Pink Lemonade Cupcakes – from Sweet Cheeks – makes 20 cupcakes

Ingredients:
2 c. all-purpose flour
1 tsp. baking powder
1/2 tsp. baking soda
Pinch salt
1 c. granulated sugar
1/2 c. vegetable oil
4 egg whites
2/3 c. thawed frozen Pink Lemonade Concentrate
1/2 c. buttermilk
Pink food coloring

Directions:

Preheat oven to 350F. Line muffin pan with liners. In a small bowl, combine flour, baking powder, baking soda and salt. Set aside.

In a large bowl, whisk together sugar, oil, egg whites and lemonade concentrate. Alternately whisk in flour mixture and buttermilk, making three additions of flour mixture and two of buttermilk, beating until just smooth.

Add just enough food coloring to turn the batter a light shade of pink.

Scoop batter into liners (fill about three-fourths full). Bake in preheated oven for 20-25 minutes or until tops of cupcakes spring back when lightly touched. Let cool in pan on rack for 10 minutes. Remove from pan and let cool completely on rack. Top cooled cupcakes with frosting (see below).

Lemonade Buttercream
3 c. + 3 Tbsp. confectioner’s sugar
1 stick unsalted butter at room temperature
1/8 tsp. salt
2 Tbsp. pink lemonade concentrate
Milk to reach desired consistency
Pink food coloring

Add the butter, confectioner’s sugar, salt, lemonade concentrate, and a few drops of food coloring to the stand mixer and mix on low using the paddle attachment until combined.

Turn the speed to med-high until the buttercream is fluffy and uniformly pink. Pipe or spread onto cooled cupcakes.

Courtesy of Beantown Baker


Chocolate Malted Cupcakes

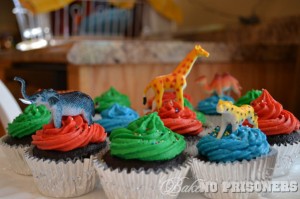
One of my husband’s favorite desserts is chocolate malt….We are talking Whoppers, Chocolate Ovaltine, malted milkshakes, and so on.  Apparently it is a family addiction because the love of chocolate malt dates back all the way to his great grandmother and the memories she created with her delicious chocolate malted milk balls! I, myself, am not the biggest fan of malted anything, but that didn’t stop me from experimenting to see if there was something malted out there that would make my mouth salivate.

So when my close friend asked me to make her little boy’s birthday cupcakes, I decided to make chocolate malted cupcakes. I used my family’s vanilla buttercream frosting recipe and to my surprise, it was delicious! It is an exciting spin on the typical chocolate cupcake that brings back all those malted memories from long ago!

Click on the picture for a larger image!

Chocolate Malted Cupcakes:

For the cupcakes:

2 1/4 cups all purpose flour

3/4 cup unsweetened Dutch-process cocoa powder

1/2 cup sugar

3/4 cup light brown sugar

1 1/2 t baking soda

1/2 t salt

1 cup milk

1 1/4 cups malted milk powder

1 cup vegetable oil

3 large eggs, room temperature

1 cup sour cream, room temperature

1 t vanilla extract

Directions:

1. Preheat oven to 350 degrees and line standard muffin pan with paper liners. Whisk together flour, cocoa, both sugars, baking soda and salt. In another bowl, whisk together the milk and malted milk powder until it is dissolved completely.

2. With an electric mixer on medium high speed, beat flour mixture, milk mixture, and oil until combined. Add eggs, one at a time, beating well until incorporated, scraping down the sides of bowl as needed. Add sour cream and vanilla, and beat until just combined.

3. Divide batter evenly among lined cups, filling each halfway. Bake, rotating halfway through, until a toothpick comes out clean, about 20 minutes. Cupcakes can be stored up to 3 days room temperature, or frozen up to 2 months, in airtight containers.