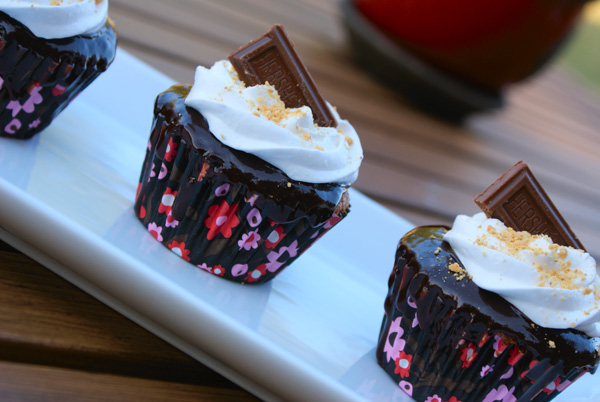
S’Mores Cucpakes

Summer has officially ended for this educator! One week ago today I was preparing to meet my new 4th grade class. I had worked out all the preparations and made sure my lesson plans were engaging, but nevertheless I had an enormous knot in my stomach wondering if my students were even going to like me. For the past 8 years I had always taught the younger grades…I knew how to win them over. All I had to do was give them a big hug and a smile and that was all it took. But for the life of me, I had no idea how I was going to win over a group of 25 4th graders. That is the hardest part you know. It’s not the curriculum or how you are going to teach something. That comes easy to me. It is the very beginning that is hard. It is finding the balance of “I think my teacher is cool” and “She is someone to pay attention to”.  Well, I did it! And all I had to be was myself. We are already on our way of forming a classroom family that will carry us through June. I can already say, I love my class!!

Anyway, back to the cupcakes! The kiddos and I made these this summer adapted via the browneyedbaker and they were fabulous! They wanted me to post them right away, but with school and all that comes with the beginning of it, my post has taken me awhile to get to. So here it is! The finale to a wonderful summer filled with gummy wummies, roller coasters, and Mario…thanks E and J! I will miss you this year!! xoxo

S’mores Cupcakes

Yield: 24 cupcakes

Prep Time: 1 hour | Bake Time: 25 minutes

For the Cupcakes:
1½ cups all-purpose flour
1-1/3 cups graham cracker crumbs
2 teaspoons baking powder
1½ teaspoons salt
1½ teaspoons ground cinnamon
10 ounces (1¼ cups) unsalted butter, room temperature
2 cups light brown sugar
¼ cup honey
6 eggs
2 teaspoons vanilla extract

For the Chocolate Ganache Glaze:
4 ounces semisweet chocolate, finely chopped
½ cup heavy cream

For the Marshmallow Frosting:
1 envelope unflavored gelatin (1 tablespoon)
1/3 cup plus ¼ cup cold water
1 cup granulated sugar

1 Hershey bar broken into 8 parts(for decoration)

1. Bake the Cupcakes: Preheat oven to 350 degrees F. Line standard muffin tins with paper liners. Whisk together flour, graham cracker crumbs, baking powder, salt and cinnamon.

2. With an electric mixer on medium-high speed, cream the butter, brown sugar and honey until pale and fluffy. Reduce speed to medium; beat in the eggs and vanilla, scraping down the sides of the bowl as needed. Add the flour mixture and mix until just combined.

3. Divide the batter evenly among the lined cups. Bake, rotating tins halfway through, until golden brown and a thin knife inserted in the centers comes out with only a few moist crumbs attached, about 25 minutes. Transfer tins to wire racks to cool 10 minutes; turn out cupcakes onto racks and let cool completely. Cupcakes can be stored up to 1 day at room temperature, or frozen up to 1 month.

4. Make the Chocolate Ganache Glaze: Place the chocolate in a medium heatproof bowl and microwave on 50% power for 30 seconds, or until the chocolate softens and starts to melt. Bring the cream to a full boil in a small saucepan over medium-high heat; pour over chocolate. Working with a rubber spatula, very gently stir together until the ganache is completely blended and glossy.

5. Make the Marshmallow Frosting: In a mixing bowl, sprinkle the gelatin over 1/3 cup cold water. Allow the gelatin to soften, about 5 minutes.

6. Heat the remaining ¼ cup water and the sugar in a saucepan over medium-high heat, stirring until the sugar is dissolved. Stop stirring; clip a candy thermometer onto the side of the pan. Boil the syrup until the temperature reaches the soft-ball stage (238 degrees F). Remove from heat; add the syrup to the softened gelatin. Whisk the mixture by  hand to cool, about 1 minute, then use an electric mixer to whisk on medium-high speed until soft, glossy (but not dry) peaks form, 8 to 10 minutes. (The frosting must be used immediately because it will harden.)

7. Assemble the Cupcakes: Spoon 2 teaspoon of the chocolate ganache glaze onto each cupcake. Fill a pastry bag with a large plain tip with marshmallow frosting; pipe frosting onto each cupcake, swirling the tip and releasing as you pull up to form a peak. Top with graham cracker crumbs and a Hershey bar. Serve immediately.

(Recipe adapted from Martha Stewart’s Cupcakes)
Terry’s Red Velvet Layer Cake

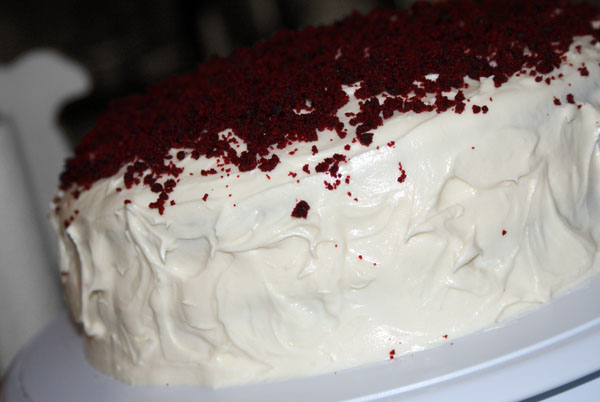
When you think of father-in-laws you typically think of old, grouchy men who like to smoke cigars and tell stories of their youth and how much better the world was back then. Now true, the world was a much safer place “back then” and there is nothing wrong with cigars, but that is just not my father-in-law. I happen to have the best father-in-law a girl could ask for! He is funny, quick witted, and frankly, hard to keep up with…oh, and very well dressed! And today is his 40th (ahem…) birthday!! So about a week ago, I called my most prized bakery to order his favorite red velvet cake only to find out that they don’t do red velvet cake anymore! WHAT?! I was shocked! Not make red velvet cake?! What was I going to do?! I couldn’t trust just anyone to make a good red velvet cake for the best FIL in the world! So I decided to make my own red velvet layer cake. It came out perfect! The cake was moist, the frosting was decadent, and everyone loved it! Happy 40th Birthday Terry! May you have many more 40th birthdays in the years to come! I love you!

Terry’s Red Velvet Layer Cake with Cream Cheese Frosting

Ingredients:

For the Cakes:
8 tablespoons unsalted butter, at room temperature
1 1/2 cup granulated sugar
2 eggs
5 tablespoons unsweetened cocoa powder
6 tablespoons red food coloring
1 teaspoon vanilla extract
1 cup buttermilk
2 cup + 4 tablespoons all-purpose flour
1 teaspoon salt
1 teaspoon baking soda
3 teaspoons distilled white vinegar

For the Cream Cheese Frosting:
8 ounces butter, at room temperature
8 ounces cream cheese, at room temperature
4 1/2-5 cups powdered sugar
2 tablespoon vanilla extract
Country Ganache – 1 cup white chocolate chips, 2-3 tablespoons buttermilk, microwaved for 1 minute on half power, stir, and then microwave in 30 seconds increments until melted.

Directions:
1. Preheat oven to 350 degrees F. Grease two 9 inch pans.

2. On medium-high speed, cream the butter and sugar until light and fluffy, about 3 minutes. Turn the mixer to high and add the eggs. Scrape down the bowl and beat until well incorporated.

3. In a separate small bowl, mix together the cocoa powder, vanilla extract and red food coloring to make a thick paste. Add to the batter and mix on medium speed until completely combined. You may need to stop the mixer to scrape the bottom of the bowl, making sure that all the batter gets color.

4. Reduce the mixer speed to low and slowly add half of the buttermilk. Add half of the flour and mix until combined. Scrape the bowl and repeat the process with the remaining milk and flour. Beat on high until smooth.

5. Again, reduce the mixer speed to low and add the salt, baking soda and vinegar. Turn to high and beat for another couple of minutes until completely combined and smooth.

6. Divide the batter evenly between the cake pans and bake for about 20-25 minutes, or until a thin knife or skewer inserted into the center of the cakes comes out clean.

7. Cool for 10 minutes and then remove cakes from the pan and place them on a cooling rack to cool completely before frosting. I would even make the cakes a day ahead and place them in the fridge so that it is easier to level them.

8. To make the frosting: Using the whisk attachment, whip the butter and cream cheese on high speed for about 5 minutes, scraping the bowl down as necessary. Reduce the speed to low and slowly alternate the powdered sugar and country ganache until all is incorporated. You do not have to use all of the ganache in your frosting. Use only as needed making sure your frosting does not get too heavy. Add the vanilla and mix to combine. Increase the speed to medium high and whip for a few minutes until the frosting is light and fluffy, scraping the bowl as necessary.

Level off your cakes and save the crumbles. I actually placed my cake crumbles in the food processor to make them finer and a bit prettier. Frost a small layer of icing on top of the bottom cake before placing your second layer cake on top. Frost the top and sides of the cake and use the crumbles to decorate the top of your cake.

(Recipe adapted from Joy the Baker, originally from The Hummingbird Bakery Cookbook)

Happy Birthday love!

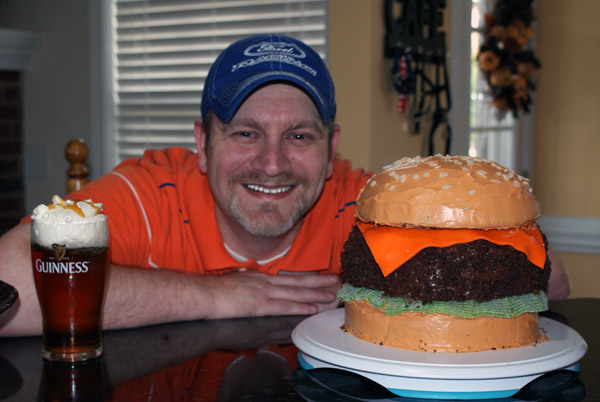
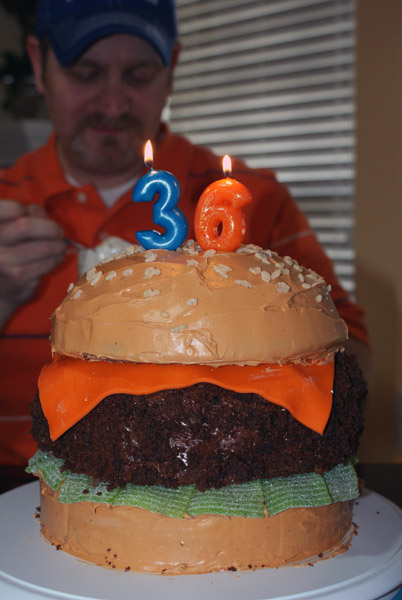
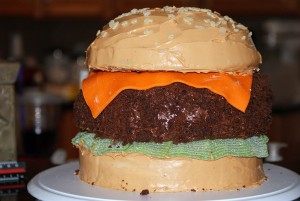
Last week, my wonderful husband turned 36 years old! He never asks for much and always tries to give me everything! In years past, we have reunited with our families at Myrtle Beach and celebrated his birthday together, but things just didn’t work out this year. So to try and make him feel special, I made him a 10 inch cake in the shape of a cheeseburger(which is one of his favorite foods)!

The birthday boy with his cheeseburger cake and butterbeer!

I got the recipe out of this month’s Food Network magazine and made sure I prepared the cakes a day ahead. That way all that was left to do was to frost and assemble. Easy as cake…cheeseburger cake!! Enjoy and Happy Birthday B!

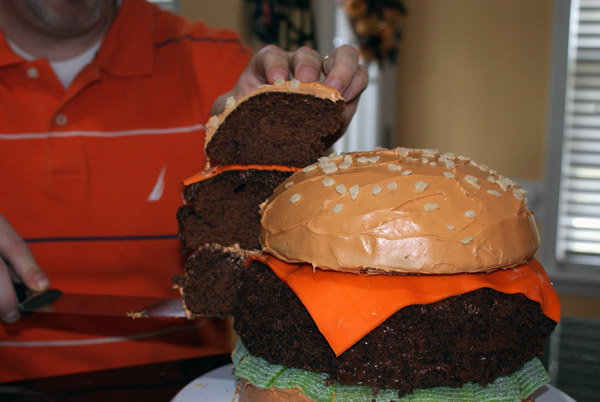
Cutting a big slice of cheeseburger cake!

Ingredients:

  • Cooking spray
  • 2 18.25-ounce boxes chocolate cake mix
  • 8 large eggs
  • 2 cups buttermilk
  • 1 cup vegetable oil
  • 1/4 cup green decorating sugar or granulated sugar
  • 8 spearmint leaf gummy candies
  • 3 ounces orange rolled fondant (available at craft stores)
  • Cornstarch, for dusting
  • 1 16-ounce tub vanilla frosting
  • 1 16-ounce tub chocolate frosting
  • 3/4 teaspoon yellow food coloring
  • 5 drops red food coloring
  • 2 tablespoons crispy rice cereal

Directions:

Preheat the oven to 350 degrees F. Spray a 2 1/2-quart ovenproof bowl and two 8-inch-round cake pans with cooking spray. Beat the cake mix, eggs, buttermilk and vegetable oil in a large bowl with a mixer.

Divide the batter among the bowl and pans; bake until a toothpick comes out clean, about 25 minutes for the pans and about 45 minutes for the bowl. Cool in the pans 15 minutes, then unmold onto racks.

Make the lettuce: Sprinkle some green or white sugar on a cutting board. Roll out the spearmint candies to 1/8 inch thick with a rolling pin, sprinkling with more sugar to keep the candies from sticking.

Cut each flattened gummy piece into 3 strips. Fold each strip accordion-style to make ruffles; pinch the ends together.

Make the cheese: Roll out the orange fondant on a cornstarch-dusted surface to about 1/8 inch thick. Trim the fondant into a 7-inch square; cover with plastic wrap and set aside.

Trim the top of 1 round cake and the flat side of the bowl cake to make them level; crumble the trimmings. Mix the vanilla frosting, 4 tablespoons chocolate frosting and the yellow and red food coloring in a bowl to make a light brown frosting.

Make the bottom bun: Put the trimmed round cake on a serving plate or cake board. Frost with some of the light brown frosting. Arrange the gummy-candy ruffles around the edge of the cake.

Make the patty: Spread the remaining chocolate frosting over the top and sides of the untrimmed round cake. Press the crumbled cake trimmings into the frosting.

Assemble the burger: Put the chocolate patty on the bottom bun, then drape the orange fondant on top. Frost the bowl-shaped cake with the remaining light brown frosting; place on the patty. Press the rice cereal into the frosting.

Happy Independence Day

Happy Independence Day! I know it has been over a month since my last post, but I promise you I have a good excuse. Let me start at the very beginning. When I first decided to take on Bake No Prisoners, my idea was to create or take on recipes that had a focus on healthy, natural ingredients, instead of processed, high in fat components. But as I got started, I focused only on how my recipes tasted because I was afraid I would get poor feedback on my own creations or the ones I recreated in my kitchen. This led me down a slippery slope of using loads of butter, sugar, and oil, all of which are great in moderation, but that’s not what I was doing.  In fact, because I tried so many of my tasty creations, I packed on a few pounds these last few months, but I am proud to say I am down 17 of those evil, nasty pounds thanks in part to The Dukan Diet.

I also admit that I had a lot of research to do before I could just “create” my own recipes. I had to hone in on what flavors and foods went well together and develop the basic and very necessary skills of cooking and baking. I am still not there, so I have decided to take you on this journey with me. All week long I have been taking either cooking or baking recipes from various chefs, cookbooks, or magazines and trying them out…seeing what I liked, what worked, or what I did wrong and taking pictures of the final product, good or bad. I have also been writing down my current cooking/baking/life goals that I want to share with you and to help hold me accountable. Since I just turned 32(my husband will tell you I am 29), I have come up with 32 hopefully attainable goals to achieve before I turn 33. Check them out and then check out the delicious and not very healthy 4th of July cake my husband and I made together to celebrate our country! This is the last fattening recipe for awhile, I PROMISE!! (Special occasions excluded, of course)

32 while 32

Food/Blogging:

1. Make 3 types of bread (Sarabeth’s Bakery has a ton of various bread recipes and ideas).

2. Develop a tart crust as good as Paulette’s (The Whirling Whisk…great stuff!).

3. Use 5 ingredients that I have never worked with before—suggestions welcomed.

4. Post a new cooking/baking adventure once a week.

5. Take one recipe from every cookbook I have bought in the last year and recreate it in my kitchen to post on my blog.

6. Become more decorator savvy when it comes to desserts, cakes, and pies.

7. Create a homemade blackberry pie for my favorite FIL.

8. Make a birthday cake for my husband that looks like a cheeseburger. (That I will post on the 15th of July, so be on the lookout).

9. Hone in on my egg skills—make eggs Benedict, poached eggs, omelets, sunny side up, etc…

10. Hold Thanksgiving or Christmas dinner (your choice Mom) and finally learn how to make good gravy.

11. Try out 1 new restaurant a month and if it is good and write a review on it and post it on the blog.

12. Soups –not a big soup person, so I would like to make my Mom’s chicken soup, clam chowder, corn chowder, and lobster bisque.

13. Develop 5 new cupcake flavors.


Relationships:

14. Start my own Women’s Life Group at church.

15. Develop new friendships at my new school and with my 4th grade team.

16. Remember to send birthday cards to all my friends and family on time.

17. Monthly Girls Bunco/Poker night anyone?

18. Volunteer on a weekly, if not, bi-weekly basis – Sunday school, soup kitchens, etc.

19. Visit my FL home more often.


Educational/Random:

20. Reread all Harry Potter books just for fun.

21. Research 4th grade at PLP and work closely with my teaching mentor.

22. Really think about getting my Masters and put things in place for the following year.

23. Become more open minded to the movies/activities that my hubby is interested in.

24. Pay off my car.

Healthy Living:

25. Lose 20 more lbs.

26. Run a 5K and a 10K.

27. Go to the spa for a facial and a massage.

Travel and Entertainment:

28. See the Blue Man Group.

29. Go to another musical – Cats, Wicked, Rent… whatever!

30. Spend a few days at Ocracoke Island.

31. Go white water rafting and zip lining at the U.S. National White Water Center.

Reader’s Choice

32. I’m one goal short of 32, so I thought I’d add a reader’s choice item. Leave a comment here with something you’d like to see me do. Whether it’s a recipe to try or an activity or festival to go to, just let me know in the comments below. I will sit down and choose one from the comments within the next few weeks and I’ll include it in my one month update in August.

And as promised…

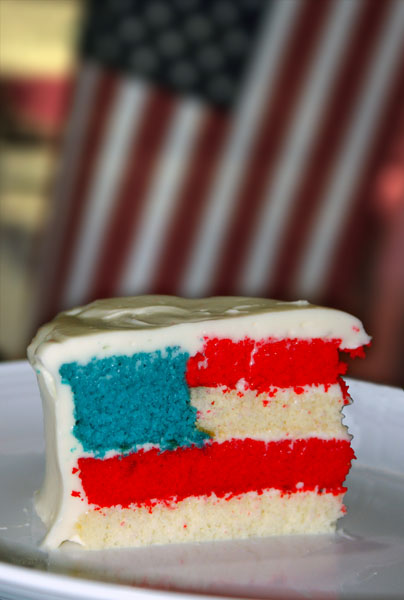
Americana Key Lime

courtesy of Secret Life of a Chef’s Wife

The only difference I made to this cake was I added 2- 2 1/2 tablespoons of key lime juice to the frosting to give it some zest, otherwise great job Elissa for this amazing cake idea!!


Palmier Cookie Banana Pudding

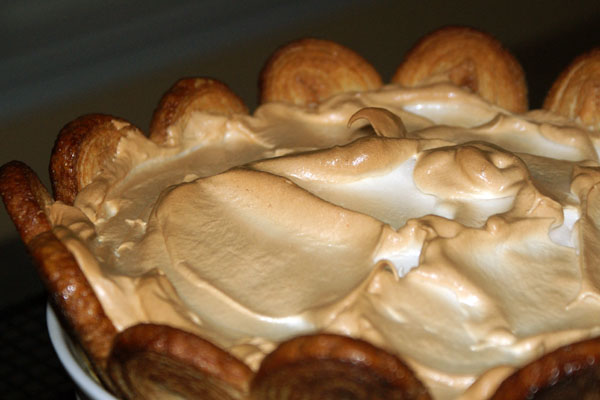
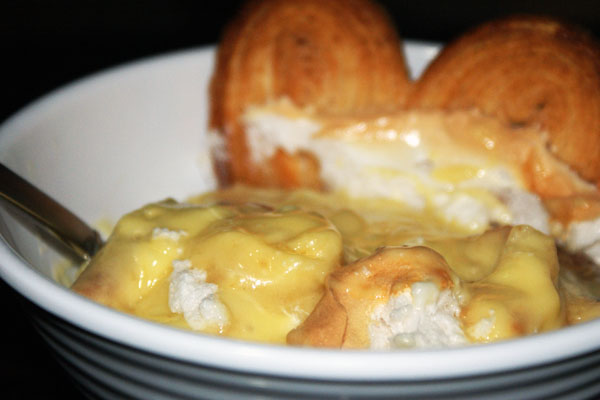
I am definitely not a banana person, so if there are bananas in the house, it is typically my husband who wants them there or I have picked them up to try to get some more fresh fruit into my diet. Either way, they tend to sit on the counter for days until they are brown and very ripe. This is exactly what happened to me a few weeks ago, so I decided to turn bananas into banana pudding! Now you can take your favorite banana pudding recipe and change the cookie like I did and it will give it a whole new flavor! I used a package of French Palmier Cookies I picked up at one of my favorite places to shop, World Market. They seemed crispy and wafer-like and the perfect substitute for the ordinary vanilla wafers I normally put in my banana pudding. They were drizzled with honey and were the perfect sweetness to my very ripe bananas. I could have eaten them straight out of the package if I hadn’t used them for my quick and easy banana pudding. I can tell you it didn’t last very long in my house! Now how’s that for your daily intake of fresh fruit!

Enjoy!

Palmier Cookie Banana Pudding

  • 2 cups heavy cream
  • 1 cup milk
  • 1 (5.1 oz.) package vanilla instant pudding mix or you can make your own
  • 1 package of French Palmier Cookies
  • 6 small to medium ripe bananas
  • 4 egg whites
  • 1/3 cup sugar
  • 1 teaspoon vanilla extract

Directions:

Combine first 3 ingredients in a large bowl and beat at low speed with an electric mixer until blended. Beat at medium speed 2 minutes or until mixture is smooth and thick. Layer palmier cookies in a 2 1/2-quart baking dish. Slice 2 bananas and layer over cookies. Pour 1/3 of pudding over bananas. Repeat layers twice, ending with pudding. Arrange remaining cookies around edge of baking dish. Beat egg whites at high speed until foamy. Add 1/3 cup sugar, 1 tablespoon at a time, beating until stiff peaks form and sugar dissolves (2-4 minutes). Fold in vanilla extract. Spread meringue over pudding, sealing to edge of dish. Bake 325 degrees for 20 minutes or until golden.

Vanilla, Peanut Butter and Oreo Mini-Cheesecakes

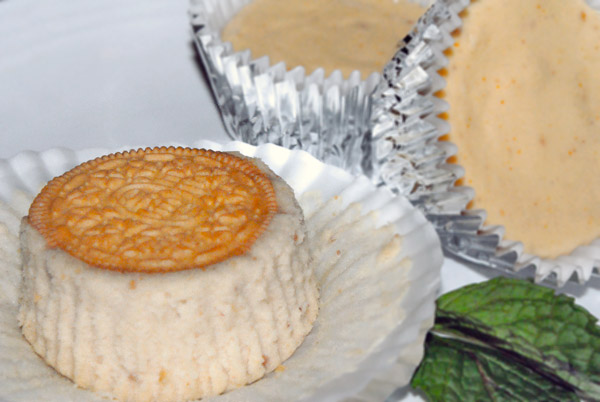
When I was asked if I would bring the “snack” to my latest book club meeting, I thought what could be better than creating mini-cheesecakes! Who doesn’t like to create mental images and dig deeper into comprehension while eating a creamy, decadent peanut butter cheesecake, especially when you find a golden Oreo at the bottom. (Not many people reading this will understand my educator lingo, but those who do will get a giggle out of it…Boteva).

To be honest, I had some inspiration with this recipe. I was perusing yet another Bostonian food blog to help with my book club snack dilemma and she had come up with a similar recipe using a few more healthier options. I choose to keep a few of her options and add a few of my own. With my recipe, I was able to make 2 dozen mini-cheesecakes in which I shared not only throughout the day with a few friends at work, but at my book club that followed! They were a huge hit! Even my principal was able to snag a few! Baking goodies for the bosses always seems to get in a few bonus points, right? :)

Enjoy!

Vanilla, Peanut Butter and Oreo Mini-Cheesecakes

Adapted from http://www.healthyfoodforliving.com

  • 24 Golden Oreo cookies
  • 8 oz neufchatel (1/3-less-fat) cream cheese, at room temperature
  • 8 oz regular cream cheese, at room temperature
  • 1/2 cup white chocolate creamy peanut butter (Peanut Butter & Co. is the best)
  • 1/2 cup sugar
  • 1/2 tsp pure vanilla extract
  • 2 large eggs
  • 1/2 cup 0% plain Greek yogurt
  • pinch of salt

Directions:

Preheat oven to 275degrees. Line standard muffin tins with paper liners. Place 1 whole cookie in the bottom of each of 24 lined cups. In the bowl of an electric mixer, beat the neufchatel, cream cheese, and peanut butter at medium speed until smooth, scraping down sides of bowl as needed. Add in sugar and beat until combined. Beat in vanilla. Beat in one egg at a time, scraping down the sides of the bowl as needed. Beat in yogurt and salt. Spoon batter evenly among the 24 lined cups, filling each almost to the top. With the back of a spoon, smooth out the top of each filled cup. Bake, rotating pans halfway through, until filling is set, 22-24 minutes. Let cool on a wire rack. Chill in the refrigerator for at least 4 hours, or up to overnight, before serving.