Brown Butter “Snicker”doodles

Brown Butter "Snicker"doodles

Ohmigosh, you guys. I am beyond excited…

Tomorrow kicks off my birthday week!!!! Yes, week!!!

While I truly believe I am 15 in my head, it will actually be my 5th annual 29th birthday this Friday…

And Mr. BNP and I are headed to Florida…

…to go to…

The Wizarding World of Harry Potter and Epcot…

SQUEEE!!

And! And, since I am a Tampa Bay native, I am also planning to spend time with family and friends…and Winter the dolphin…because. :)

I am completely in love with the Hubster for planning this trip and I promise to take loads of pictures to share with you guys next week.

But for now, let’s talk cookies…

I am obsessed with Snicker doodles. Like, I could eat 5 or 6 cookies, hot, right out of the oven, on any given day, in one sitting…that is how much I love them. At Christmas time, Betty Crocker stocks the shelves of Target with the best Snicker doodle mix I have ever found and so I buy them all up. But by this time in the year, they are hard to find and I have completely run out of my snicker doodle stash.

So last weekend I found myself in desperate need of some snicker doodles. I was going through some definite withdrawal…for serious. I went into the kitchen and instantly started working on my own recipe. I looked like a mad scientist, you guys! Flour in my hair, cinnamon and sugar all over my apron, but in the end, I made these incredible bad boys.

Brown Butter "Snicker"doodles

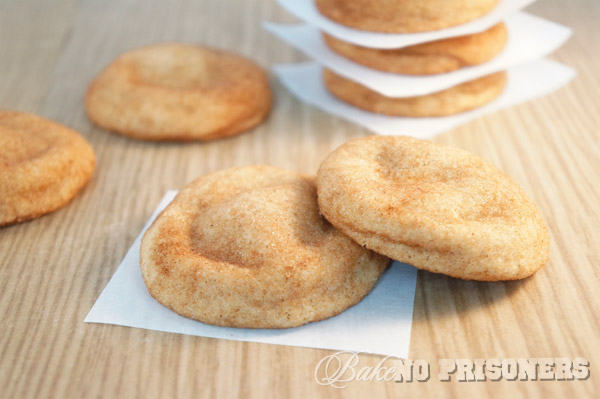
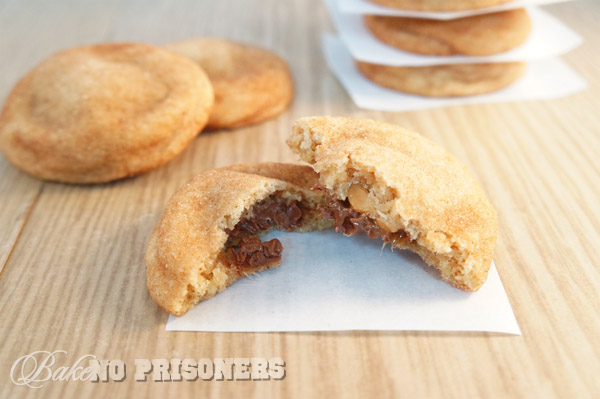
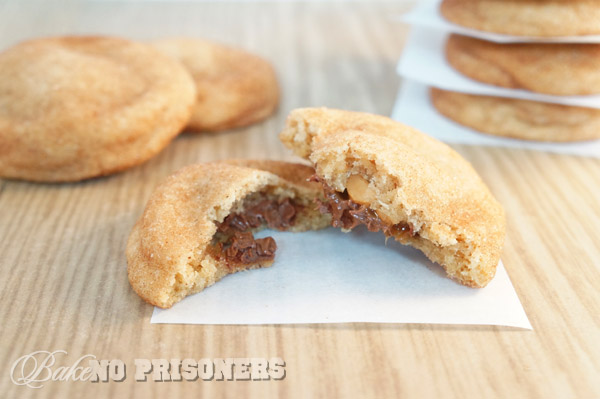
They are comparatively, just as delicious as Betty Crocker’s in my opinion. And just to add a twist to my cookie, I added a Snickers mini inside the middle. Oh, and I also browned the butter first to give it a nutty flavor. It tied in nicely with the peanuts from the Snickers bar.

Brown Butter "Snicker"doodles

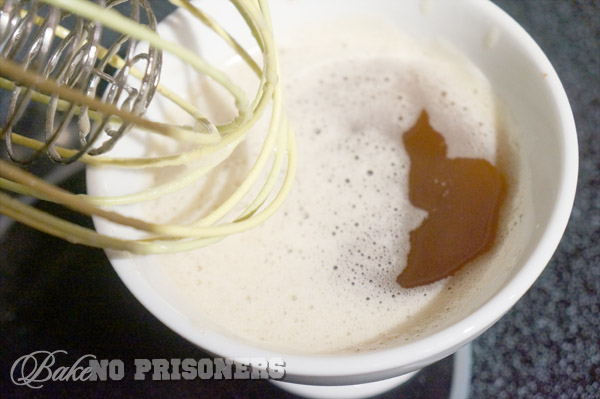
Browning butter is very simple. Slice your butter into tablespoon pieces first, so that your butter melts evenly. Whisk constantly in a medium saucepan on medium high heat for 5-8 minutes. Make sure you take it off the heat once you start to see the light brown specks on the bottom. Transfer it to a different bowl to prevent it from burning.Brown Butter "Snicker"doodles
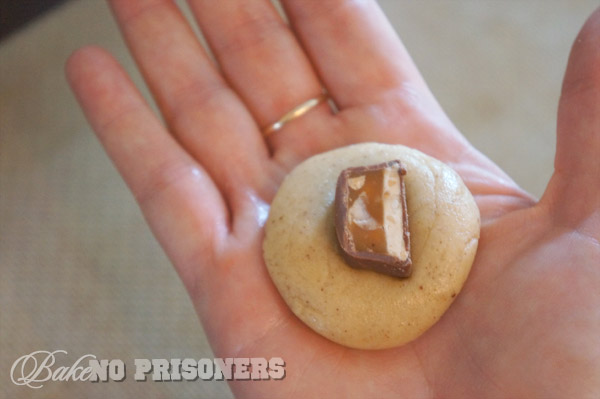
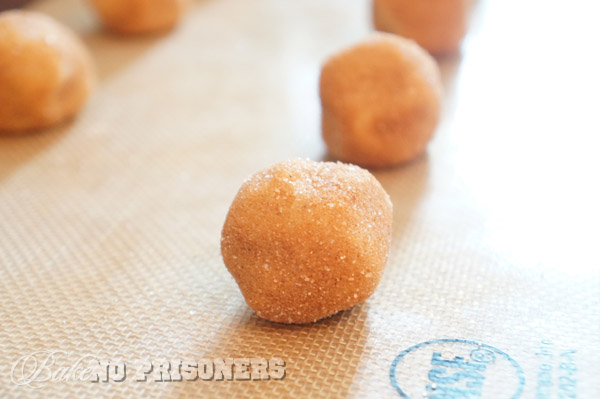
I cut the Snickers minis in half and then wrapped the dough around the candy bar before dipping it into my cinnamon sugar mixture.

Brown Butter "Snicker"doodles

Make sure you keep your cookies 1-2 inches apart on your cookie sheet. That way they won’t run into each other when they flatten out.
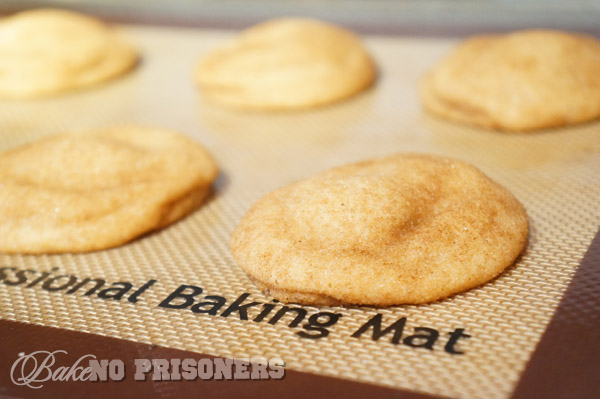
DSC03740_600x400Let your cookies cool for a few minutes before transferring them onto a wire rack to prevent them from breaking.

Brown Butter "Snicker"doodles


Brown Butter “Snicker”doodles

Yield: 2 1/2-3 dozen

Recipe by Carrie

Ingredients

  • 1 cup (2 sticks) browned butter, cooled to room temperature
  • 2 eggs, room temperature
  • 1 1/2 teaspoons vanilla extract
  • 2 3/4 cups flour
  • 1 1/2 cups granulated sugar
  • 2 teaspoons cream of tartar
  • 1 teaspoon baking soda
  • 1/4 teaspoon salt
  • Bag of mini snickers, cut in half
  • 4 tablespoons sugar
  • 1 tablespoon cinnamon

Instructions

  1. Preheat oven to 350° and line cookie sheets with parchment or silapat.
  2. When browning your butter, slice your sticks of butter into tablespoon sized pieces so that it melts evenly.
  3. You want to whisk your butter continuously in a medium sauce pan on medium-high heat for about 5-8 minutes.
  4. Smell your butter, it should have a nutty aroma. You should be able to see small brown specks on the bottom of the pan.
  5. Immediately remove from heat and transfer into separate bowl to cool and to prevent the butter from browning any further.
  6. In your stand mixing bowl, combine butter and sugar until light and fluffy; about 2-3 minutes.
  7. In a separate bowl, combine flour, cream of tartar, baking soda, and salt.
  8. Add eggs to your butter mixture; one at a time until fully incorporated.
  9. Add your vanilla extract.
  10. Slowly add your flour mixture to your wet ingredients; mix until just combined.
  11. In a small bowl, combine your 4 tablespoons sugar and 1 tablespoon of cinnamon.
  12. Using a mini-ice cream scoop, measure out 1 heaping tablespoon of dough and roll into a ball.
  13. Press half of the Snickers min into the middle of your dough and carefully wrap the dough around the candy bar.
  14. Roll back into a ball and into your sugar & cinnamon mixture.
  15. Place cookies 1 1/2 inches apart on your cookie sheet and bake for 10 minutes or until golden brown.
  16. Cool on a wire rack for 10-15 minutes.
Schema/Recipe SEO Data Markup by ZipList Recipe Plugin
http://www.bakenoprisoners.com/wordpress/index.php/brown-butter-snickerdoodles/


Salted Chocolate Toffee = Salted Chocolate Toffee Shortbread Cookies = Salted Chocolate Toffee Milkshake

I am a late-to-life nerd in some ways because I used to get teased in school for all  the geeky things that I enjoyed. So as I got older, at some point or another, I abandoned all my beloved Disney friends, time traveling aliens, spaceships, and fantasy sci-fi to try and fit in. When I finally realized that a.) I would never truly fit in with the “it” crowd and b.) nerds are cool, I let my geek flag fly high and proud.

The fact of the matter is, nerds rule the world…

It’s true. Ask anybody…

Natalie Portman, Ben Stein, Bill Gates, Albert Einstein, and Emma Watson are just a few famous nerds in existence.

…the list goes on and on and for thousands of years.

Wil Wheaton was recently asked by a new mom to explain to her newborn daughter why it is awesome to be a nerd…

His response was the stuff of legend…life changing for not only the newborn and her mom, but to every other nerd in the room…

Check it out..

So in honor all all things geekery, I made toffee. But not just any ordinary toffee though…

I made you Salted Chocolate Toffee…

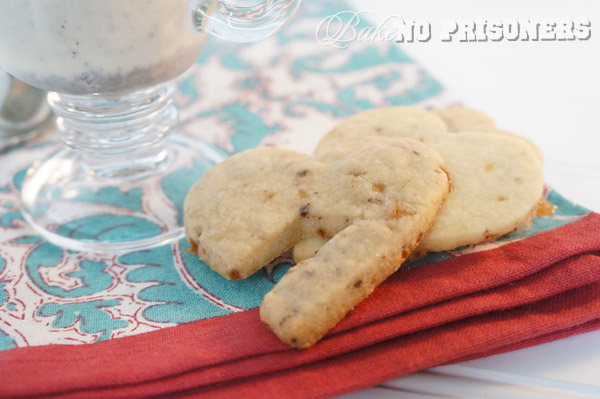
Which then turned into Salted Chocolate Toffee Shortbread Cookies…

And then Salted Chocolate Toffee Milkshakes…

Oh yeah…I went there…and so should you.

Salted Chocolate Toffee
Let’s start with the toffee. Shall we?

Salted Chocolate Toffee

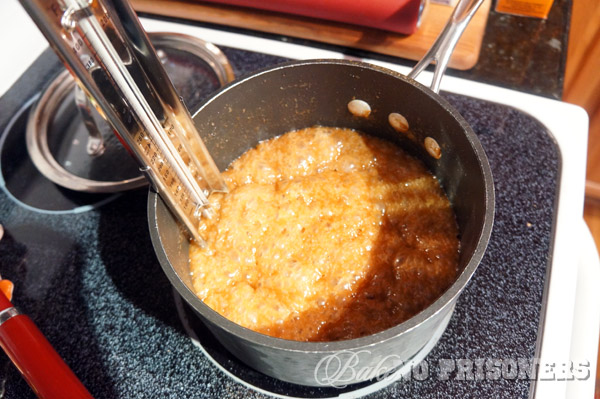
Combining your sugars, butter, corn syrup, and water, you want to make sure all your sugars dissolve and that it reaches 285 degrees. This is called the soft-crack stage. Soft-crack stage has been reached when the syrup forms firm but is still pliable. It is typically referenced for your toffees, brittles, and even butterscotch.
Salted Chocolate Toffee

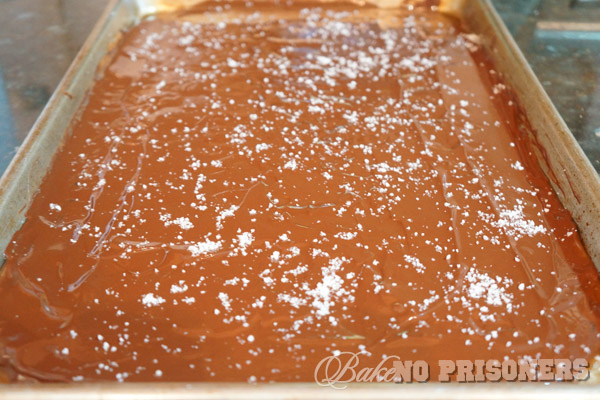
After you have poured your toffee onto a rimmed cookie sheet, gently sprinkle your chopped chocolate and let the hot toffee melt it until it is spreadable, then sprinkle your sea salt.

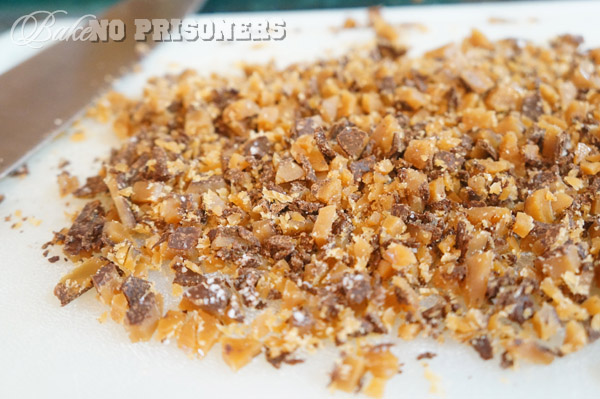
Salted Chocolate ToffeeIf your using your toffee in another recipe like me, wait until it is completely cooled before a coarse chop. Or if it is by itself, just crack it a few times with a knife and dig in.

Salted Chocolate Toffee

Total Time: 30 minutes

Recipe by Carrie

Ingredients

  • 1 cup salted butter, softened
  • 1/2 cup light brown sugar, packed
  • 1/2 cup granulated sugar
  • 1 tablespoon light corn syrup
  • 1 tablespoon water
  • 1 teaspoon vanilla extract
  • 1/4 teaspoon baking soda
  • 6 ounces semisweet chocolate, coarsely chopped
  • coarse sea salt

Instructions

  1. Preheat oven to 350 degrees and spray rimmed baking sheet with flour spray.
  2. In a medium saucepan, combine butter, sugars, corn syrup, and water.
  3. Bring the sugar mixture to a boil, constantly stirring to dissolve the sugars.
  4. Have the baking soda and vanilla extract ready.
  5. Cover the saucepan with a lid for about a minute to allow any of the sugar mixture to melt down into the pan.
  6. Remove lid and securely clamp a candy thermometer to the side of the pan, making sure it does not touch the bottom.
  7. Cook, without stirring, until the sugar mixture reaches 285 degrees(soft crack stage).
  8. Remove saucepan and add the vanilla and baking soda, stirring to combine.
  9. Immediately pour the mixture evenly onto the baking sheet.
  10. Spread the chopped chocolate over the toffee mixture.
  11. After 2-3 minutes, the chocolate will be softened enough to spread an even layer over the toffee using an offset spatula.
  12. Sprinkle 2-3 teaspoons of coarse sea salt or fleur de sel over the melted chocolate.
  13. Place pan in the fridge until chocolate has set.
  14. Using a sharp knife, cut toffee into desired pieces.
Schema/Recipe SEO Data Markup by ZipList Recipe Plugin
http://www.bakenoprisoners.com/wordpress/index.php/salted-chocolate-toffee-salted-chocolate-toffee-shortbread-cookies-salted-chocolate-toffee-milkshake/

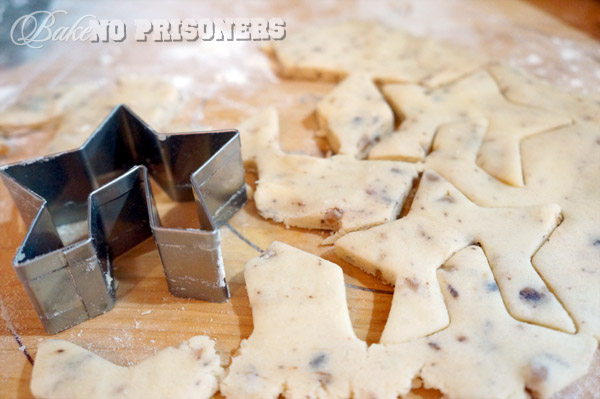
Now let’s talk cookies. I found these way cool cookie cutters at World Market. They have a unique, almost rectangular cut out right in the middle so that you can slip one of these bad boys on a tall glass of milk…or even better, milkshake.

Salted Chocolate Toffee

This is the star shape, but they also have hearts and flowers. I couldn’t help but buy all three.

Salted Chocolate Toffee

Salted Chocolate Toffee Shortbread Cookies

Yield: 4 dozen cookies

Recipe by Carrie

Ingredients

  • 4 cups flour
  • 2 cups salted butter, softened
  • 1 cup granulated sugar
  • 2 teaspoons vanilla extract
  • 3/4 cup salted chocolate toffee, coarsely chopped

Instructions

  1. Preheat oven to 350° and line baking pan with parchment or silapat.
  2. In your stand mixer bowl, cream butter and sugar until light and fluffy.
  3. Add vanilla one teaspoon at a time until incorporated.
  4. Add 1 cup of flour at a time and mix well.
  5. Fold in salted chocolate toffee.
  6. Roll into a ball and wrap in saran wrap.
  7. Place in fridge for 30 minutes to an hour.
  8. Flour your surface, roll out a small ball of dough to about a 1/2 inch, and cut using your favorite cookie cutters.
  9. Bake for 9-10 minutes and allow to cool for 5-10 minutes before transferring to a wire rack.
Schema/Recipe SEO Data Markup by ZipList Recipe Plugin
http://www.bakenoprisoners.com/wordpress/index.php/salted-chocolate-toffee-salted-chocolate-toffee-shortbread-cookies-salted-chocolate-toffee-milkshake/

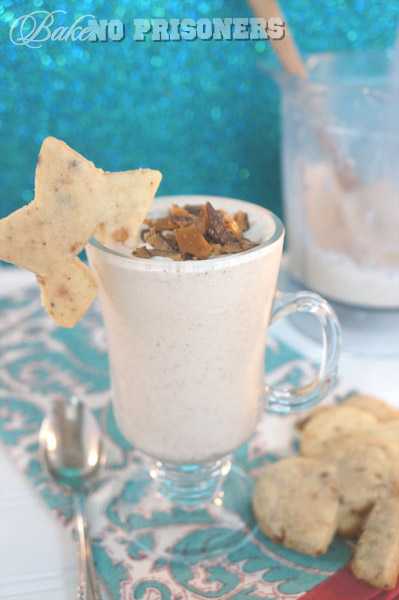
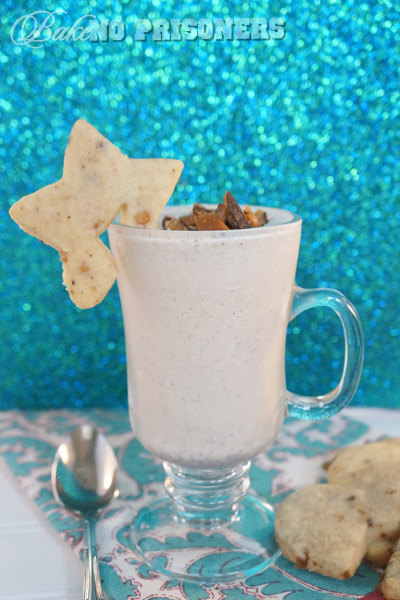
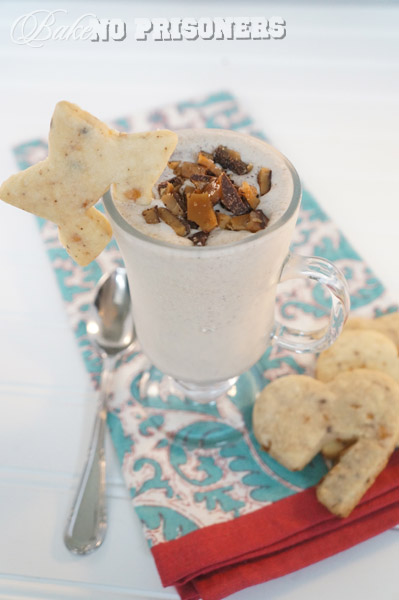
And to tie it all together….Salted Chocolate Toffee Milkshake with our cookies as garnish.

Salted Chocolate ToffeeWe had a few friends over the night that I made these. Not only did we each have our own milkshake and cookies, but we manage to finish them…complete with our spoons scraping the bottom for more.

Salted Chocolate Toffee Milkshakes

Recipe by Carrie

Ingredients

  • 8 scoops of Breyers Homemade Vanilla icecream
  • 3/4 cup salted chocolate toffee, coarsely chopped
  • 1/4 cup whole milk
  • 1 teaspoon vanilla

Instructions

  1. Combine ingredients in blender and blend on high for about a minute.
  2. Add milk or take away depending on your preference of thickness.
  3. Top with a Salted Chocolate Toffee Shortbread Cookie and bits of toffee.
Schema/Recipe SEO Data Markup by ZipList Recipe Plugin
http://www.bakenoprisoners.com/wordpress/index.php/salted-chocolate-toffee-salted-chocolate-toffee-shortbread-cookies-salted-chocolate-toffee-milkshake/

Salted Chocolate Toffee

Semi-homemade Strawberry Push Pops

My Mom lives hundreds of miles away, so each year, when Mother’s Day rolls around, I try to think of something new to show her how much she is loved. Something from the heart that says, thank you for being there. This year, both my Mom and MIL got a handmade, framed family tree that included all the kids, grand-kids, and grand-pups. Mr. BNP and I spent several nights putting it together and making it just right for our Mamas.

My Mom is the type of person who gives you 100% at all times. She is full throttle at everything she does. The way she loves you. The way she supports you. Even the way she hugs you. And she gives the best hugs. We talk everyday and spend every holiday together. We cook together. We shop together. We are each others best friend and we have been that way for many years.

But all of that could have changed about a year ago…

You see, my Mom had a massive heart attack, followed by triple bypass surgery a few months later.

My heart broke when I got the phone call. I was on a plane that night to see her. I had no idea whether my life would fall apart that day or not.

Over the past year, I have seen my Mom give a 100% in her recovery. I have seen strength, perseverance, and a renewed love for life. She finally took the trip of her dreams and spent 31 days in Europe. She met and chatted with the Canadian Tenors, her favorite music group. And she is finally learning that a new life can start at any age and to never give up on your dreams.

My Mom. My hero. I love you more than words could say. I am so proud to call you my Mom.

So here is something that is easy and girly and perfect for any Mom.

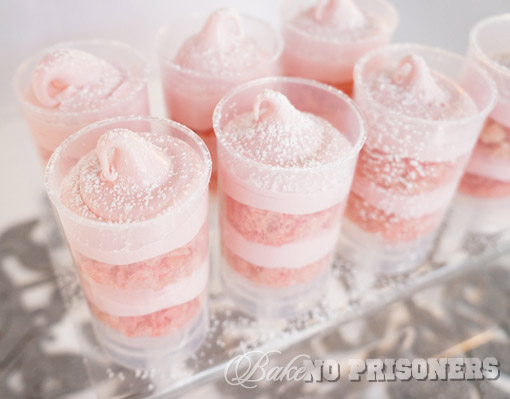
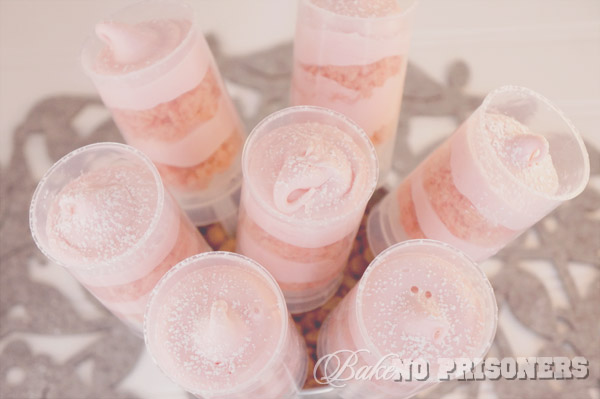
Semi-homemade Strawberry Push Pops

These semi-homemade push pops combine the sweet crunch of strawberry Rice Krispie Treats with the creamy flavor of strawberry shortcake icing.

Semi-homemade Strawberry Push Pops

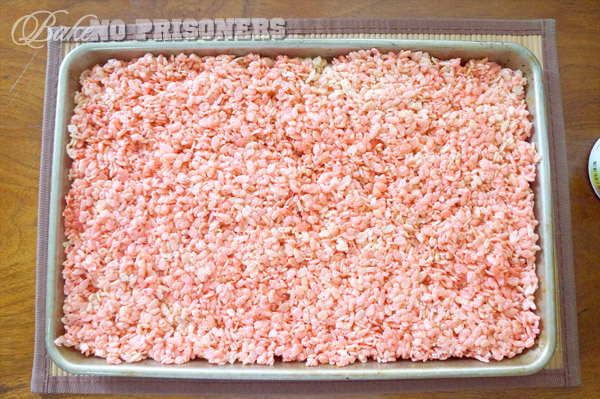
To begin, heat on medium heat, 3 tablespoons of butter in a medium saucepan until melted. Add a 10 oz. bag of vanilla and strawberry marshmallows to melted butter and stir until marshmallows are melted and gooey.  Add 6 cups of Rice Krispies cereal and mix well. Using wax paper, press firmly into a rimmed cookie sheet sprayed with flour spray.

Semi-homemade Strawberry Push Pops

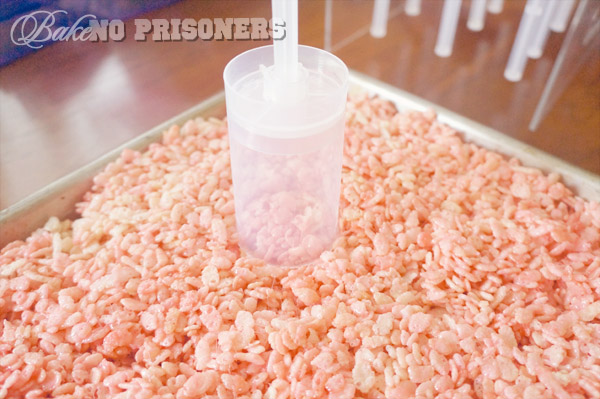
You can find push pop containers at your local craft store, but I found mine on Amazon and it came with a handy stand to hold them. This really helps when you are trying to decorate or layer.

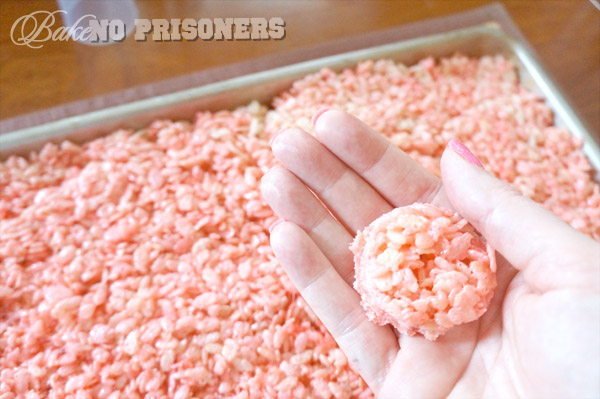
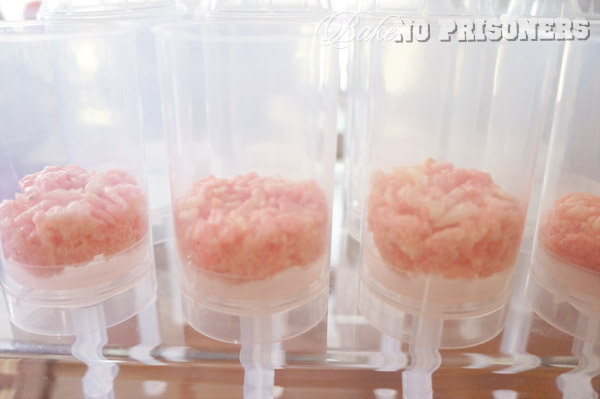
Once the strawberry Rice Krispie treats are cooled, use the circle top end of your push pop to “cut out” your circles.

Semi-homemade Strawberry Push Pops

You will need 2-3 circles per push pop container.

Semi-homemade Strawberry Push Pops

Gently push the Rice Krispie treats down to the bottom of your push pops and then layer with icing.

Semi-homemade Strawberry Push Pops

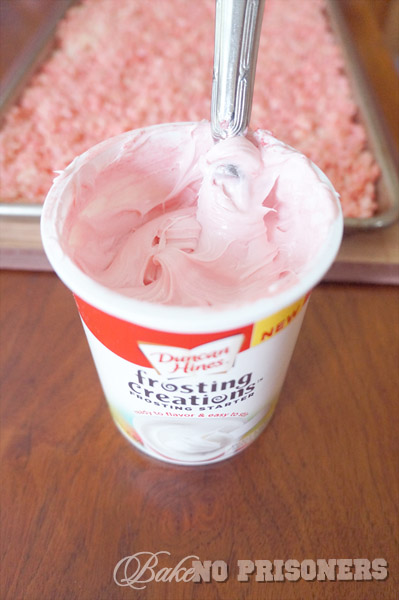
I chose to use a can of Frosting Creations from Duncan Hines I had in my pantry, along with the Strawberry Shortcake flavoring packet. It went perfectly with the strawberry Rice Krispie treats.

Semi-homemade Strawberry Push Pops


Doggie Doughnuts {Inspired by E}

Doggie Doughnuts

The Hubster and I don’t have any children. Instead, we come home to the pitter-patter of little…paws. We have 12 paws in the house with not 1, not 2, but 3 little dogs that we call “forever puppies.” Mr. BNP coined the phrase, “forever puppies”, because our dogs will never, ever be very big.

Scrappy Rowan

Scrappy Rowan was the first, and is the oldest in our little pack. Weighing in around 8 pounds, he is a Yorky-Silky mix. We got him in 2003 when we were still living in the Tampa Bay area and before the Hubster and I were even married. Being the first, and the sweetest, my Mom and his Dad fight over who Scrappy likes better…Nana or Papaw.

Bogart Mahan

Bogart Mahan came a few years later in 2005. We had just moved to NC and I had convinced my husband that we needed a playmate for Scrappy. Playmate, yes, but this dog has also convinced us that we needed several new pieces of furniture over the years…if you know what I mean. Maybe Chewy would have been a better name?

Waffles Orilius

We found Waffles Orilius roaming the streets about 6 months ago. It was cold and rainy outside and we just had to stop. The Hubster was taking me to the doctor’s that morning because we thought I had the flu (I did), so while I was at the doctor’s, he took Waffles to the vet. He was underweight, shaky, and scared. We took him home, gave him a bath, and put up flyers, but no one claimed him. He fit right him with the other two, so we decided to adopt him.

Doggie Doughnuts

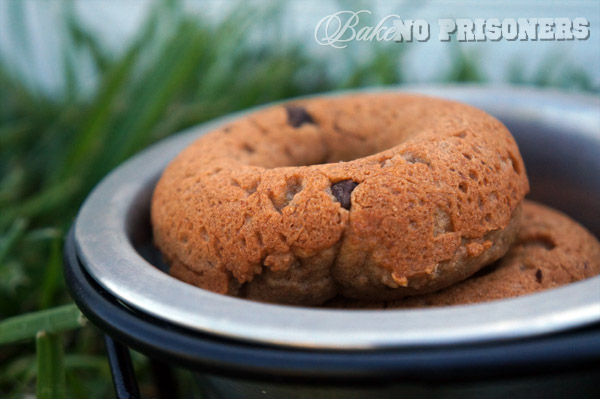
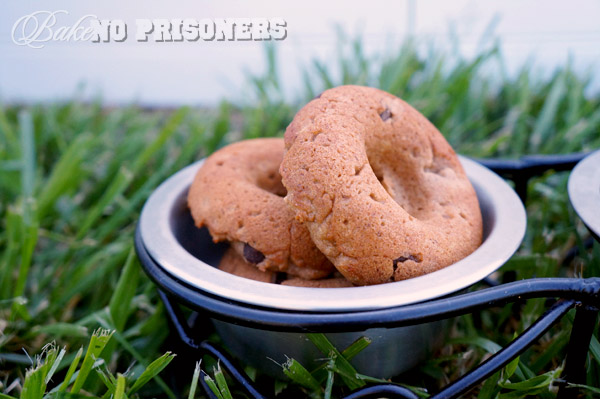
Now I know these doughnuts are dubbed as doggie doughnuts, but I also made them an Inspired by E recipe because there is no sugar, chocolate, or all purpose flour in the ingredient list. As a matter of fact, these doughnuts would be perfect for the less-furry, human kind of mammal inhabiting your home.

Doggie Doughnuts

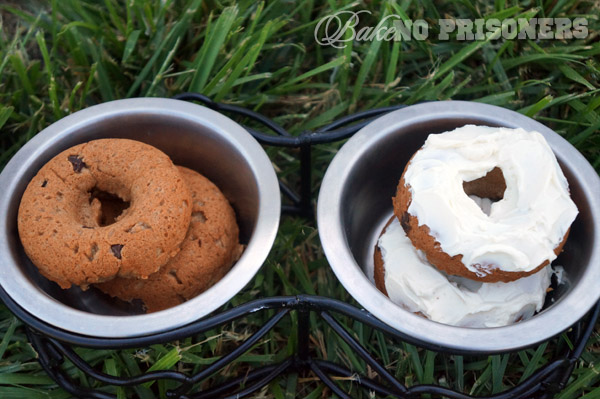
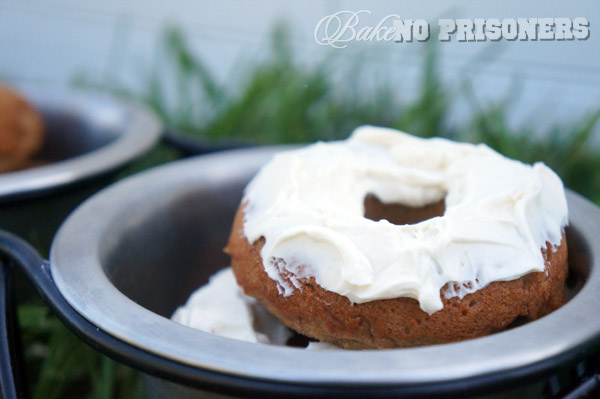
They have a cakey doughnut texture with just the hint of sweetness to them. You can eat them by themselves, or add a bit of cream cheese “frosting” if you’d like.

Doggie Doughnuts

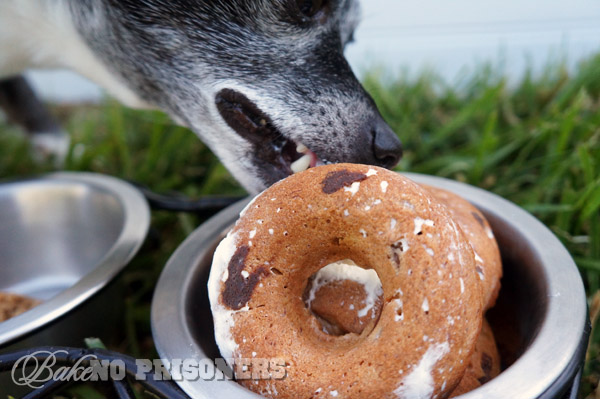
Bogart preferred the “frosting”, while the other two…

Doggie Doughnuts

…devoured the doughnuts!

Doggie Doughnuts

Scrappy ate 2 all by himself!!

Doggie Doughnuts {Inspired by E}

Ingredients

  • 2 cups whole wheat flour
  • 1 teaspoon baking soda
  • 2 eggs
  • 1/2 cup organic peanut butter
  • 1/4 cup vegetable oil
  • 1/2 cup honey
  • 1/4 cup unsweetened, organic applesauce
  • 1 ripe organic banana, mashed
  • 1/4 cup unsweetened carob chips
  • Cream Cheese frosting: 4 oz. cream cheese, room temperature
  • 1 teaspoon organic vanilla
  • 2 teaspoons honey

Instructions

  1. Preheat oven to 350 degrees and lightly spray your doughnut pan with flour spray. I use Pillsbury Flour Spray and it works great.
  2. In your stand mixer bowl, combine mashed banana, eggs (one at a time until well mixed), vegetable oil, honey, applesauce, and peanut butter.
  3. **Tip** Measure the honey using the same measuring cup you used for the oil. The oil makes a slick surface and your honey will come out of the cup easier.
  4. In a separate bowl, combine four and baking soda.
  5. With your mixer on low speed, carefully incorporate your flour mixture a little at a time.
  6. Make sure to scrape the sides of the bowl and then mix on medium speed for about a minute.
  7. Fold in the carob chips.
  8. Carefully spoon mixture into prepared pan, about 2/3 full, using the back of the spoon or a spatula to spread it around the doughnut circle.
  9. Be careful not to overfill.
  10. Bake for 10-12 minutes or until toothpick inserted comes out clean.
  11. Cream Cheese frosting: Combine cream cheese, vanilla, and honey until well incorporated.
  12. Refrigerate left over frosting until ready to use.
Schema/Recipe SEO Data Markup by ZipList Recipe Plugin
http://www.bakenoprisoners.com/wordpress/index.php/doggie-doughnuts-inspired-by-e/

Doggie Doughnuts


Bananas Foster Muffins

So here is how last Saturday went.

Me: Honey, what do you want for breakfast? I was thinking muffins.

Hubster: Sounds good to me.

Me: What kind do you want? I have apples, bananas, raspberries…{voice trailing off to tackle mound of laundry}

Hubster: I don’t care. Whatever works for you?

Me: Banana muffins then. Banana muffins with rum. Banana muffins with rum and brown sugar. Banana muffins with rum and brown sugar and homemade caramel sauce.

And that’s how it’s done.

Banana Fosters Muffins

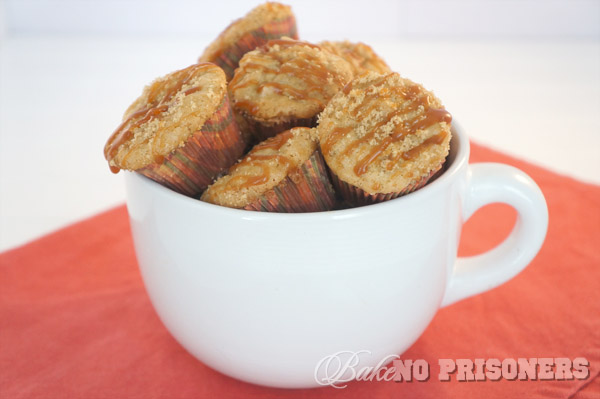
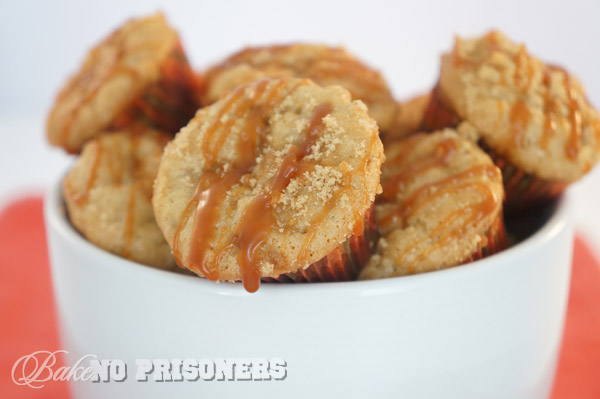
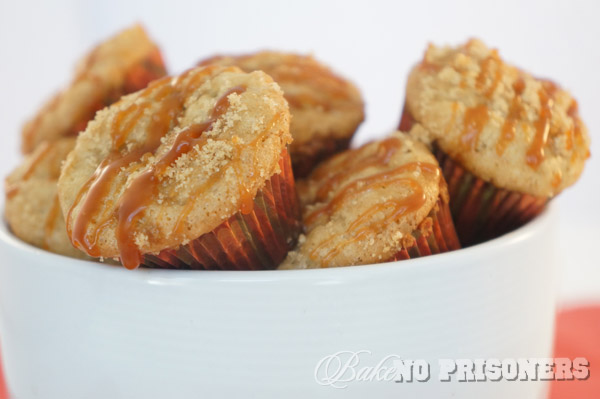
It is crazy how easy these muffins came together. I mean, I mashed the ripe bananas I had using my stand mixer and then piled the rest of the ingredients in, starting with the wet and ending with the dry. I put them in the oven for 15 minutes or so and while that was baking, I made the caramel sauce. The caramel sauce came together in 10 minutes and I cannot tell you how amazing it is. {That post is coming later this week, but I know for a fact that SprinkleBakes has a great recipe for Caramel Sauce too.} So within the hour, I had warm, ooey-gooey, pop-in-your-mouth Banana Fosters Muffins. Just because.

Banana Fosters Muffins

Banana Fosters Muffins

Serving Size: Makes 3 dozen mini-muffins

Recipe by Carrie

Ingredients

  • 1 1/2 cups flour
  • 1 cup sugar
  • 1 teaspoon baking soda
  • 1/2 teaspoon salt
  • 2-3 ripe bananas
  • 2 tablespoons rum {optional}
  • 1 egg
  • 1/3 cup vegetable oil
  • caramel sauce {homemade or store bought}
  • brown sugar

Instructions

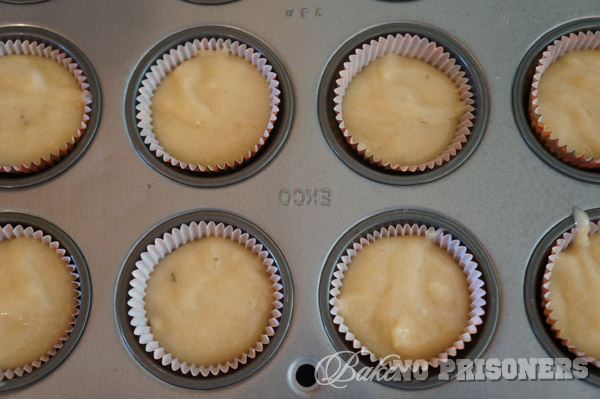
  1. Preheat oven to 350 degrees and line mini-muffin pan.
  2. In your stand mixing bowl, mash ripe bananas on low speed.
  3. Add vegetable oil, egg, and rum and mix well.
  4. In separate bowl, combine flour, sugar, baking soda, and salt.
  5. Add dry ingredients to the wet ingredients a little at a time until well incorporated.
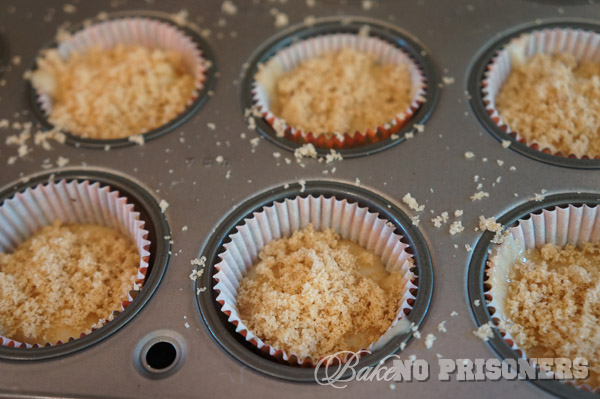
  6. Fill muffin well 2/3 full and top with brown sugar.
  7. Bake for 15 minutes or until toothpick inserted comes out clean.
  8. Drizzle with caramel sauce.
Schema/Recipe SEO Data Markup by ZipList Recipe Plugin
http://www.bakenoprisoners.com/wordpress/index.php/banana-fosters-muffins/

Banana Fosters Muffins

You can line your mini-muffin pan with muffin liners, like I did, or spray wells with flour spray to avoid wrappers altogether.

Banana Fosters Muffins

Sprinkle tops of muffins with brown sugar before they go in the oven to give them a sweet, crispy layer on top.

Banana Fosters Muffins

And so the perfect Saturday morning treat was born!

Lemon Poppyseed Bundt Cakes

Lemon Poppyseed Bundt Cakes

Here is a little known fact:I love birthdays and especially birthday parties and more importantly, MY birthday party.

I turn 30 this year for the fourth time. To celebrate, the Hubster and I are planning a trip to Orlando in June. My birthday theme is Disney princess, so we plan to hit up the Magic Kingdom and try to find and take a picture with, as many princesses as we can. I may even wear my own tiara and become my own Disney princess for a day. We tried to make a reservation to eat at Cinderella’s Royal Table, but they are booked months in advance.  So if anyone knows any secrets on how to get in, then please let me know! In addition to Magic Kingdom, we also plan to go to Epcot for a day and then head on over to Universal to visit Harry, Ron, and Hermione at the Wizarding World of Harry Potter. Yeah. Like I could go to Orlando and not go to the WWOHP. As if.

Anyway, I am super excited, so I made you guys cake to celebrate.

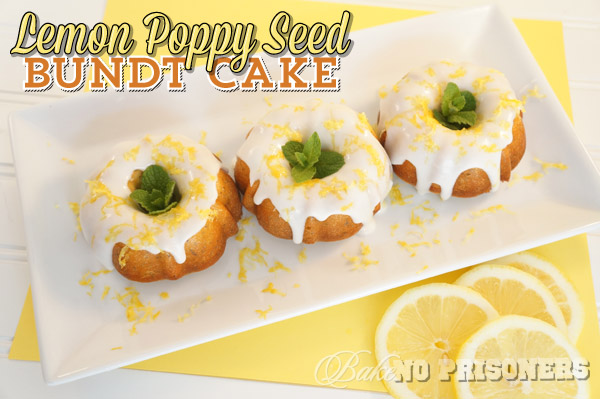
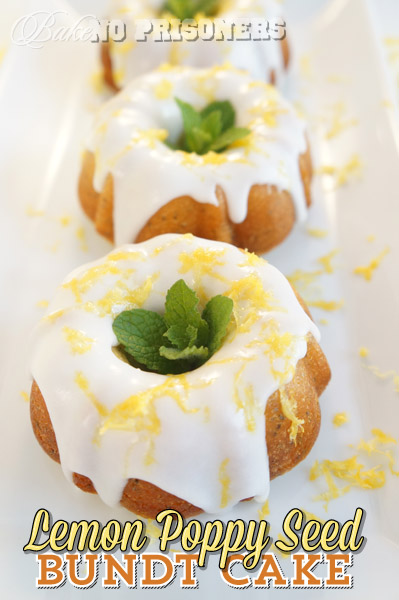
Lemon Poppyseed Bundt Cake

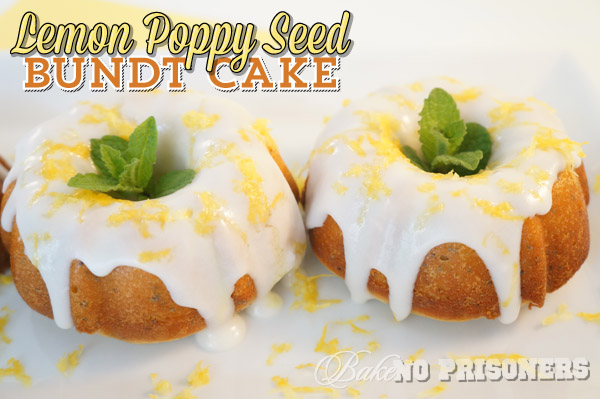
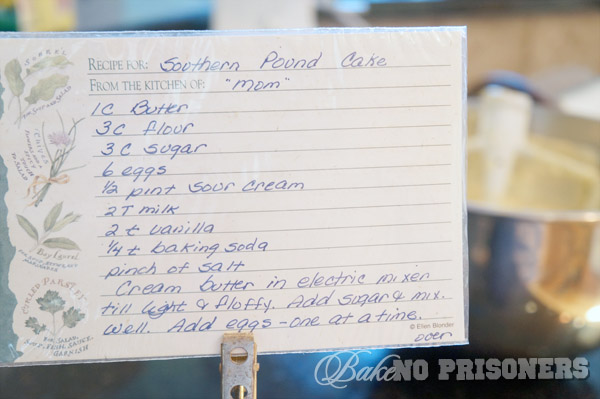
I actually had a lot of help this week when thinking up this recipe. I realized I wanted to make my cake with lemon because I love lemon desserts in the Spring. So after talking with my Mom, I decided to use her fabulous southern pound cake recipe as the base of mine. Then a student at school, I call him Harvard, actually thought mini bundt cakes would be perfect to use with my idea. I couldn’t have agreed more, so onto Amazon I went to order my mini bundt baking pan. Wilton makes the best Elite baking pans and my pan makes 6 mini bundt cakes at a time. Finally, Savory Spice Shop carries Organic Lavender flavoring, so I picked up a bottle to go into my icing. So there you go. The cutest Lemon Poppy Seed Bundt Cakes on the block. And oh. so. delicious.

Lemon Poppyseed Bundt Cakes

Yield: 18 mini bundt cakes

Recipe by Carrie, adapted by Mom

Ingredients

  • 1 cup butter
  • 3 cups flour
  • 3 cups sugar
  • 1/4 cup poppy seeds
  • 6 eggs
  • 1 pint of sour cream
  • 2 tablespoons of milk
  • 1 teaspoon vanilla
  • 1 teaspoon lemon flavoring
  • 1/4 teaspoon baking soda
  • pinch of salt
  • zest of one lemon
  • For the lavender icing: 1 cup confectioner's sugar, 1 teaspoon lavender flavoring, and 4-6 teaspoons heavy cream

Instructions

  1. Preheat oven to 350 degrees and prepare pan with flour nonstick spray.
  2. Cream butter in bowl of electric stand mixer until light and fluffy.
  3. Add sugar and mix well.
  4. Add eggs, one at a time.
  5. Add milk, vanilla, lemon, zest and sour cream.
  6. Combine flour, baking soda, poppyseed, and salt.
  7. Slowly add flour to mixture until blended.
  8. Spoon carefully into prepared mini bundt pan.
  9. Bake for 18-20 minutes or until golden brown.
  10. Carefully spoon icing onto cake and top with lemon zest.
  11. For the Lavender icing:Start with 1 cup confectioner's sugar, 1 teaspoon lavender, and 4 teaspoons heavy cream.
  12. Continue adding cream by the teaspoon until desired consistency.
  13. To make a bigger batch, double the recipe. I choose to make my icing just before serving, so my icing doesn't harden.
Schema/Recipe SEO Data Markup by ZipList Recipe Plugin
http://www.bakenoprisoners.com/wordpress/index.php/lemon-poppyseed-bundt-cakes/

Lemon Poppyseed Bundt Cake

Mom’s Southern Pound Cake recipe. Thanks Mom.

Lemon Poppyseed Bundt Cake


Pink Champagne Meringue

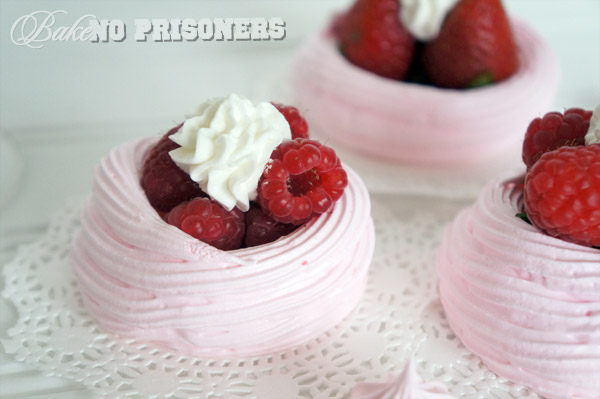
I am not a fan of meringue. I was not a fan of meringue. Even spelling meringue gave me a headache. I mean, other than the white fluffy on top of my banana pudding, I had quite the disdain for it. That was before. Everything has changed.

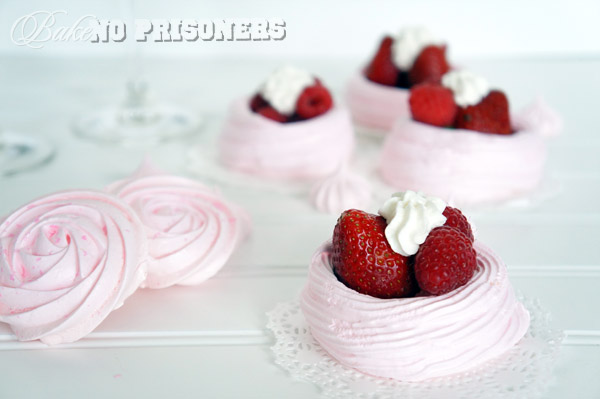
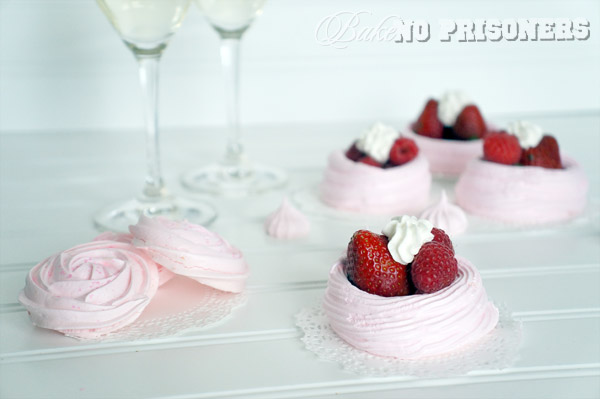
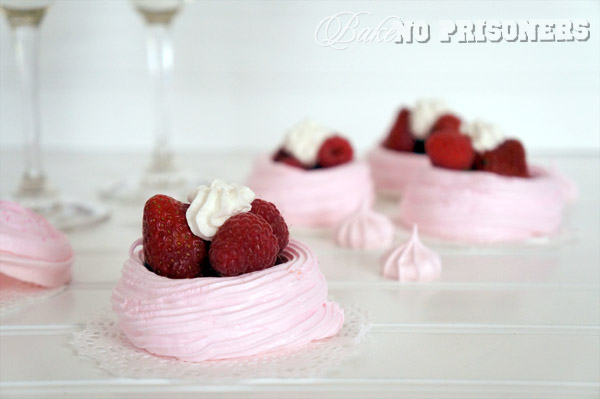
Pink. Champagne. Meringue.

It is girly. And sparkly. And oh so pink-a-delicious. 

Pink Champagne Meringue

This meringue has changed my world.

I will never again use the words hate and meringue in the same sentence.

Pink Champagne Meringue

I decided to tackle the art of meringue during Spring Break, this week. I went with the whole stay-cation route, so that I could spend the entire week focusing on new recipes, like this one.

Pink Champagne Meringue

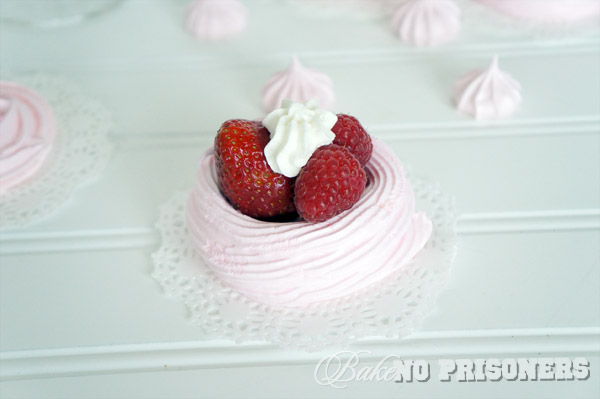
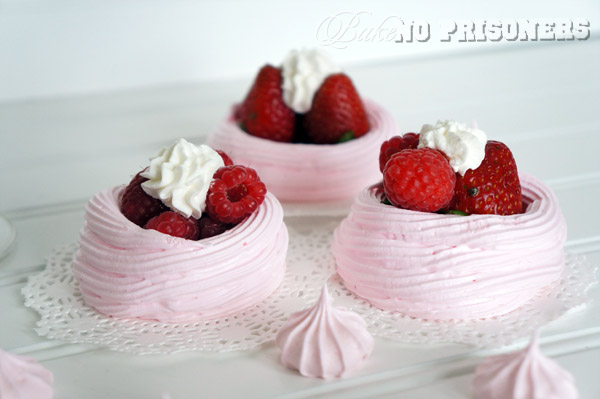
These meringue bowls are so simple to put together. I used Wilton tip #21 to make a circular base at the bottom. I then piped rings around the circle until I reached my desired height.

Pink Champagne Meringue

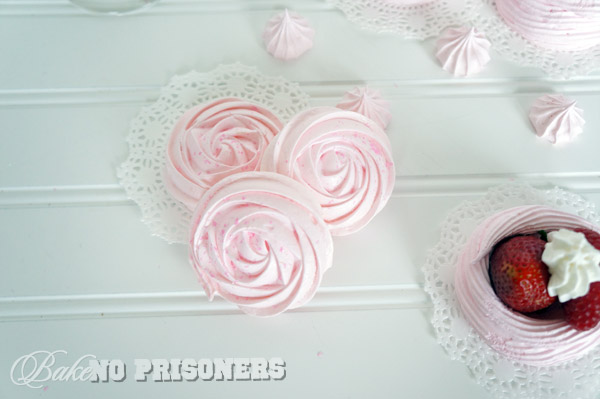
I made these sweet meringue roses using a technique I found over at the fabulous i am baker, and then sprinkled them with shimmering, edible pink glitter.

Pink Champage Meringue

The whipped cream for my meringue cups is so easy. Combine 1 cup cream with 1 1/2 tablespoons confectioner’s sugar and whisk on high in your stand mixer bowl using the whisk attachment until soft peaks form. That’s it!

Pink Champagne Meringue

Pink Champagne Meringue

Recipe by Carrie

Ingredients

  • 5 large egg whites, room temperature
  • 1 1/2 cups sugar
  • 1/2 teaspoon cream of tartar
  • 1/2 teaspoon salt
  • 5 drops of champagne oil flavoring (or any other flavoring or 1 teaspoon vanilla)
  • Pink gel food coloring
  • pink edible glitter

Instructions

  1. Preheat oven to 200 degrees.
  2. Line cookie sheets with parchment paper or silapat.
  3. In your stand mixer bowl with whisk attachment, whisk egg whites, sugar, cream of tartar, and salt until just combined.
  4. Pour contents into a double boiler with a few inches of simmering water in the bottom pan.
  5. Whisk contents in top pan for 7-10 minutes or until sugar has completely dissolved.
  6. Return contents to stand mixer bowl and whisk until stiff, glossy peaks form.
  7. Mix in a very small amount of pink food coloring, along with 5 drops of champagne oil flavoring.
  8. Transfer mixture to a pastry bag fitted with Wilton tip 1M for roses, Wilton #30 star tip (or similar) for kisses, or Wilton #21 tip for meringue bowls.
  9. Kisses:Pipe 3/4 inch high kisses on your cookie sheet about 1/2 inch apart.
  10. Bowls: Pipe a flat, circular bottom layer for your base and then carefully pipe in a circular motion until desired height.
  11. Bake for about 1 hour or until they are completely dry on the outside.
  12. Transfer to a wire rack to cool completely.
  13. Fill with fresh strawberries or raspberries and top with whip cream.
Schema/Recipe SEO Data Markup by ZipList Recipe Plugin
http://www.bakenoprisoners.com/wordpress/index.php/pink-champagne-meringue/

Pink Champagne Meringue

Doctor Who Party {Part II}

New mouth. New rules.

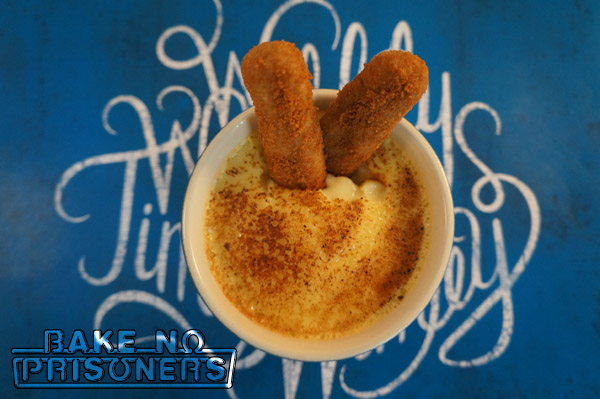
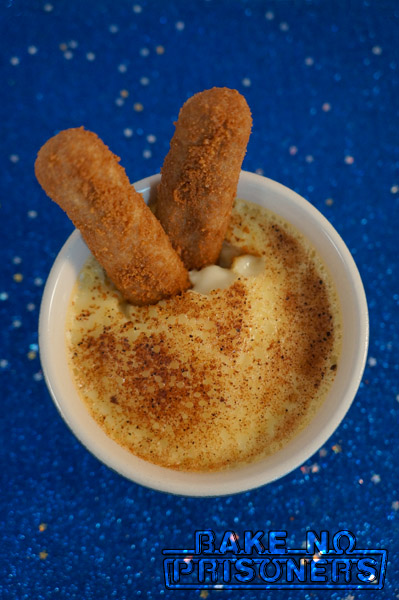
The latest Doctor has been around for awhile, but I always like to revisit the episode where the Doctor meets Amelia Pond for the first time. He has just regenerated and that makes him very, very hungry! The problem is, he has no idea what he likes to eat. So he has Amelia search through her cupboards. She offers him yogurt, beans, bread and butter, bacon; none of which he is even remotely fond of. He finally settles himself on fish fingers and custard. Ew! Gross. I know. Luckily, when I thought about recreating this unusual dish, I decided to make a fish finger look-alike.  Instead of actually fish fingers, I made tea-infused shortbread.

"Fish Sticks" and custard

The tea infusion itself is actually very simple. Whenever you are baking with tea, steep approximately 1 1/2 teaspoons of loose leaf tea per tablespoon of butter. It is also a good idea to use unsalted butter, so as not to alter the flavor of the tea.

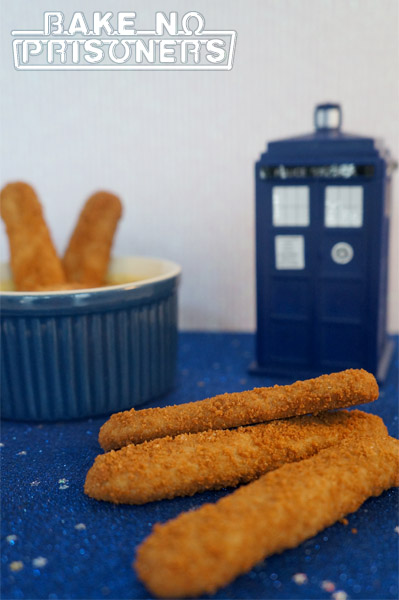
Tea Infused Shortbread - "Fish Fingers"

I used crumbled Biscoff cookies for the “breading” of my fish sticks. Just pulse 10-15 cookies in your food processor and then roll your “fish sticks” until coated.

Tea Infused Shortbread - "Fish Fingers" & Custard

Recipe by Carrie

Ingredients

  • 2 cups, plus 2 tablespoons butter, softened
  • 1 cup, plus 3 teaspoons loose leaf tea
  • 1 tablespoon honey
  • 1 cup brown sugar
  • 3 1/2 cups flour
  • Package of biscoff cookies

Instructions

  1. In a small saucepan over low-medium heat, melt the butter until it just becomes a liquid.
  2. Add the loose tea leaves.
  3. Continue heating the mixture for about 5 minutes on low-medium heat.
  4. Remove from the heat and allow to stand for another 5 minutes or until the color of the butter is slightly tinted by the tea leaves; it will have a hint of green.
  5. Pour the mixture through a fine sieve, pressing hard on the tea leaves and then discard the leaves.
  6. Let the butter come to room temperature.
  7. For the "breading", pulse 10-15 biscoff cookies in your food processor, until they become a fine crumb mixture.
  8. In your stand mixer bowl, cream tea infused butter, brown sugar, and honey until light and fluffy.
  9. Add flour, 1 cup at a time and mix well.
  10. Your dough should be pulling away from the bowl at this point.
  11. Roll and shape tablespoon portions of dough into "fish finger" size; about 3-5 inches long.
  12. Roll each "fish finger" in the biscoff cookie crumbs to give it the "breading" effect.
  13. Place 1/2 inch apart on ungreased baking sheets lined with parchment or silapat.
  14. Bake at 325° for 15-20 minutes or until cookies are lightly browned.
Schema/Recipe SEO Data Markup by ZipList Recipe Plugin
http://www.bakenoprisoners.com/wordpress/index.php/doctor-who-party-part-ii/

*Baked custard recipe courtesy of Betty Crocker

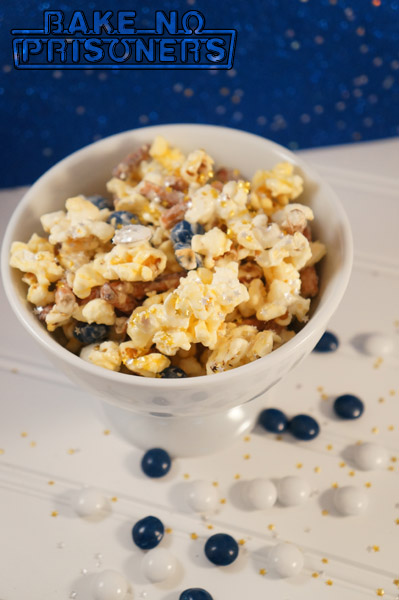
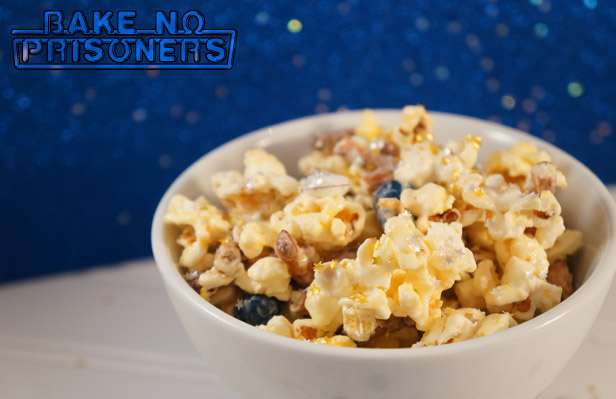
Tonight marks the Season premiere of Doctor Who 7.5. We have a tradition in our house that before every new episode, we make homemade popcorn. It kind of makes us feel like we are at the movie theatre. This season, I thought I would step it up a notch with my Geronimo Popcorn Mix. Geronimo is the Doctor’s favorite catch phrase. Every Doctor has one or two.

Geronimo Popcorn Mix

I love the sweet and salty in this snack. York Peppermint patties have always been one of my favorite candies, but these minis, along with the gold and silver stars make it cool.

Geronimo Popcorn Mix

Geronimo Popcorn Mix

Recipe by Carrie

Ingredients

  • Microwavable movie theater popcorn or you can make your own
  • York Peppermint blue and white minis
  • White chocolate melts
  • Crushed pretzel sticks
  • Edible gold and silver stars

Instructions

  1. Microwave your white chocolate melts according to the package instructions; set aside.
  2. Microwave your movie theater popcorn or make your own.
  3. While the popcorn is warm, add the crushed pretzel sticks, and York Peppermint blue and white minis.
  4. Drizzle the white chocolate over the popcorn mix and stir gently.
  5. Top with edible stars.
Schema/Recipe SEO Data Markup by ZipList Recipe Plugin
http://www.bakenoprisoners.com/wordpress/index.php/doctor-who-party-part-ii/

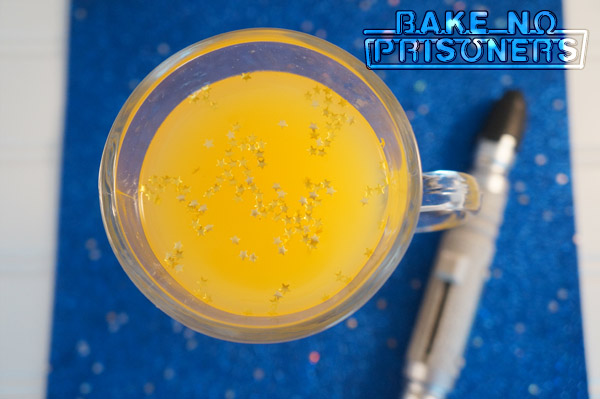
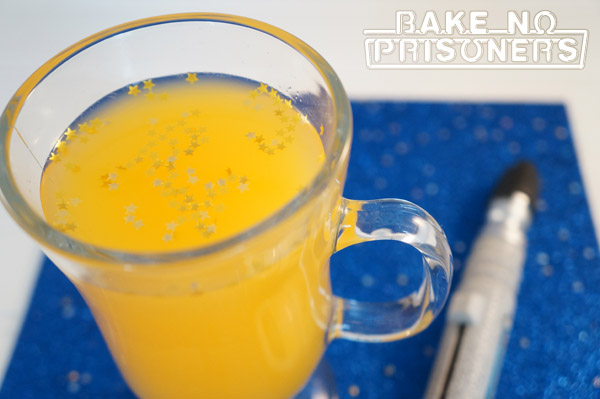
 The Doctor would never go anywhere without his sonic screwdriver, so I thought I would make it into a drink for tonight.

DSC02733_600x400

I am in love with my Soda Stream and it came in handy for this drink perfect for any Doctor. The mango energy drink gives the ordinary screwdriver, a sonic kick.

Sonic Screwdriver

Sonic Screwdriver

Recipe by Carrie

Ingredients

  • 1 1/2 ounces Vodka (optional)
  • 4 ounces orange juice
  • 4. ounces Soda Stream Mango energy drink or Red Bull
  • 5 ice cubes
  • Edible gold stars for garnish

Instructions

  1. Make Soda Stream Mango energy drink according to instructions.
  2. Combine vodka, orange juice, mango energy drink, and ice cubes; stir gently.
  3. Pour into desired glass and garnish with edible gold stars.
Schema/Recipe SEO Data Markup by ZipList Recipe Plugin
http://www.bakenoprisoners.com/wordpress/index.php/doctor-who-party-part-ii/

Did you like our Timey Wimey font used on Part I & Part II of our Doctor Who Party? Want your own? Go LIKE our Facebook page and then download it here.

{FREE} Doctor Who Font Download


**Wibbly Wobbly Timey Wimey background art for “Fish Fingers” & Custard courtesy of weallscream4icecream & Brian HokeDSC02721_600x400


Spiced Vanilla Doughnuts

So yesterday I spent the whole day in my pajamas.

The WHOLE day.

I loved every minute of it.

I also spent the entire day watching Game of Thrones on HBO. I am late to the game when it comes to the whole seven kingdoms, protect the realm thing, but I am trying to catch up before Season 3 premieres next Sunday. Unfortunately, I will have to choose what I watch first –Game of Thrones, Season 3 premiere or The Walking Dead, Season 3 finale. They both air on Sunday at exactly 9:oopm EST. I hate it when that happens.

It looks like I watch a lot of T.V., but I actually don’t. I only have 7-8 shows in my T.V. viewing repertoire and they typically don’t overlap. But here I am, having to decide what to watch first next Sunday.

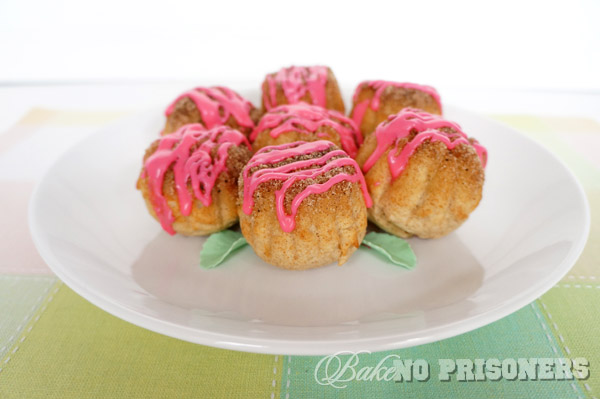
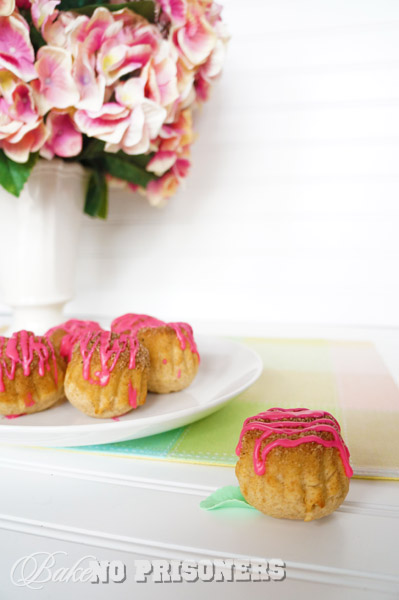
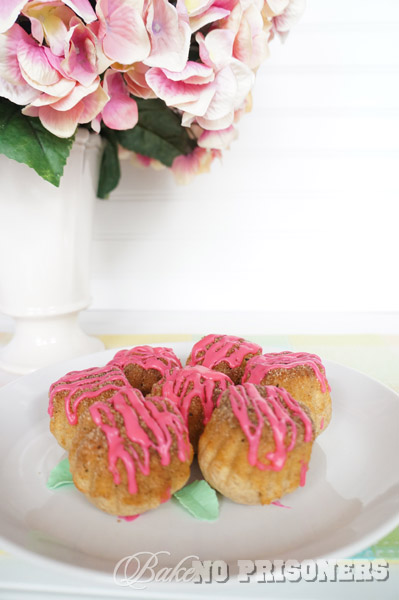
Anyway, I didn’t just watch T.V. I made you doughnuts.

Spiced Vanilla Doughnuts

These spicy vanilla doughnuts are not only baked, but I threw in whole wheat flour to the mix too! I used 2/3 all purpose and 1/3 whole wheat, but you could totally used 1/2 and 1/2 or even 2/3 wheat and 1/3 all purpose.

Spiced Vanilla Doughnuts

The spiced vanilla bean sugar I found is perfect for dipping my warm, butter drenched doughnuts in. I discovered it at my local spice shop, but you can order it online here.

Spiced Vanilla Doughnuts

Recipe by Carrie

Ingredients

  • 2 sticks {1 cup} unsalted butter, softened
  • 1 cup sugar
  • 2 eggs
  • 1 cup buttermilk
  • 1 teaspoon vanilla extract
  • 2 cups all purpose flour
  • 1 cup whole wheat flour
  • 4 `1/2 teaspoons baking powder
  • 1/4 teaspoon salt
  • 1 teaspoon baking spice
  • 1/2 cup Spiced Vanilla Bean Sugar or 1/2 cup sugar, plus 1/2 teaspoon cinnamon
  • 6-7 tablespoons cream
  • 1 cup confectioner's sugar

Instructions

  1. Preheat oven to 350 degrees.
  2. Grease doughnut pan or muffin tin with flour spray.
  3. In your stand mixer bowl, combine 1 stick{1/2 cup} and 2 tablespoons of butter with 1 cup of sugar. Mix until light and fluffy.
  4. Add the eggs one at a time and mix well.
  5. In a large bowl, combine flours, baking powder, salt, and baking spice.
  6. Add dry mixture to the butter and sugar, alternating with the buttermilk, and beginning and ending with the dry mixture.
  7. Fill greased muffin tins 2/3 full
  8. Bake for 15 to 20 minutes, or until doughnuts are golden.
  9. Melt remaining 6 tablespoons of butter.
  10. While doughnuts are still warm, roll them in melted butter; then in Spiced Vanilla Bean Sugar.
  11. Combine cream and confectioner's sugar until a thin icing forms. Use pink food coloring gel to tint your icing Spring pink.
  12. Drizzle icing on top with a spoon.
Schema/Recipe SEO Data Markup by ZipList Recipe Plugin
http://www.bakenoprisoners.com/wordpress/index.php/spiced-vanilla-doughnuts/

Spiced Vanilla Doughnuts

Doctor Who Party {Part I}

  Doctor Who Party

It is no secret that I am obsessed with Doctor Who. In fact, I have been waiting for the TARDIS (Time And Relative Dimension In Space) to show up in my backyard for some time now. The way I see it, the Hubster and I could just pull a “Rory and Amy” and fly off into space and time with the Doctor any day now…

Annnnny day now…

Mr. BNP and I are fairly new to the Who scene, considering it is celebrating its 50th anniversary this year. We jumped on the Whovian train a few years back and I have since caught up by watching the reruns on Netflix. By far, my favorite Doctor is David Tennant. He was the Tenth Doctor and coincidentally, played Barty Crouch Jr. in Harry Potter and the Goblet of Fire (my favorite HP movie.)

There are currently Eleven Doctors total, with the marvelous Matt Smith playing the current Doctor. Why so many Doctors? Well…it’s a bit of a long story, but  to avoid  any confusion to all my non-Whovian readers, I will try and make it short. There really is only one Doctor. He is the last time lord from the planet Gallifrey.  The Doctor is around 900 years old and every time he “dies”, he actually regenerates into someone “new”. New face. New look. New likes. New dislikes. New tastes, even. But inside it is the same old wonderful Doctor. Get it?

The Doctor travels in a big, blue police box called the TARDIS. It is bigger on the inside and is able to travel through space and time.  He typically has a companion or two with him. That’s what I am not-so-patiently waiting for…

Once they step out of the TARDIS, the Doctor and his companions are always faced with a new dilemma that could change the course of history as we know it. He is often seen battling Daleks, Cybermen, Weeping Angels, or any other alien life force with his sonic screwdriver in order to save the world. In short…BEST. SHOW. EVER.

March 30th marks the mid-season premiere of Doctor Who 7.5!!!

There are not many Whovians in my little town (I know a total of 5), so I thought, why not have a virtual party to celebrate? There has got to be a TON of you out there in cyber world!

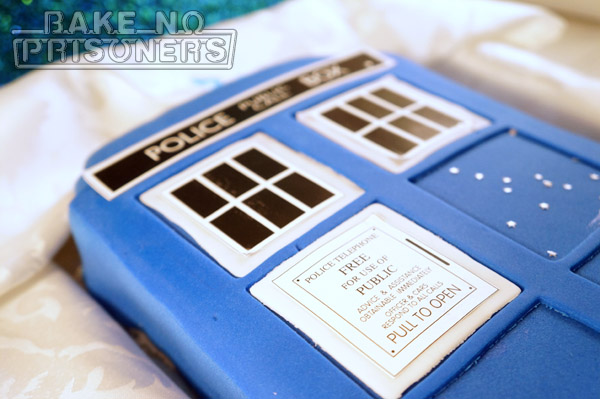
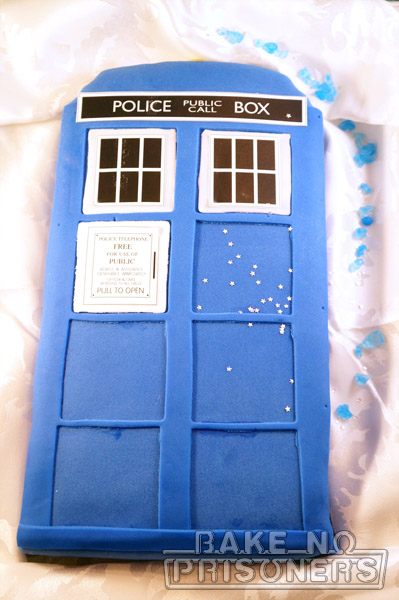
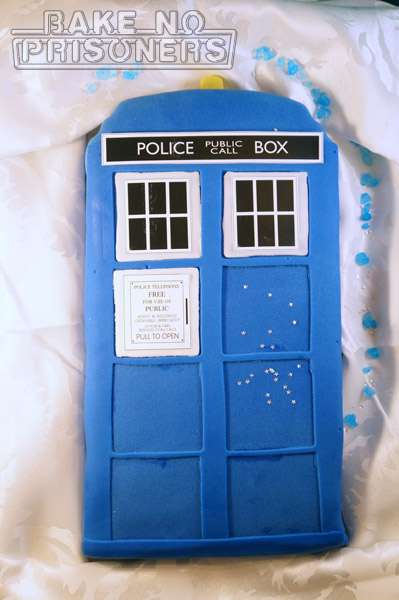
 So to kick off our Who party, I made you guys a TARDIS cake!

Doctor Who Party

 I wonder if its bigger in the inside…

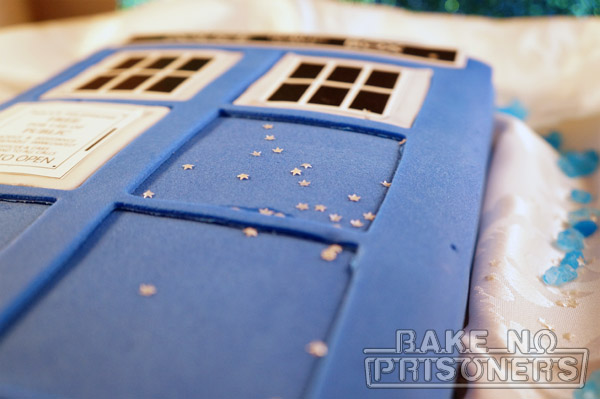
This cake started out as a 9 x13 vanilla cake. I used a cardboard TARDIS pattern to cut out the shape, crumb coated it, and then covered the cake with the first layer of blue fondant. For the second layer, I cut out the squares using a square fondant cutter and carefully laid it on top. Finally, I cut out the white squares, added the yellow light on top, and glued it all together.

I dyed the fondant myself and had blue hands for a week!

Doctor Who Party

I found edible stars to make it feel more spacey wacey!

Doctor Who Party

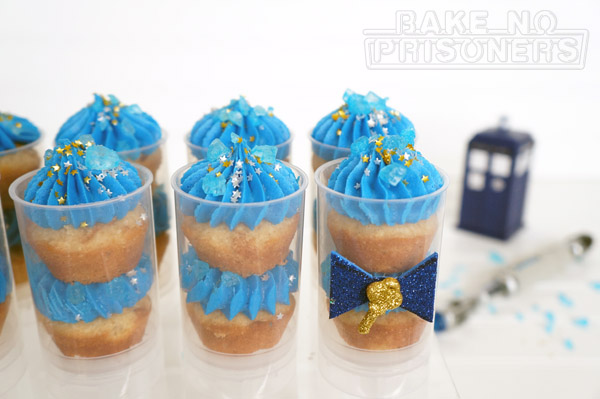
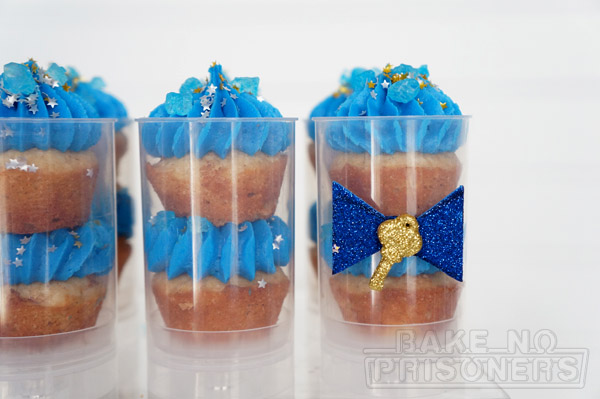
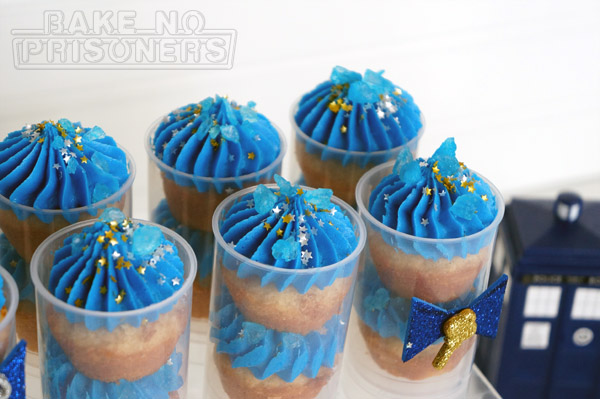
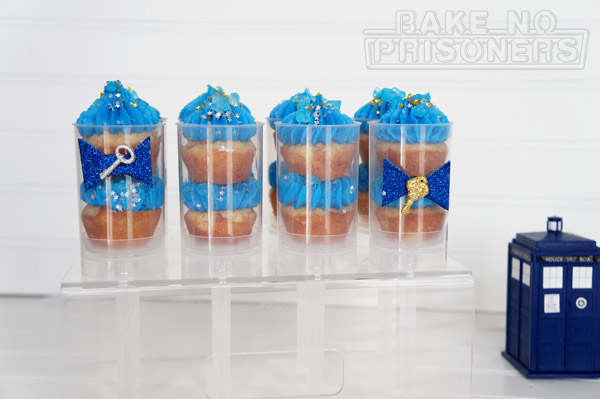
How about some Wibbly Wobbly Timey Wimey Push Pops?

Doctor Who Party

I used my mini muffin pan to make these cute little cakes and then squished them together with yummy blue buttercream!

Doctor Who Party

Bow ties are cool! Especially when they hold the key to the TARDIS! I am so in love with them! I found the keys at my local craft store and I cut mini bow ties out of blue sparkly foam paper.

DSC02416_600x400

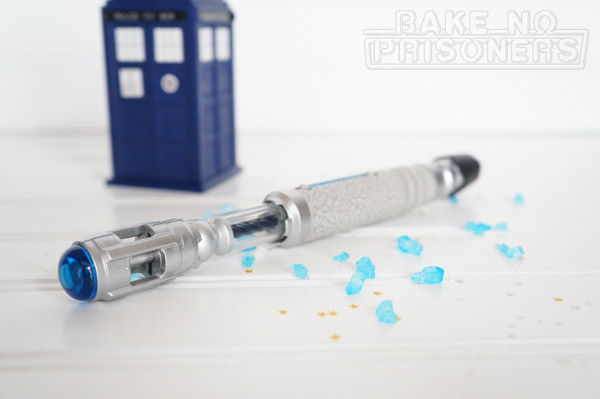
Did you notice the gold and silver stars? And the blue asteroids? Ahhh. I die. I mean…I regenerate.

Doctor Who Party

I used my basic vanilla cake recipe and added a bit of cinnamon spice, but you could choose whatever flavor you want.

Doctor Who Party

Like my Bake No Prisoners font on today’s photos? It just so happens to be a special Doctor Who Edition! Want your own Doctor Who font? Stay tuned for Part II next week to find out how to get your FREE Doctor Who font download!! You know you have to have it!! Allons-y!