Foodie Pen Pals

When I was in elementary school, I had a pen pal in the United Kingdom. The details are a bit fuzzy on how I got my pen pal or for how long we kept in contact, but I used to love reading her letters and comparing how different life was here in the States. That’s probably where my love for all things UK came from. For some reason or another, we stopped writing to each other, but I never got over how fun it was to receive something in the mail. I think my pen pal contributed to my obsession for Amazon as well. :D

I stumbled upon the Lean Green Bean last month and was pleasantly surprised to hear that they had a pen pal system in place for foodies just like me! They have over 1,000 foodies and bloggers alike from around the globe that send foodie packages once a month to an assigned pen pal. Every month you get a new pal, so it is a great way to network and make friends, not to mention try out the food fare from around the nation.

This month, I was to send a foodie package that contained all the local goodies in and around my town to Jessica at The Enlightened Kitchen and I was to receive a package from new foodie friend, Lynn from Spotsylivania, VA. I had never heard of Spotsylvania before, so I looked it up. According to its county page, in addition to its beautiful rural landscapes, Spotsylvaniais is known as the “Crossroads of the Civil War” and is home to many historical resources including the Fredericksburg and Spotsylvania County Battlefields National Military Park. I, personally, would love to visit the Historical Courthouse and Old Jail in the Spotsylvania Courthouse area.
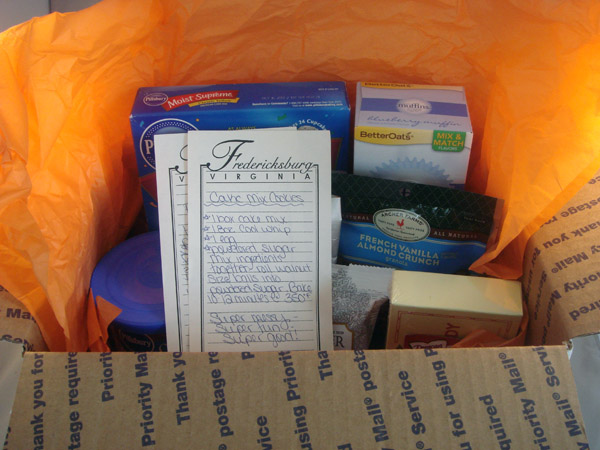
Here is the foodie package I received from Lynn. :)

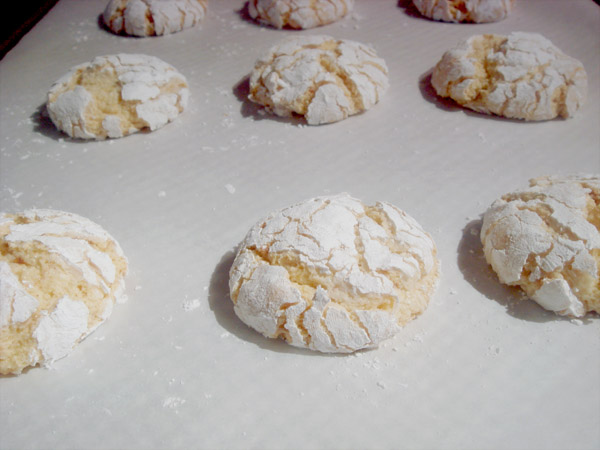
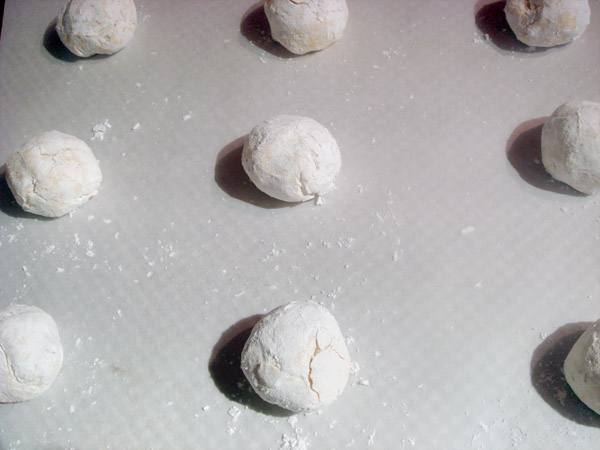
She also attached a sweet letter and a recipe for Cake Mix Cookies. She included a few of the ingredients to make the cookies, so I gave it a go! They sounded delicious and reminded me of the post I made last week of the  deep dark chocolate cookies I found on Pinterest because of the way the confectioner sugar cracks when it bakes.

I also decided to add the gourmet Virginia Diner peanuts she included in my foodie package to give a bit more crunch. I just pulsed 1/2 cup in the food processor and added it to the batter.

They were so yummy! And they tied in perfectly with the vanilla cinnamon coffee Lynn sent as well!

Cake Mix Cookies

Ingredients:

1 box vanilla cake mix

1 8oz. Cool Whip or other preferred whipped topping

1 egg

confectioner sugar

Directions:

Mix all ingredients together except the sugar in a large bowl. Using a mini-ice cream scoop or small spoon, roll out a ball of batter about 1/2 of an inch. Drop it into the confectioner sugar and coat well.

Place on baking sheet and bake at 350 degrees for 10-12 minutes.
Overall, Foodie Pen Pals was a great experience this month and I can’t wait to try it again in September! If you are interested in participating, please check out Lindsay’s blog, Lean Green Bean. You won’t be disappointed!
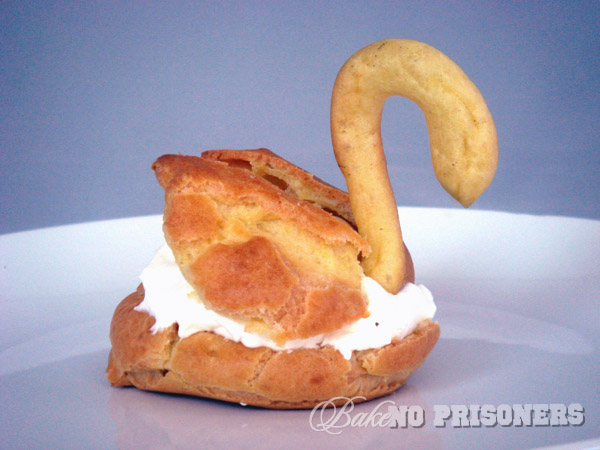


The Daring Bakers’ Challenge: Filled Pate a Choux Swans

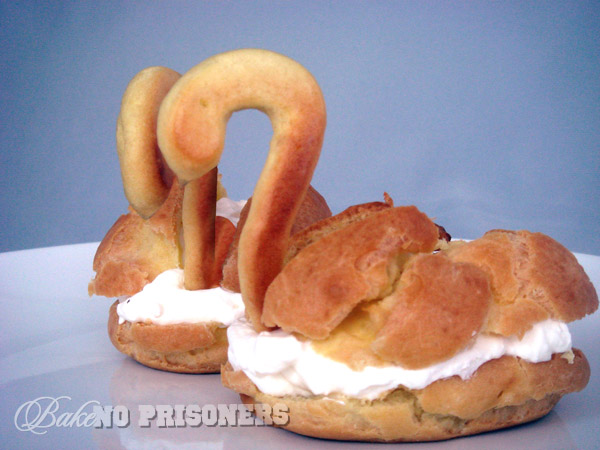
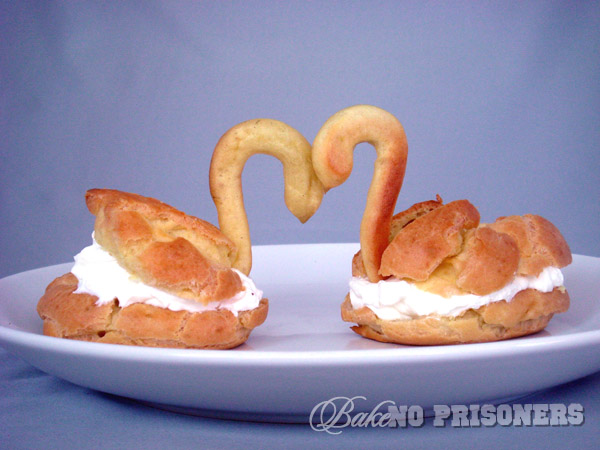
Pate a Choux, or in our house, Pikachu to be nerdy, has proven to be quite the Daring Bakers’ Challenge this month. Over a month’s time, I have tried to make Pate a Choux 7 times, using 28 eggs, 42 tablespoons of butter, 7 cups of flour, and 7 tablespoons of sugar and salt. In its simplest form, Pate a Choux is nothing more than the pastry dough that makes up an eclair. It is just a few eggs, several tablespoons of butter, a cup of flour, and a little sugar and salt. Sounds like a breeze, right? Wrong! Nothing could be further from the truth! Do not let the short ingredient list fool you! This recipe challenge is not for the faint of heart! In my opinion, it is the devil incarnate! But, I digress…

The first 3-4 times were a complete disaster! (OK, so I thought I was done with my rant…apparently not) The dough never solidified, thus I had to begin again and again. After trying a different recipe, I finally had some success with the dough forming in the pan, allowing me to add the eggs, and fill the pastry bag. The swan heads came fairly easy, but I piped the bodies too flat. Once out of the oven, the heads again were perfect. They were puffed and golden brown, but the bodies weren’t done and what puff they had, quickly deflated.

The 6th time I tried, I had perfected the dough and getting it into the oven was a breeze, but, (yes, there is a big BUT),  I had dripped something onto the oven floor prior to their arrival, thus smoking out my poor Pate a Choux swans. They were not blog worthy, so I began again, again.

The 7th and final go round with my Pikachu was a complete success! The dough formed nicely in the pan, the eggs were added, the swans were piped, and all were puffed and golden. Once cooled, I sliced the swan bodies in half and sliced the top half to make the wings. I then added Chantilly cream (which was the easiest part of the entire process!) to the bottom half, added the head carefully(which I wanted to rip off at this point), and placed the wings neatly on top.

When it comes to this challenge (or my life for that matter) I am not sure whether I would call myself stubborn and hard headed or determined and steadfast, but the ladder sounds better to me, so I will go with that. For anyone attempting Pate a Choux, I recommend a bakery!

Kat of The Bobwhites was our August 2012 Daring Baker hostess who inspired us to have fun in creating pate a choux shapes, filled with crème patisserie or Chantilly cream. We were encouraged to create swans or any shape we wanted and to go crazy with filling flavors allowing our creativity to go wild!

Here is the challenge in its entirety!


Spicy Peach Milkshakes and a MILKSHAKE BAR cookbook giveaway

We have a winner to announce for Bake No Prisoners Milkshake Bar GIVEAWAY! Our winner will receive a copy of the Milkshake Bar, by Hannah Miles!

The winner is……comment #5!!!!!

Samantha Remington says:

August 30, 2012 at 6:19 pm (UTC -5)

Vegan chocolate

Congratulations, Samantha!! I will contact you shortly for shipping information.

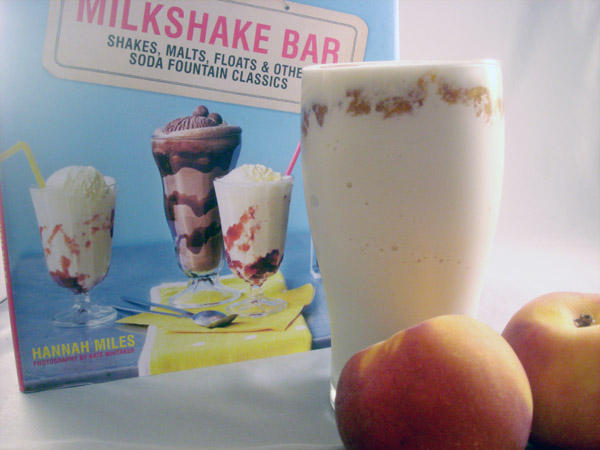
School is back in session this week and we are celebrating the end of summer and the beginning of the new school year with one of my favorite things…MILKSHAKES!! And to top it off, BNP is giving away Hannah Miles’ MILKSHAKE BAR cookbook! It is filled with everything from Lemon Meringue milkshakes, to Watermelon Coolers, to even a doughnut float! You won’t want to miss out on this!!

When I was little, I always loved the end of summer. Mom and I would head to the mall to pick out new clothes, kicks, and school supplies for the upcoming school year. (Some things never change! I am totally in love with my new purple glitter Vans I got a few weeks ago! Thanks Mom!) Summer was also our last chance to have our friends over for a sleepover or go to the pool. And nothing made a hot Florida summer day better than a cold sweet treat.

Today, I am still picking out new clothes and heading to the pool at the end of summer vacation, but it is the cold summer treats that really make my day! I had recently picked up a few pounds of peaches and was inspired (thanks to my new Milkshake Bar cookbook) to make this spicy peach milkshake.

I began by taking 4 peaches, peeled and diced, and placed them in a small 4 quart pot. I then added a 1/4 cup of sugar, 1 tablespoon of cinnamon, a dash of nutmeg and 3 tablespoons of water. With the burner on low, I let the peach mixture simmer for 30 minutes. Finally, I let it cool to room temperature.

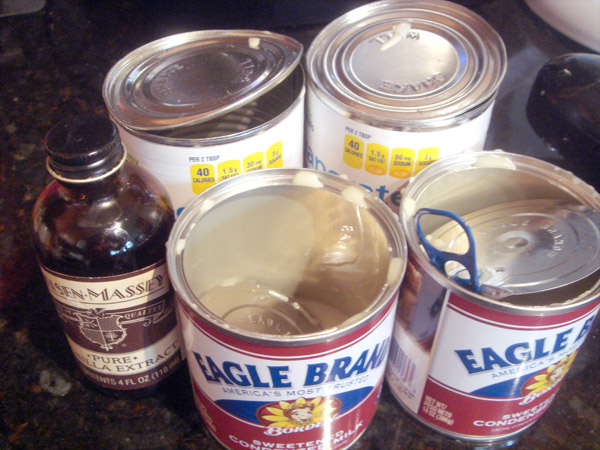
The ice cream base comes from my father-in-law’s top secret, super-easy, lightning fast, vanilla ice cream recipe. Unfortunately, this is all I can show you about the recipe without being in jeopardy of a major copyright infringement lawsuit…Ha!

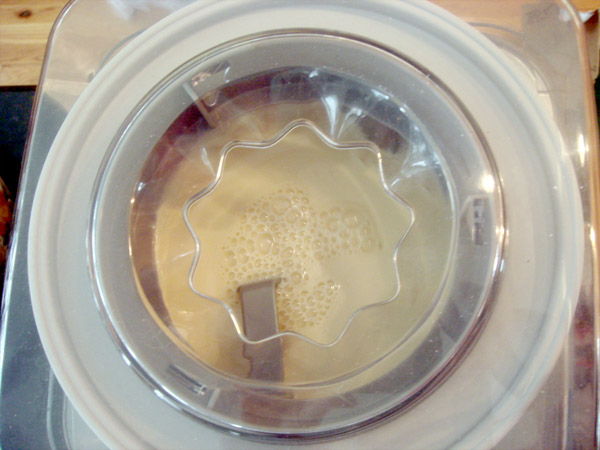
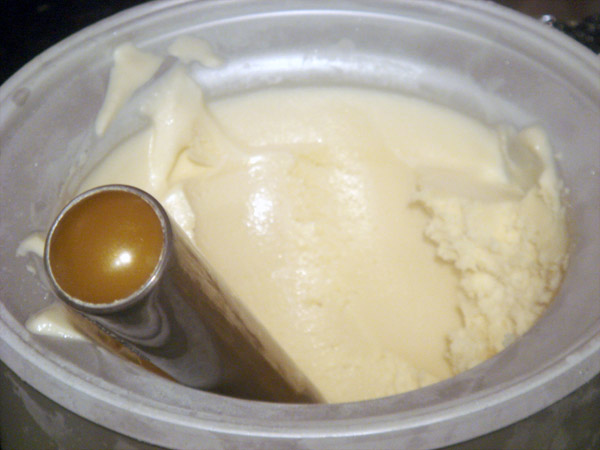
Honestly, you can use any vanilla ice cream base recipe you want and whip it up in your ice cream maker in less than 30 minutes!

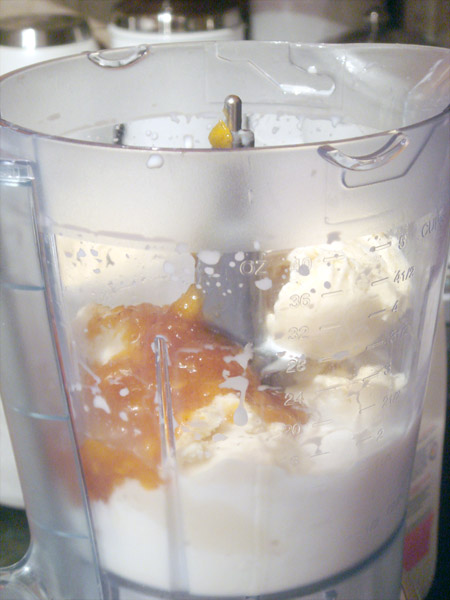
Once at desired consistency, add 4-6 scoops of vanilla ice cream to the blender, along with your cooled peach mixture, a little milk,  and blend. I saved a few spoonfuls of the peach mixture to place on top for decoration.

Now onto the giveaway…

How to Enter the Milkshake Bar Cookbook GIVEAWAY

To enter this giveaway, just answer the following question in the comments section of this post:

“What’s your favorite milkshake?”

Additional (Optional) Entries

To up your chances of winning, you can receive up to THREE additional entries to win by doing the following (these are optional, not required):

1. Become a fan of Bake No Prisoners  on Facebook. Come back and let me know you became a fan in an additional comment.

2. Share Bake No Prisoners on Facebook on your personal page and let me know you did in an additional comment.

3. Follow @BakeNoPrisoners on Twitter. Come back and let me know you’ve followed in an additional comment.

The Fine Print

Restrictions: Winner must have a U.S. shipping address.

Deadline: Friday, August 31, 2012 at 11:59pm EST. Contest is now closed.

Winner: The winner will be chosen at random using Random.org and announced at the top of this post. The winner will also be notified via email; if the winner does not respond within 48 hours, another winner will be selected.

GOOD LUCK!!

Top Ten Countdown to Harry’s Birthday: #1 Hagrid’s Birthday Cake


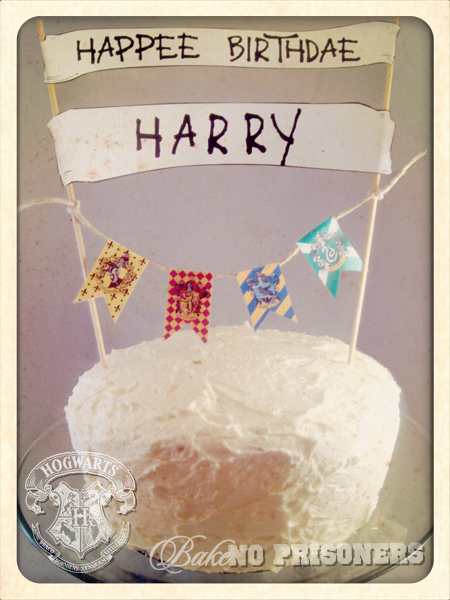
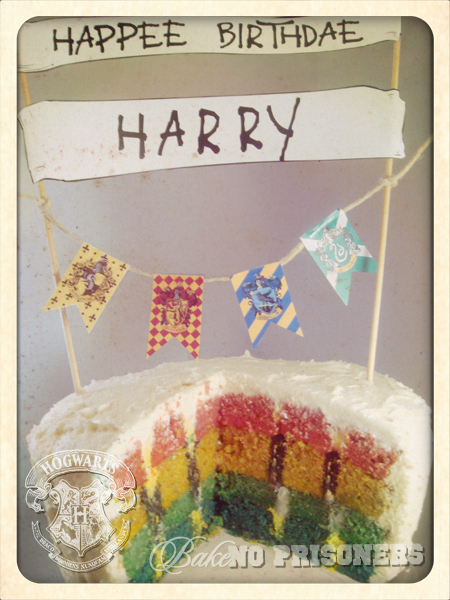
Ok… so this is not technically the birthday cake that Hagrid made for Harry all those years ago in the Sorcerer’s Stone, but it is Harry’s birthday (and the awesome Ms. J.K. Rowling) and that gives us reason to celebrate!

Harry turns a whooping 32 today…only 1 year younger than me. :)

I was hoping in my small backwoods town that there might have been a Harry Potter fan club getting together tonight in Harry’s honor, but to my knowledge I don’t believe they exist outside of Charlotte…well, at least not in my age group. So I planned to have my own little cyber birthday party right here for “the boy who lived”.

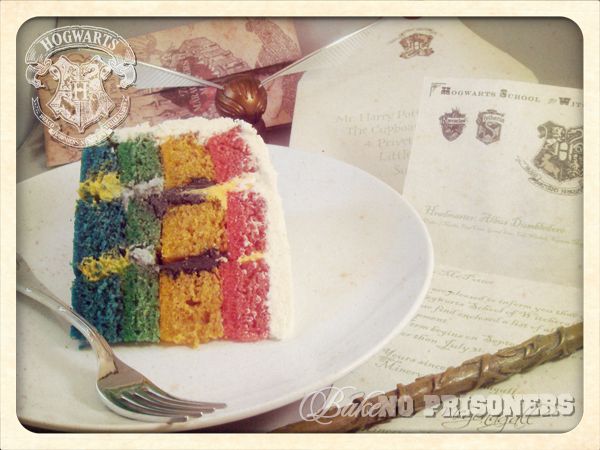
To prepare for the party, I bewitched the vacuum (Roomba) to sweep up around the “the burrow”, hung banners over the fireplace that sparkle, and recreated this amazing 4 layer Hogwarts Spice cake without magic thanks to Bakingdom…one layer to represent each house at Hogwarts.

Speaking of houses, if I had ever received my letter to Hogwarts and had the opportunity to try on the Sorting Hat, I am confident that it might have been confused on where to put me. I believe my geeky side might have persuaded the hat to put me in Ravenclaw, but my courage to be who I want to be would place me in Gryffindor. Ultimately, I would prefer to be with Harry, Ron, and Hermione in the Gryffindor house. Oh how I love my fantasy world….

Back to reality…

This cake is a nice segway  back to the real world.


Anyway – Harry,’ said the giant, turning his back on the Dursleys, ‘a very happy birthday to yeh. Got summat fer yeh here – I mighta sat on it at some point, but it’ll taste all right.’
From an inside pocket of his black overcoat he pulled a slightly squashed box. Harry opened it with trembling fingers. Inside was a large, sticky chocolate cake with Happy Birthday Harry written on it in green icing.’

- Chapter Four, The Keeper of the Keys, Harry Potter and the Philosopher’s Stone

DSC06980_600x450


Top Ten Countdown to Harry’s Birthday: #2 Treacle Tarts

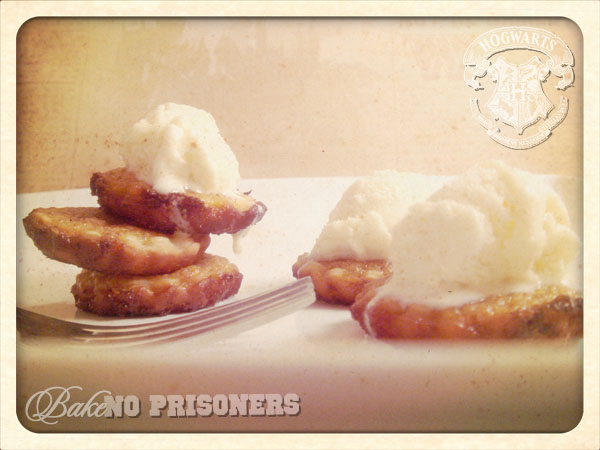
Number 2 on our countdown is Harry’s favorite treat…Treacle Tarts!! They would have been higher on the list, but I have had some difficulty with the various treacle tart recipes that are floating around on all the baking blogs. I adapted the one below from Bakingdom (I want to be like her when I grow up! Ha!) but I used my Mom’s pastry crust recipe. It has never let me down and I have it practically memorized. Treacle is a sweet syrup that is derived during the processing of cane sugar and I was fortunate to find a light treacle, otherwise known as golden syrup at World Market. Unfortunately, I used a new mini tart pan to make the treacle tarts and I just haven’t got it perfected yet. They tasted pretty yummy, but I would have preferred more treacle and less crust. Either way I ran out of time and couldn’t make them again in time for this post, so here you go! (I promise to keep trying for Harry’s sake and post when I finally get it!)

The clip of the day comes from Harry Potter and the Deathly Hallows Part I. It is the scene where Harry, Ron, and Hermione are attacked in the cafe…and Hermione…like always, is prepared in more ways than one!
 

Treacle Tart
Makes one 9 inch tart, or 2 dozen tartlets

Ingredients

FOR THE CRUST
1 1/2 cups all-purpose flour
1/3 cup confectioners’ sugar
1/4 teaspoon salt
1/2 cup (1 stick) cold, unsalted butter, cut into 8 pieces
3-4 tablespoons ice water

FOR THE FILLING
14 oz. golden syrup
2 eggs
finely grated zest and juice of 1 small lemon
3/4 teaspoon all spice
2 tablespoons heavy cream
1 cup fresh bread crumbs

For the crust: In the food processor, combine the flour, sugar, and salt with 2 or 3 pulses. Evenly distribute the cold butter over the flour mixture and and pulse 10 to 15 times, until the mixture resembles coarse corn meal. Sprinkle 1 to 2 tablespoons of the cold water over the flour mixture, and process with 4 to 5 pulses. After processing, the mixture should look sandy. Transfer the mixture to a large bowl. Sprinkle another tablespoon of the water over the mixture and use a rubber spatula to press the dough together. When the dough looks shaggy and a bit dry, but holds together, turn it out onto a lightly floured surface and knead 3 or 4 times until the dough comes together completely. Add more water, up to 1 tablespoon, as needed. Handle the dough as little as possible to prevent melting the butter.

Continuing to handle the dough lightly, shape it into a disk six to seven inches across. Wrap the disk in plastic wrap and chill in the freezer for 30 minutes, or the refrigerator for at least two hours.

Once chilled, Place the dough on a lightly floured surface. If making many small tartlets, work with half of the dough at a time. Roll the dough to about one-eighth of an inch thick. Line tart pans as directed above.

Place the tartlets on a baking sheet and chill for at least 30 minutes, preferably in the freezer.

Preheat oven to 350 degrees.

Once chilled, line the tarts with bits of foil or parchment and fill each one with a small amount of pie weights or dry beans. Bake mini tartlets for 15 minutes. Bake a full size tart for 20 minutes. Allow to cool completely before filling.

For the filling: Combine all of the ingredients in a medium bowl and pour into the cooled tart crust.

Bake for 20 minutes (for tartlets), or about 30 minutes (for a standard tart), or until the filling has set.

Allow to cool completely before serving. Serve with vanilla ice cream or fresh whipped cream.

Top Ten Countdown to Harry’s Birthday: #3 Rock Cakes

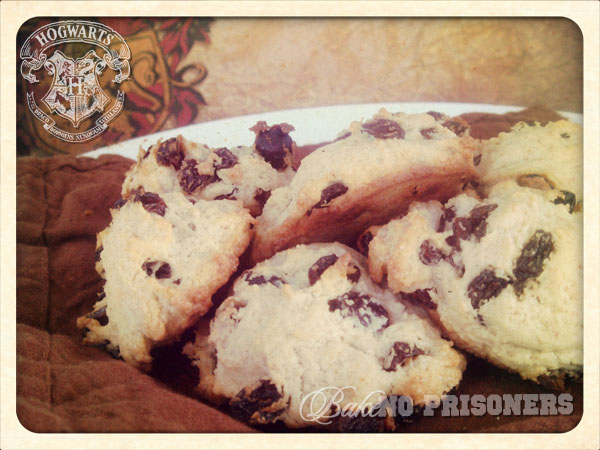
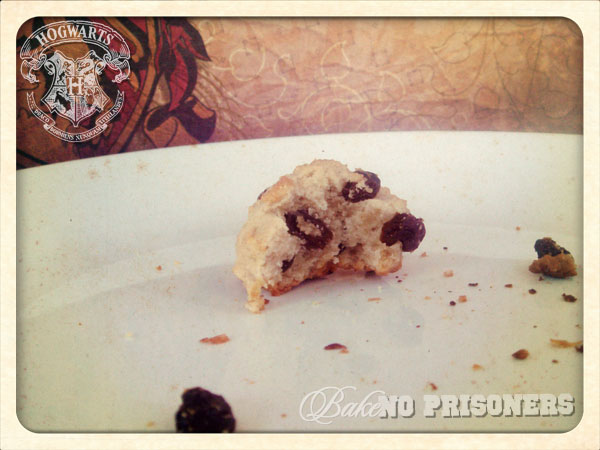
Who doesn’t love Hagrid and his infamous Rock Cakes? J.K. Rowling made it a point to mention these lovely treats no less than 3 times in the Harry Potter series. Once in the Sorcerer’s Stone, another in the Goblet of Fire, and finally in the Half  Blood Prince. The Unofficial Harry Potter cookbook says this about these raisin filled desserts: “Rock cakes, standard with tea, look like but don’t taste like rocks, unless of course you leave them out for several days, which is probably what Hagrid did. Rock cakes have a short history and seem to have been invented by the Victorians.”

Our clip today actually comes from the Half Blood Prince and features ‘ol Hagrid himself at the funeral of Aragog, the spider.

My favorite part of this scene, as sad as it is, is when Harry mentions the pincers as another reason why spiders are misunderstood creatures.

Now on to the Rock Cakes…

Rock Cakes

Ingredients:

2 cups all-purpose flour
1/2 cup granulated sugar
1 teaspoon baking powder
1/2 teaspoon cinnamon
1/4 teaspoon salt
1 stick (8 tablespoons) cold butter, cut into chunks
1 large egg
1/3 cup whole milk
1 cup raisins

Directions:

1. Preheat the oven to 350°F and grease and flour a large cookie sheet. Combine the flour, sugar, baking powder, cinnamon, and salt in a large mixing bowl. With your fingertips, rub the butter into the dry ingredients until the mixture reaches the consistency of wet sand.

2. Beat the egg together with the milk and pour it into the flour-butter mixture. Fold it together using a spatula to form a stiff dough. Fold in the raisins. Drop dough by rounded tablespoonfuls 2 inches apart on the prepared cookie sheet.

3. Bake for 25 minutes or until the bottoms are golden, rotating the pan midway through baking.

Makes 12 Rock Cakes

Recipe adapted by The Unofficial Harry Potter cookbook.

FYI: If you truly want them to be like Hagrid’s Rock Cakes, you will need to bake them way too long and sit out for days…

“You’re a wizard Harry!”~Hagrid

The Daring Baker’s Challenge: Crazy for Crackers

Our July 2012 Daring Bakers’ Host was Dana McFarland and she challenged us to make homemade crackers! Dana showed us some techniques for making crackers and encouraged to use our creativity to make each cracker our own by using ingredients we love.

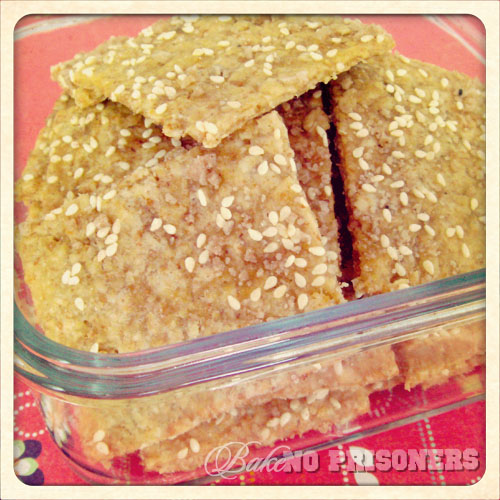
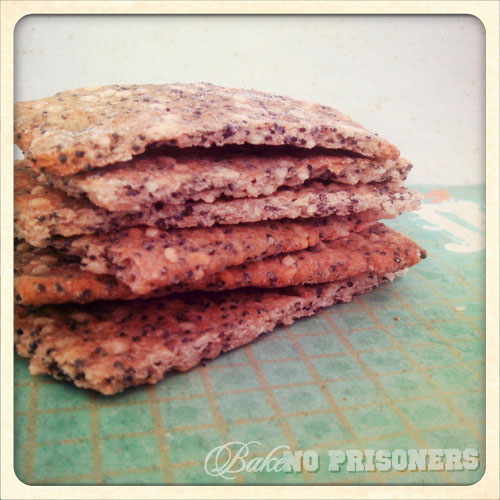
So the challenge was to create two types of crackers using two of three methods: hand rolled, pasta machine rolled, or the icebox method. I choose to hand roll the Health Crackers and use my hand cranking pasta machine for the Seedy Crisps.
I’ve made Barefoot Contessa’s Parmesan crackers before, but this was something new for me. I found the poppy seeds and the sesame seeds at a new, local spice shop in Birkdale called Savory Spice Shop. They have everything from vanilla bean paste to Asafetida (this spice mimics the taste of onions, but is not made from onions…perfect spice for the hubster’s allergy to onions). These were the perfect little snack to sit at home with and nom during happy hour with some wine and cheese.

Health Crackers (Roll these by hand):

Servings: Approximately 80 crackers

Ingredients:

3 cups (720 ml) (240 gm)(8½ oz) rolled oats
2 cups (480 ml) (280 gm/10 oz) plain (all-purpose) flour
1 cup (240 ml) (80 gm) (2¾ oz) wheat germ
3 tablespoons (45 ml) (40 gm)(1½ oz) sugar
1 teaspoon (5 ml) (6 gm) salt
¾ cup (180 ml) vegetable oil
1 cup (240 ml) water
1 large egg white
Cracker topping:
Sesame seeds, poppy seeds, nigella (onion) seeds, salt
Salt sprinkling

Directions:

1. Mix the oats, flour, wheat germ sugar and salt together in a large bowl or bowl for the standup mixer.
2. Combine the water and oil and stir into the oat mixture until it comes together and a dough forms.

3. Form dough into a disk and allow to rest in the fridge for about 20 minutes but up to a day if you are making the ahead.
4. Preheat the oven to moderate 325°F/160°C/gas mark 3.
5. Divide the dough into quarters and work with one piece at a time, allowing the remaining pieces to stay in the fridge as you proceed with rolling out the crackers.
6. On a lightly floured surface, roll the dough to about 1/16 inch (1½ mm) thick and transfer to a parchment lined baking sheet by carefully wrapping the dough around the rolling pin.

7. Brush the dough with the egg white mixed briefly with a tablespoon of water and sprinkle with seeds and salt of your choice.
8. Cut the dough with a pizza wheel and bake for 25-30 minutes until browned. Crackers that are not crispy once cooled may be returned to the oven.
9. Store in an airtight container and eat within two weeks.

Seedy Crisps (Roll with pasta rollers or by hand):

Servings: Varies depending on thickness; approximately 50 crackers

Ingredients:

1 cup (240 ml) (140 gm/5 oz) whole wheat four
1 cup (240 ml) 140 gm/5 oz) all-purpose (plain) flour
1/3 cup (80 ml) (50 gm) (1¾ oz)poppy seeds
1/3 cup (80 ml) (40 gm) (1¼ oz) sesame seeds
1½ teaspoons (7½ ml) (9 gm) table salt
1½ teaspoons (7½ ml) (8 gm) baking powder
3 tablespoons (45 ml) olive oil
¾ cup plus 1 tablespoon (195 ml) (6½ fl oz) water

Directions:

1. Mix the flours, seeds, salt and baking powder in a large bowl.
2. Add the oil and stir until combined.
3. Add the water until the dough comes together.
4. Kneed the dough 5 or 6 times and allow to rest, covered, on the counter for 15 minutes. You can also chill the dough at this point and come back later.

5. Preheat the oven to hot 450°F/230°C/gas mark 8.
6. Working with a quarter of the dough at a time, either use a rolling pin to reach a desired thickness (thick or thin) or roll out in your pasta rollers. If you use pasta rollers, ensure the dough is well-floured so as not to stick.

7. Place strips of dough on a sheet pan lined with parchment.

8. If the crackers are thick, bake for 7minutes, flip them over and bake for 7 minutes more. Then cut or break into crackers shapes while still warm. Return to the oven for a further 5 minutes until crispy.
9. If not crispy enough when cooled, crackers can be returned to the oven.
10. Store in an airtight container and eat within 2 weeks.

Top Ten Countdown to Harry’s Birthday: #4 Cockroach Clusters

“‘How about these?’ said Ron, shoving a jar of Cockroach Clusters under Hermione’s nose. ‘Definitely not,’ said Harry” (Prisoner of Azkaban).

Normally if you asked me anything that had the word, cockroach, in it, I would be running for the hills. Palmetto bugs (as they are commonly referred to in Florida) are big, brown, and downright nasty little creatures. I am petrified that they will come in my bed in the dead of night and chew off my eyebrows….I digress…

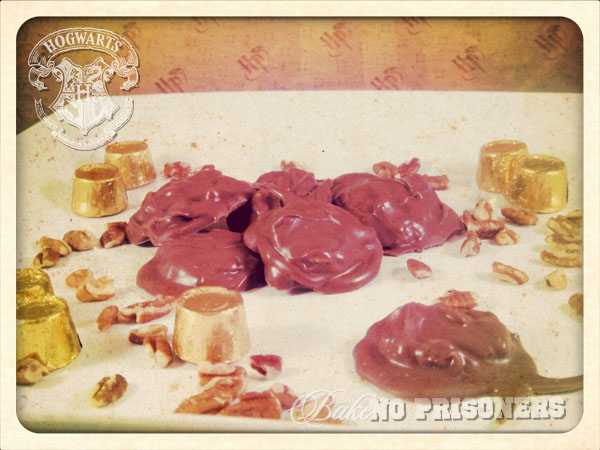
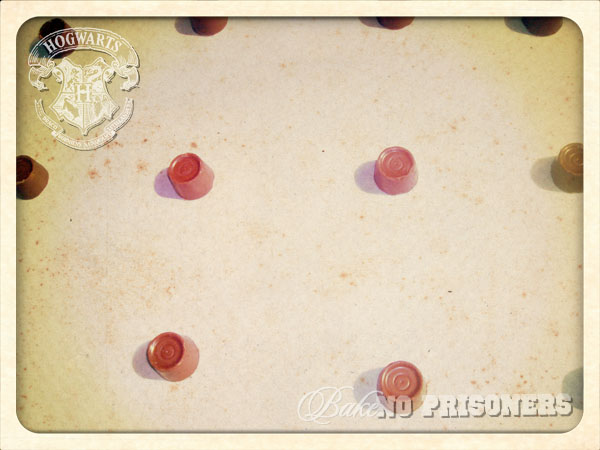
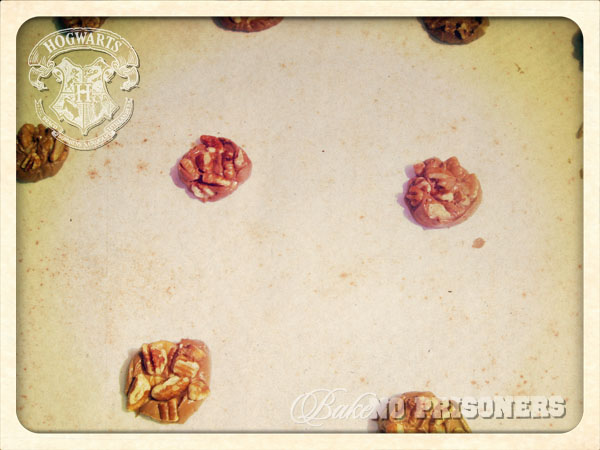
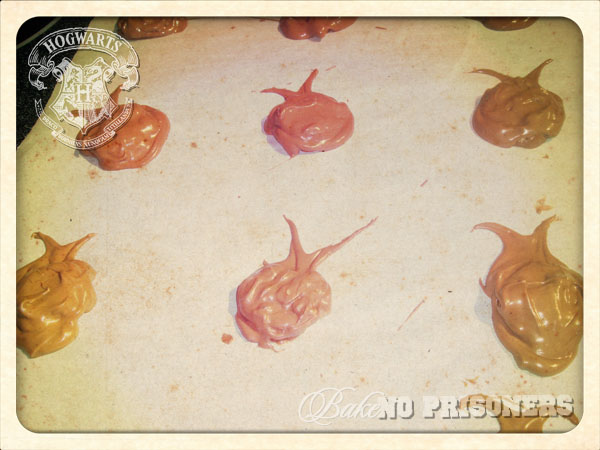
But these cockroach clusters however, are made of chocolatey caramel goodness with a crunch of  pecans! I have also heard them called “the poor man’s turtles”, but I prefer to think of them as just another treat from Honeydukes! They were super easy to make and with just 3 ingredients, it won’t break the Gringotts bank!

The clip of the day comes from Harry Potter and the Order of the Phoenix. It is where Harry and Professor  Dolores Umbridge face off about Lord Voldemort’s existence and Harry gets detention(torture). As a teacher, I pride myself on being more of a fun Professor Lupin type of teacher rather than scary, rule enforcing Umbridge. She takes the fun out of learning  everything! Not to mention, she slightly reminds me of my grandmother!

Cockroach Clusters

Ingredients:

Rollos, unwrapped

Pecan pieces

Melting Chocolate

Directions:
1. Place a sheet of parchment paper on a cookie sheet. Arrange the unwrapped Rollos on the parchment, at least 1.5″ away from each other.

2. Place the cookie sheet in an oven preheated to 350 degrees for about 3 minutes, until the Rollos are soft but not melted out of shape.

3. Press  pecan pieces on top of each Rollo, smashing them into the Rollo (so that it looks like you stepped on the little critter). Let the Rollos harden.


4. Melt more chocolate over top of the pecans, and smooth with a tooth pick or your finger. This is when you get to be extra creative. Use the chocolate to create antennae, legs, wings, whatever you’d like!

Top Ten Countdown to Harry’s Birthday: #5 Honeydukes Candyfloss Cupcakes

We are at the half way mark of our countdown and I cannot wait to share the awesome Harry Potter news that I have! My amazing  hubster, the man of my dreams, my love, my best friend…in short, the greatest man in the world….has pre-ordered me this!

That’s right fellow Potterheads…On September 7th I will have my very own limited and numbered edition of the Harry Potter Wizard’s Collection.  Amazon says this about the vast collection,”The most comprehensive Harry Potter movie collection yet features all eight films, exclusive never-before-seen content and must-have memorabilia. This new limited and numbered 31-disc collection contains all eight Harry Potter movies on Blu-ray, DVD and UltraViolet Digital Copy and more than 37 hours of special features including all previously released materials and more than 10 hours of new to disc bonus content, and 5 hours of never-before-seen material. In addition to the theatrical release of every film, the collection also includes the extended versions of  Harry Potter and The Sorcerer’s Stone and Harry Potter and the Chamber of Secrets; and the 3D versions of Harry Potter and the Deathly Hallows –- Parts 1 and 2.”

I don’t mean to brag, but I am super excited about it. Anybody else out there planning on getting one?

I first saw these cupcakes over at Bakingdom. Darla is so very creative and I absolutely love how she came up with these cupcakes from the store window of Honeydukes over at the WWOHP.

I tweaked the recipe just a bit by adding cotton candy spinning sugar instead of cotton candy and I also used the cotton candy flavoring that I had just ordered from Layer Cake Shop. Be careful when you are using flavoring oils….a little goes a long way!!

Honeydukes Candyfloss (Cotton Candy) Cupcakes
Makes about 1 dozen

Ingredients

FOR THE CUPCAKES
1 1/2 cups all-purpose flour
1/2 cup sugar
1 1/2 teaspoons baking powder
1/2 teaspoon salt
1/2 cup (1 stick) unsalted butter, at room temperature
1/2 cup sour cream
1 egg, plus 2 egg yolks, at room temperature
1 teaspoon vanilla extract
1/2 cup cotton candy spinning sugar (I used strawberry flavor)

Preheat the oven to 350 degrees. Line a muffin pan with paper liners and set aside.

In a large bowl, or the bowl of a standing mixer, combine the flour, sugar, baking powder, and salt. Add the butter, sour cream, egg, yolks, and vanilla and beat until smooth. Scrape the bowl to make sure it’s combined, then stir in the cotton candy sugar until evenly distributed.

Place three tablespoons of batter in each of the paper liners int he prepared muffin pan. Bake for 18 to 22 minutes, until a toothpick inserted in the center comes out clean. Transfer to a wire cooling rack and allow to cool completely before frosting.

Honeydukes Candyfloss (Cotton Candy) Buttercream Frosting
Makes 12 ounces

Ingredients

FOR THE FROSTING
5 -7 drops cotton candy flavoring(use sparingly)
1cup (2 sticks) unsalted butter, at room temperature
2 cups confectioners’ sugar (or more to reach desired consistency)
1/2 teaspoon vanilla extract

In a large bowl, or the bowl of a standing mixer, cream together the butter and sugar until thoroughly combined. Stir in the vanilla and cotton candy flavoring. Beat on medium high until light and fluffy, about 45 seconds, adding the remaining cream, if necessary.

Cupcake recipe adapted from Bakingdom.

Two of my favorite quotes from Hermione from Harry Potter and the Order of the Phoenix. (I am currently rereading this one!)

“Just because you have the emotional range of a teaspoon doesn’t mean we all have.”

“All those poor elves I haven’t set free yet, having to stay over during Christmas because there aren’t enough hats!” -Hermione Granger”

Top Ten Countdown to Harry’s Birthday: #6 Cauldron Cakes

I am not sure what it is that makes Harry Potter and the Goblet of Fire my favorite in the series…the hubster would joke and say it is because of Robert Pattinson, but I am not that crazy about vampires. :)   I think I adore it so much because Goblet of Fire is the first movie to introduce the true darkness of Lord Voldemort and take the Harry Potter series from tween to young adult.

Okay, so the clip of the day is at the end of the movie when Harry and Lord Voldemort are facing off in the graveyard. Their wands are connected and well…just watch…

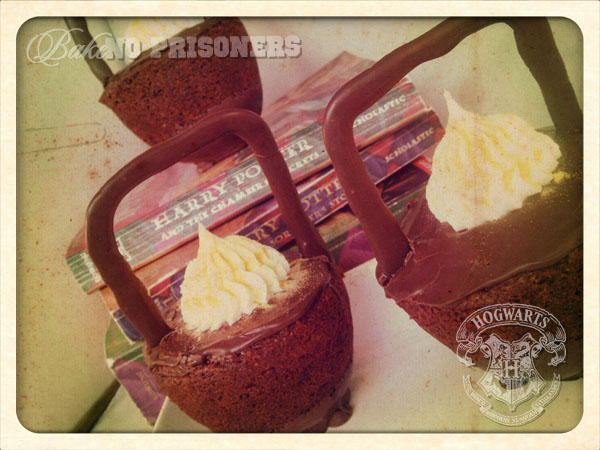
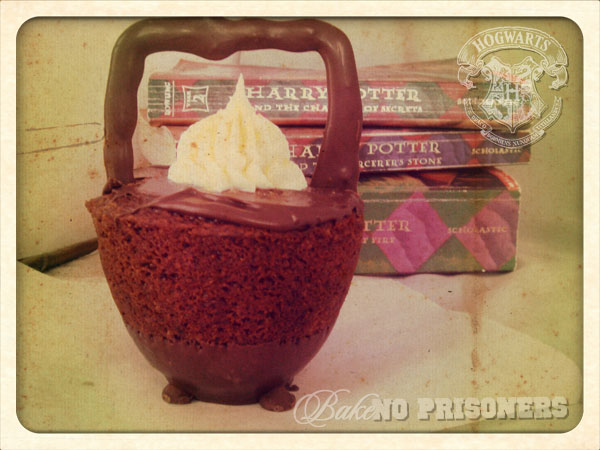
Cauldron Cakes anyone?

Cauldron Cakes are actually the wizarding term for big fluffy pancakes, but they typically look like this all over the baking blogosphere. Harry sees them for the first time on the witch’s trolly on board the Hogwarts Express in Harry Potter and the Sorcerer’s Stone.

Ingredients:

FOR THE CAKES
2 cups all-purpose flour
3/4 cup cocoa powder
1 1/2 teaspoons baking powder
1/2 teaspoon baking soda
1 teaspoon salt
1/2 cup canola oil
2 cups sugar
1 egg
1 teaspoon vanilla
1 cup milk
1 cup semi-sweet chocolate chips

To make the cakes: preheat the oven to 350 degrees. Spray pan with cooking spray that contains flour.. In a large bowl, combine flour, cocoa, baking powder, baking soda, and salt; set aside. In another large bowl or the bowl of a standing mixer, combine the oil and sugar. Add the egg and vanilla and beat until thoroughly combined. Sprinkle 1/3 of the flour mixture over the ingredients in the bowl and beat until just combined. Add have the milk and stir until combined, then scrape the bowl. Sprinkle another 1/3 of the flour into the bowl, and again mix until just combined before adding the remaining milk. Beat until just mixed, then add the remaining flour and beat the mixture until thoroughly combined, scraping the bowl, as needed. Stir in the chocolate chips. Fill each cup a little more than 1/2 full. Bake the muffins for 18-20 minutes, or until a toothpick inserted in the center comes out clean of cake batter. Allow to cool completely before decorating.

FOR THE FROSTING:
3/4 cup Marshmallow Fluff
2 sticks of butter
2 1/2-3 cups confectioners sugar (or until you reach desired consistency)
2 teaspoons vanilla extract

In a medium bowl, beat together the marshmallow fluff, butter, sugar, and vanilla extract until light and fluffy, about 3-5 minutes.

1 bag of dark cocoa candies

Melt bag according to directions in a glass microwave safe bowl and use to dip the cakes

To assemble:
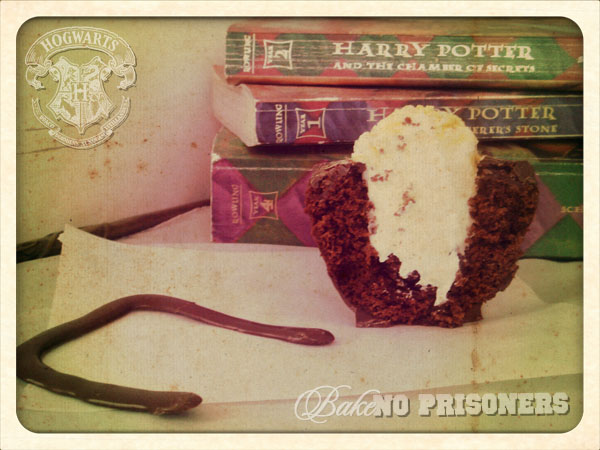
Using a cupcake corer or sharp knife, cut out a cavity in the bottom of the cupcake. When using a knife, I run it in a circular motion around the cupcake, while always pointing the knife towards the center (this will make the cavity cone shaped).

Dip the bottom of the cupcake into the chocolate candies. Flip the cupcakes right side up and let rest until the chocolate sets, about 30 minutes. To speed up the process, place cupcakes in the refrigerator.

To make the cauldron feet, take 4 chocolate chips and form a small square, placing each chocolate chip roughly an inch from the others. Place the top of a cupcake onto the chocolate chips and push down ever so slightly so the chocolate chips will stick into the chocolate glaze. Repeat for the rest of the cupcakes.

Place remaining chocolate glaze into a piping bag and pipe a chocolate rim around the edge of the opening to the cauldron. If chocolate is too thick to pipe, heat chocolate glaze up until warm and allow to sit until glaze thickens slightly. If chocolate glaze is too runny to pipe, wait a few minutes until the glaze thickens to a pipe-able consistency. Alternatively, you could use a knife to spread the glaze around the edge of the cupcake.

Fill a pastry bag with marshmallow filling and pipe into the cavity of the cupcakes. Garnish the top with edible gold glitter or shimmer.

To make cauldron handle, melt the remaining chocolate chips, stir until smooth, and place into a pastry bag. You don’t need a special tip for this step; I simply cut off the very end of the pastry bag which was sufficient. On a non-stick mat or wax paper, pipe out the handles (feel free to use any pattern you’d like). I recommend measuring the cupcakes with a ruler to determine how wide you need to make the handles before piping. Let the chocolate set until hardened, approximately 30 minutes, before very carefully peeling off of the non-stick surface and placing into the top of each cupcake.

Recipe adapted by Pastry Affair.

“I’m going to kill you, Harry Potter. I’m going to destroy you. After tonight, no one will ever again question my power. After tonight if they speak of you, they’ll only speak of how you begged for death. And how I being a merciful Lord… obliged. ” ~Voldemort (Hey, they can’t all be warm and fuzzy!)